How to Engineer a Frankenstein-Themed Candy Dispenser
It’s that time of year again, ghouls and goblins! The air is getting crisp, my pumpkin spice coffee intake is skyrocketing, and my brain is buzzing with spooky DIY projects. 🎃
Are you tired of the same old bowl of candy sitting by the door? Do you crave a Halloween decoration that’s more than just a spooky face—something that actually does something cool? I know I do, and that’s why I’m here, as your friendly neighborhood Halloween fanatic, to help you build something truly memorable. 🎉
We’re going to bring a monster to life by engineering a Frankenstein-themed candy dispenser! This project is the perfect blend of mad science and spooky fun, perfect for teaching some STEM skills and creating a show-stopping piece for your Halloween party. Let’s get building! 🛠️
Activity At-a-Glance
- Best For: DIY enthusiasts, families with teens, STEM educators, unique Halloween decor 👨👩👧👦
- Time Required: Approx. 3-6 hours (depending on design complexity and builder experience) ⏳
- Budget Level: Moderate 💸
- Spookiness Level: Medium 👻
What You’ll Need for Your Frankenstein Candy Dispenser 📋
Here’s the parts list for our little monster. Remember, you can always scavenge and substitute!
- Structural Materials:
- Sturdy Cardboard (shipping boxes are perfect!) 📦
- PVC Pipe or a Thick Dowel Rod (for the lever handle)
- Craft Foam Sheets (for details like bolts and stitches)
- Tools of the Trade:
- Hot Glue Gun & Plenty of Glue Sticks 🔥
- Craft Knife or Box Cutter (with a fresh blade)
- Ruler & Pencil 📏
- Scissors ✂️
- The Monster’s Makeover:
- Frankenstein Green Craft Paint 🎨
- Black Paint or Permanent Marker (for details)
- Two Large Bottle Caps or Bolts (for the neck)
- Simple Machine Components:
- A small wooden block or extra cardboard for a fulcrum
- A small rod or sturdy skewer for the lever’s pivot point
- Rubber bands or a small spring (optional, for resetting the mechanism)
- The Goods:
- A variety of small, individually wrapped candies 🍬
Preparation & Setup: Creating the Spooky Scene 🔬
Before we bring our creation to life, let’s set up our laboratory! Clear a large table or floor space so you have plenty of room to work. Make sure the area is well-lit—a mad scientist needs to see their work, after all! I always lay down some old newspaper or a plastic tablecloth to protect surfaces from paint and glue.
Organize all your tools and materials so they’re within arm’s reach. To really get in the spirit, I recommend queuing up a spooky soundtrack. Nothing says “engineering a monster” like some classic horror movie music playing in the background!
Pro Tip 💡: Before a single cut is made, grab a piece of paper and create a basic blueprint. Sketch out your dispenser’s shape and, most importantly, how your simple machine will work. I find that visualizing the candy release mechanism (like a lever tipping a platform) saves a ton of headaches later.
How to Engineer Your Spooky Dispenser: Step-by-Step 🚀
Step 1: Conceptualizing Your Monster’s Mechanics
First, we need to figure out the “brain” of our operation—the simple machine that will dispense the candy. The easiest and most reliable option for this project is a first-class lever.
Think of a seesaw! You’ll have a handle (the lever arm) that you push down on one side. This arm pivots on a central point (the fulcrum). On the other side of the fulcrum, inside the dispenser, a small platform will lift up, pushing a piece of candy down a chute. Sketch this out: a long arm, a pivot point in the middle, and a little candy-pushing platform on the end. This is the heart of your monster!
Image-1: A top-down shot of a piece of paper with several hand-drawn sketches. The main sketch shows a cutaway view of a box with a lever mechanism inside, illustrating how pushing the lever dispenses a piece of candy down a chute.

Step 2: Constructing the Core Structure
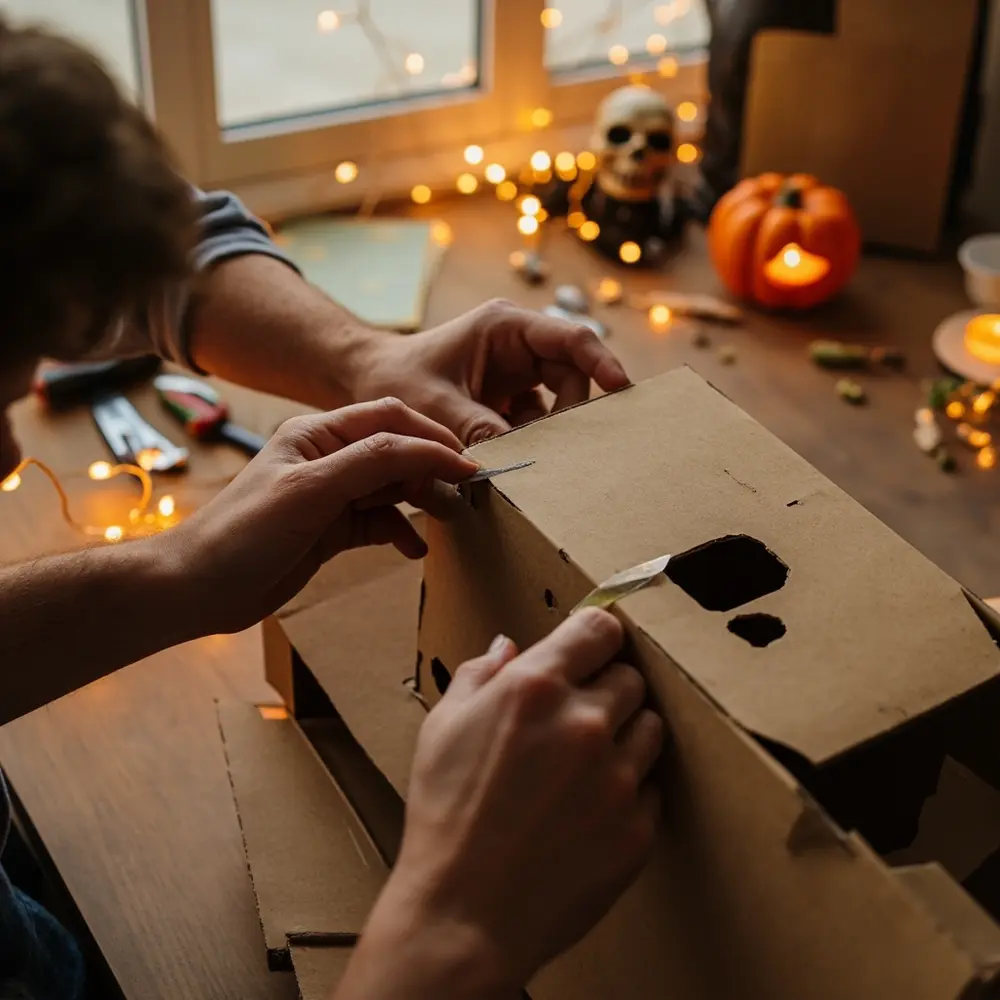
Now, let’s build Frankenstein’s body. Using your sturdy cardboard, cut out pieces for a tall, rectangular box. This will be the main housing that holds the candy and hides the mechanism. A good size to start with is about 18 inches tall, 8 inches wide, and 6 inches deep.
Assemble the box using your hot glue gun, creating a strong and stable structure. Cut a small opening near the bottom of the front panel where the candy will come out. Also, decide where your lever handle will stick out from the side and cut a small slot for it.
Caution 💀: Hot glue guns are… well, hot! And craft knives are very sharp. Adult supervision is an absolute must for younger builders. Always cut away from your body and take your time. Safety first, spooky second!
Image-2: A close-up shot of hands carefully applying hot glue along the edge of a cardboard panel to assemble the main box-like structure of the dispenser. The partially assembled frame sits on a craft table.
Step 3: Integrating the Simple Machine Mechanism
It’s time for the monster’s heart transplant! Build your lever mechanism based on your sketch.
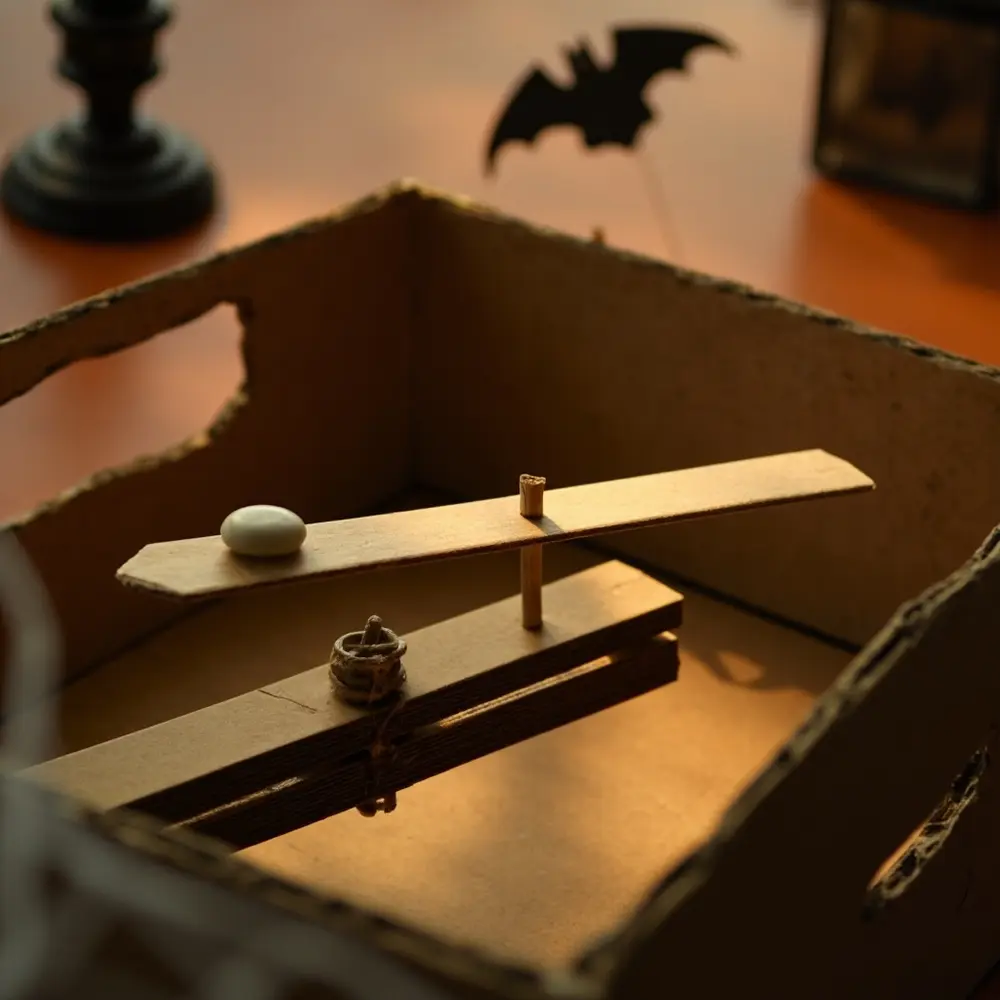
- 1. Create the Lever Arm: Use a long, flat piece of sturdy cardboard or a wooden paint stirrer for the lever itself.
- 2. Build the Fulcrum: Glue a small wooden block or a stack of cardboard squares inside the dispenser, roughly in the middle.
- 3. Attach the Pivot: Carefully poke a small hole through the center of your lever arm and through the top of your fulcrum. Insert a skewer or small rod through the holes to create a pivot point. The lever should be able to seesaw freely.
- 4. Install the Platform: On the end of the lever inside the box, glue a small cardboard platform, just big enough to hold one or two pieces of candy.
Slide the long end of the lever out through the slot you cut in the side of the box. Now, when you push the handle down, the platform inside should rise up!
Image-3: An inside view of the cardboard box, showing the lever mechanism being installed. The focus is on the pivot point (fulcrum) and the small platform attached to the lever’s internal end.
Step 4: Adding Frankenstein’s Monstrous Features
With the mechanics in place, it’s time for the fun part! Let’s give this creature its classic look.
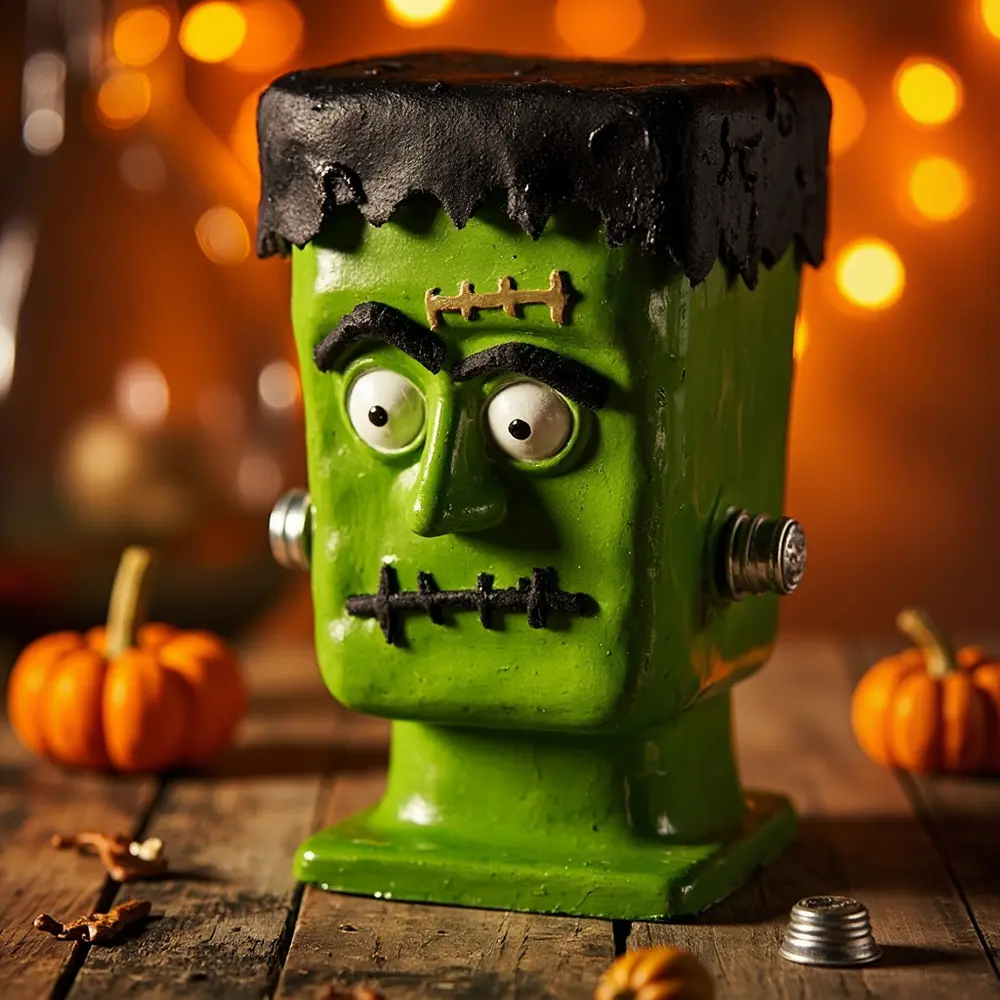
- 1. Paint it Green: Give the entire structure a coat or two of that iconic Frankenstein green.
- 2. Add the Details: Use your black marker or paint to draw on a stitched-up mouth and some scars.
- 3. Create the Head: Build a smaller, blocky cardboard box for the head and glue it on top. Give him some sleepy eyes and that classic flat-top haircut using black craft foam or cardboard.
- 4. Don’t Forget the Bolts! Glue the bottle caps or actual hardware bolts to the “neck” area on the sides of the main body.
This is where you can get really creative. I once made one where the lever handle was decorated to look like a giant switch from a mad scientist’s lab!
Image-4: A medium shot of the dispenser, now painted green. A hand is shown gluing on a black craft foam stitch detail across the monster’s “forehead.”
Step 5: Testing, Troubleshooting, and Fine-Tuning
Fill the top of your dispenser with candy, making sure the candy rests just above the mechanism’s platform. Now, for the moment of truth! Push the lever.
Did a piece of candy pop out? Hooray! If not, don’t worry—every great inventor has to troubleshoot.
- Candy is stuck? The exit chute might be too small, or the internal platform might not be lifting high enough. Adjust the size of the hole or the position of your fulcrum.
- Lever is stiff? Your pivot point might be too tight. Make sure the lever can move freely.
- Nothing happens? Make sure the candy is loaded correctly so it naturally falls onto the platform area.
Keep making small adjustments until you get a smooth, reliable candy-dispensing action every single time.
Image-5: A dynamic action shot showing a hand pressing the lever on the side of the fully decorated Frankenstein dispenser. A piece of wrapped candy is captured mid-air as it successfully exits the dispenser’s chute.
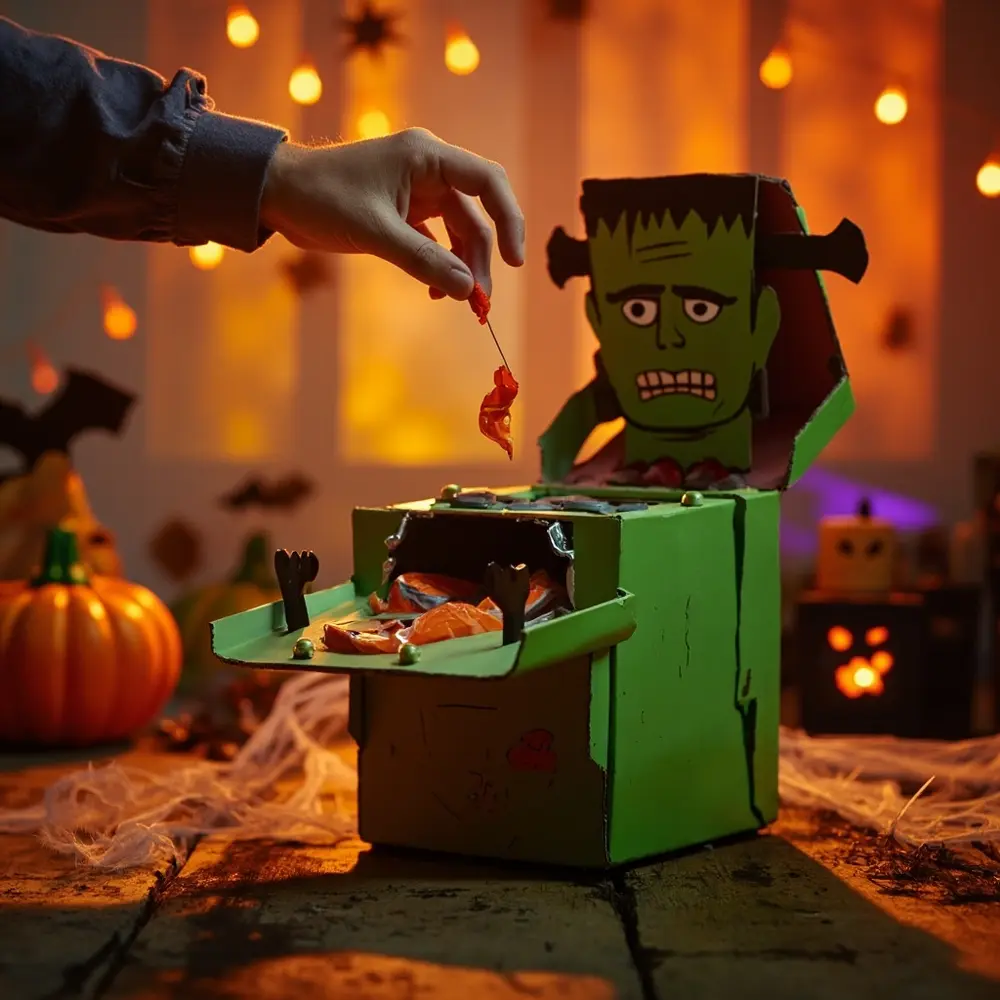
Image-6: A beautiful, slightly zoomed-out shot of the finished Frankenstein candy dispenser sitting on a table next to a bowl of Halloween candy. The lighting is slightly dim and spooky, perhaps with a string of orange lights in the background, showcasing the complete and awesome final project.

Elevating Your Engineering: Advanced Concepts & Troubleshooting 🧠
Ready to take your monster to the next level? For all my fellow advanced builders out there, here are some ways to upgrade your creation.
- Complex Machines: Combine simple machines! Create an inclined plane (a ramp) inside for the candy to slide down after the lever lifts it. This creates a more complex and reliable delivery system. You could even design a simple gear system where turning a crank activates the lever.
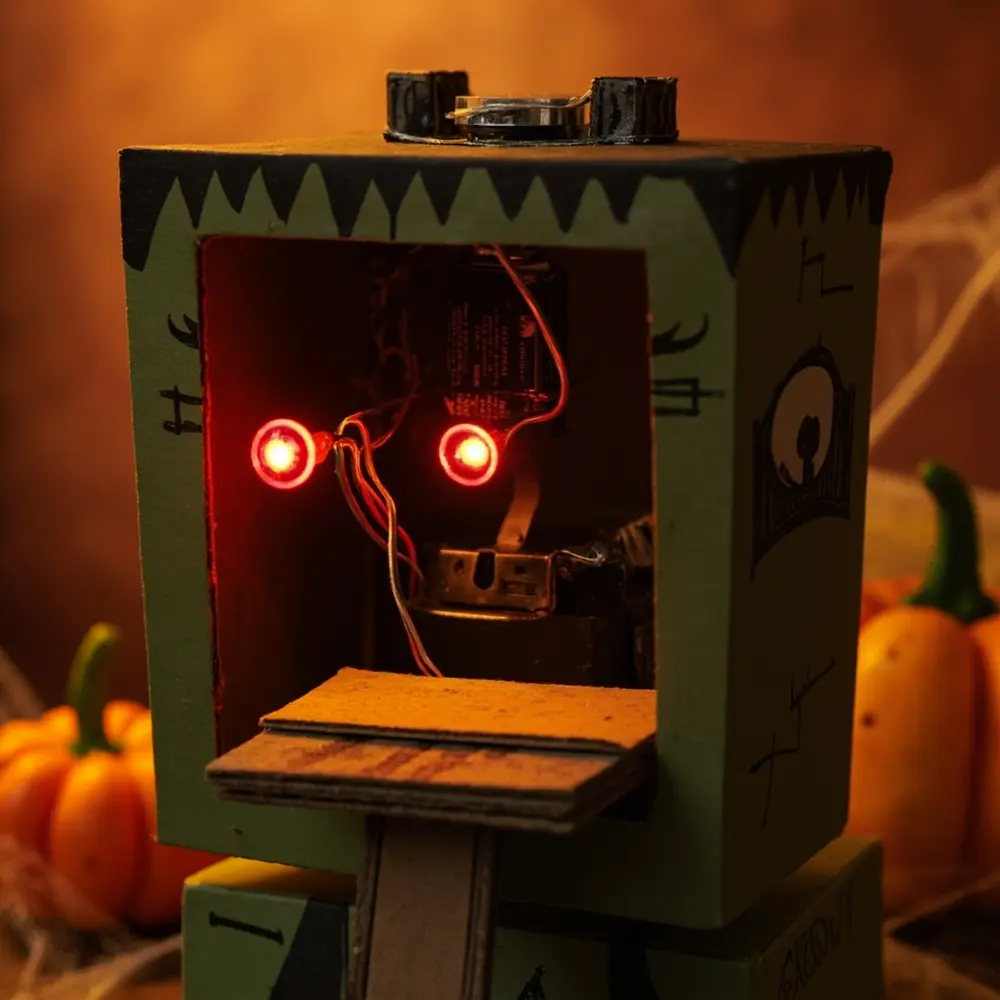
- Add Electronics: This is one of my favorite tricks from my haunted house design days! Get a simple battery-powered LED circuit and install two red LEDs for eyes. Wire them to a small momentary switch so the eyes light up every time the lever is pressed. Spooky and effective!
- Common Mechanical Fixes:
- Friction: If your parts are rubbing and getting stuck, try lining the moving surfaces with smooth packing tape to reduce friction.
- Jams: The number one cause of candy jams is using candies that are too big or irregularly shaped. Stick to small, uniform items like Tootsie Rolls or small chocolate bars.
- Stability: If your dispenser feels wobbly, glue a wider cardboard base to the bottom to prevent it from tipping over when used.
Image-7: A detailed close-up of a more advanced mechanism inside an open dispenser, showing a lever connected to a small ramp (inclined plane), with wires leading to an LED eye visible in the background.
Variations & Customizations to Haunt Your House 🧟
- Ages: For younger kids, you can pre-build the box and let them focus on the fun decorating part. For older, more experienced builders, challenge them to build a dispenser using a pulley system instead of a lever!
- Materials: Raid the recycling bin! Plastic bottles can make great chutes, and old toy parts can be repurposed into cool mechanical components or decorations.
- Interactive Elements: Instead of a simple lever, make the activator a “pull chain” that looks like a brain dangling from the top, or a big, chunky “circuit breaker” switch on the front.
- Dispensing Variety: Could you design a dual-chamber dispenser that gives out two different kinds of candy? Or one that dispenses small spider rings?
Theme Twist 💡: Transform this design into a “Zombie Arm” dispenser! The main box could be a patch of graveyard dirt, and the lever mechanism is attached to a creepy zombie arm that rises from the ground to drop a piece of candy from its hand.
Halloween Activity FAQs ❓
#### Q1: What are the most common simple machines I can use for a candy dispenser?
The easiest and most popular are the lever (like we used), the inclined plane (a simple ramp or chute), and the wheel and axle (a crank that turns to release candy). A pulley system is also possible but can be a bit more complex to build with cardboard.
#### Q2: How can I make my Frankenstein dispenser more durable for repeated use?
Great question! To make it last all season, reinforce the internal corners and stress points (like around the lever) with extra layers of cardboard and hot glue. You can also coat the entire finished project with a layer of Mod Podge or clear sealant to protect the paint and strengthen the cardboard.
#### Q3: What if my candy gets stuck in the mechanism? How do I fix it?
First, check the candy size—it’s the most common issue! If the candy is the right size, check your mechanism’s path. Is there a rough edge of cardboard catching the candy? Sand it down or cover it with tape. Is the candy falling off the platform before it gets to the chute? Make the platform wider or add small “walls” to it. Most jams can be fixed with a few small tweaks.
*
There you have it! You’ve successfully combined a little bit of engineering, a dash of creativity, and a whole lot of spooky spirit to create a functional Frankenstein candy dispenser. The best part of a project like this is the satisfaction of watching it work and seeing the delight on people’s faces when a monster gives them candy.
I hope you have an absolute blast bringing your creation to life. Happy haunting!
What other spooky creatures would make a great candy dispenser? Let me know your ideas in the comments below! 👇
