How to Make Classroom Halloween Treats That Are Safe & Easy
✨ From haunted party planning spreadsheets to classroom volunteer sign-ups, I’ve mastered the art of school-safe Halloween snacks—testing, fixing fails, and discovering solutions that actually work.
😅 But I know the struggle: How do you make something cute that won’t trigger allergies? What if the school has strict rules? Are there any easy, individually wrapped Halloween treats that kids will actually love?
👑 That’s why in this post, I’ll show you exactly how to solve these challenges with tips I’ve tested myself. Stick with me, and you’ll learn how to create adorable, worry-free Halloween treats while creating magical memories with your loved ones! 🎃
Tutorial At-a-Glance
Time Required: Approx. 45-60 minutes (for one recipe, plus packaging)
Budget Level: Low-Cost to Moderate
Skill Level: Beginner / Kid-Friendly
What You’ll Need for Your Safe & Easy Classroom Treats 🎃
Here is the simple shopping list for my go-to Mummy Pretzel Rods. After making hundreds of treats for parties and school events, I’ve found this is always a huge hit!

✅ Pretzel Rods (standard size)
✅ White Candy Melts or White Chocolate Chips
✅ Edible Googly Eyes (👑 Nancy’s Pick: Opt for brands that clearly state “nut-free” and “gluten-free” if possible, to minimize cross-contamination risks in a classroom setting. Always check labels!)
✅ Black Gel Icing or Dark Chocolate Chips (for mummy stripes/details)
✅ Individual Clear Treat Bags (cellophane or plastic, sized for pretzel rods)
✅ Twist Ties or Halloween-themed Ribbon
✅ Baking Parchment Paper
✅ Microwave-safe Bowl
✅ Spoon or Spatula
Crafting Your Spooky & Safe Classroom Treats: Step-by-Step Guide 👻
As a parent and former classroom volunteer, I know the joy (and sometimes stress!) of bringing treats to school. Let’s make this year’s Halloween party a breeze for everyone, ensuring every child feels included and safe with these fun, easy-to-make Mummy Pretzel Rods. My go-to trick for this is to set everything up before you start, making the process smooth and mess-free.
Step 1: Prepare Your Workspace & Melt the Candy
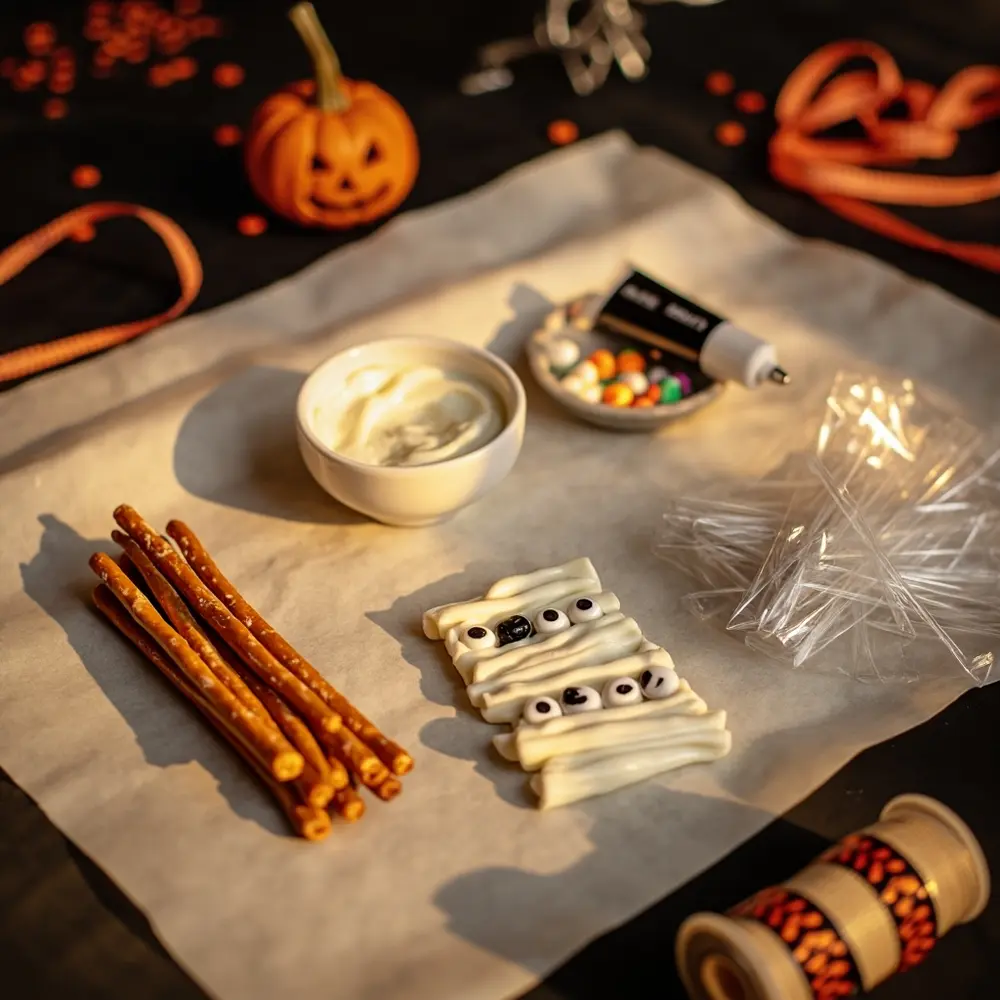
First things first, let’s get organized! Cover a large baking sheet or your countertop with parchment paper. This is your no-mess zone for dipping and decorating. Place your pretzel rods, googly eyes, and any other decorations nearby. Next, pour your white candy melts into a microwave-safe bowl and melt them according to the package directions, usually in 30-second intervals, stirring in between until smooth.
[Image Placement Instruction: image-1: All ingredients (pretzels, candy melts, googly eyes, bags) laid out neatly on a parchment-lined baking sheet, with melted candy in a bowl.]
Step 2: Dip & Decorate Your Mummy Pretzels
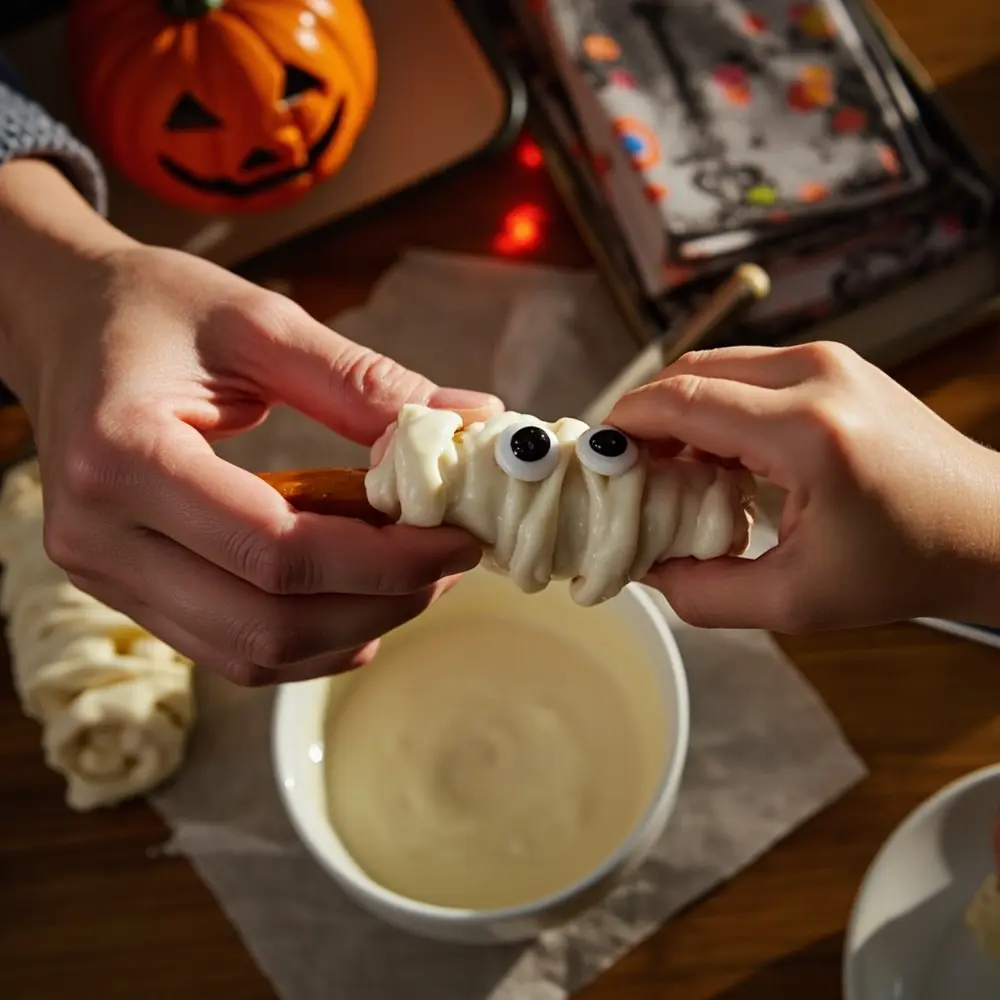
Now for the fun part! Hold a pretzel rod by one end and dip it into the melted white candy, using a spoon to help coat it about three-quarters of the way up. Gently tap the pretzel on the side of the bowl to let any excess candy drip off. Lay the coated pretzel on your parchment paper and, while the candy is still wet, press two edible googly eyes into place.
⚠️ Safety First: Melted candy can be hot! If you have little ones helping, make sure an adult handles the bowl of melted candy. Supervise closely to prevent any burns.
[Image Placement Instruction: image-2: Close-up shot of hands dipping a pretzel rod into white candy melts, then placing googly eyes onto it.]

Step 3: Add Spooky Details & Let Set
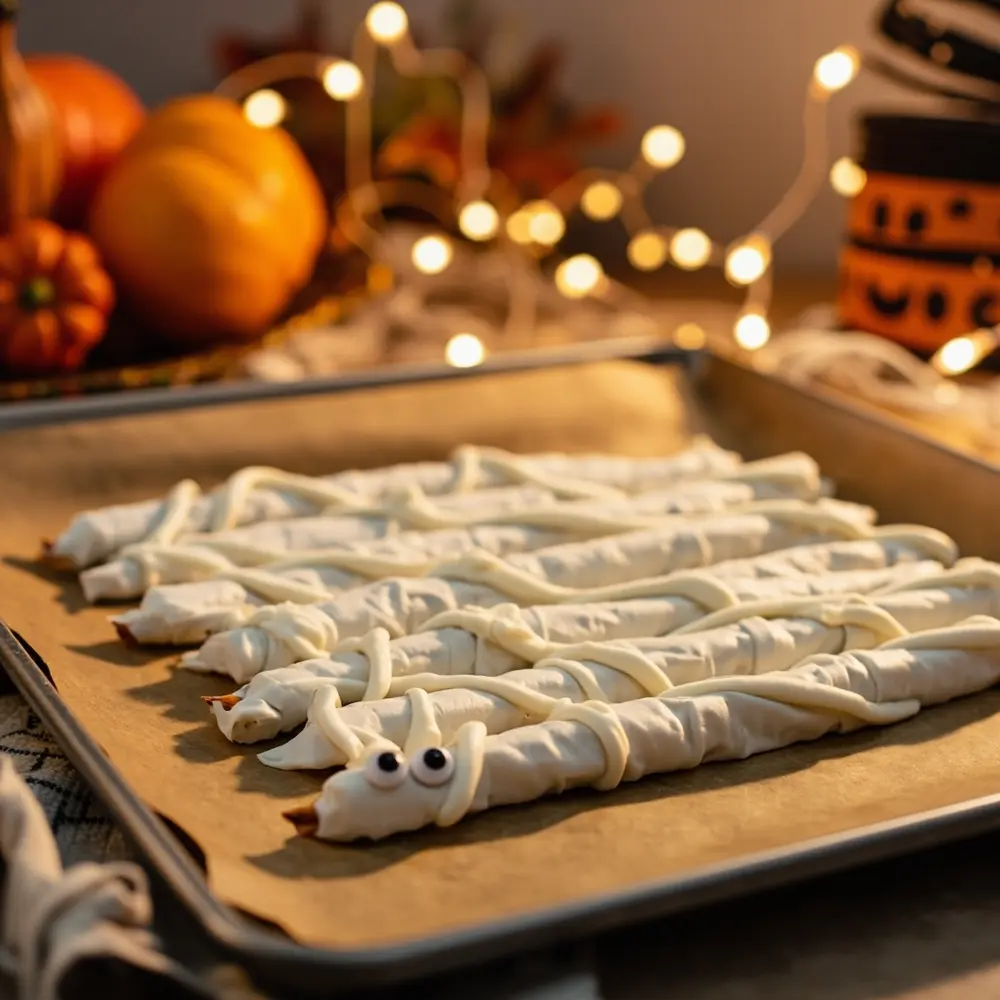
Once you’ve dipped all your pretzels and given them eyes, it’s time to create the mummy effect. You can do this one of two ways: either dip a spoon into the remaining white candy and drizzle thin lines back and forth over the pretzel, or use black gel icing for a bit of contrast. Be sure to leave the googly eyes peeking out! Let the pretzels set completely on the parchment paper.
💡 Pro-Tip: If you’re short on time or your kitchen is warm, pop the baking sheet of pretzels into the fridge for 10-15 minutes. This will help the candy set up much faster so you can get to packaging.
[Image Placement Instruction: image-3: A tray of finished mummy pretzels, fully set and ready for packaging.]

Step 4: Individually Package for Classroom Safety
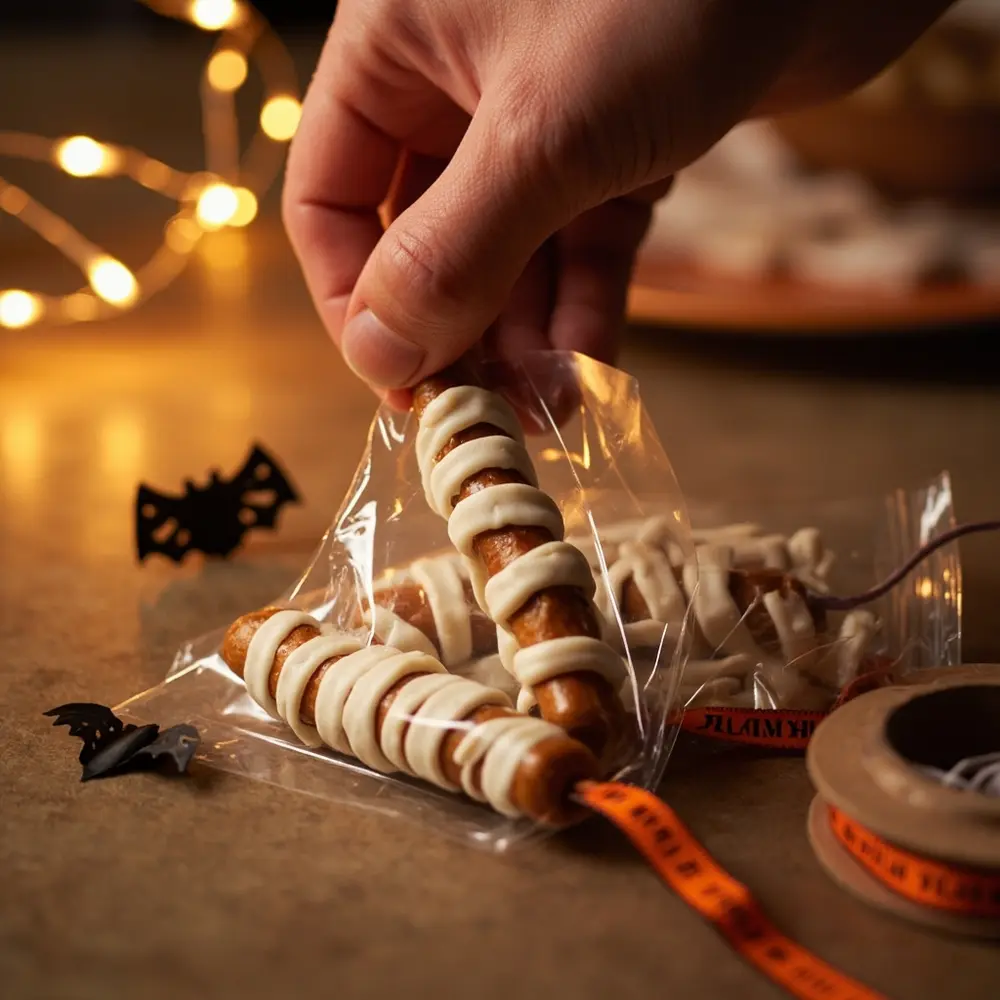
This is the most important step for school treats! Once your mummy pretzels are fully hardened, carefully slide each one into an individual clear treat bag. Secure the top with a festive Halloween ribbon or a simple twist tie. This individual packaging is key for hygiene, portion control, and making distribution in a busy classroom super easy for the teacher.
[Image Placement Instruction: image-4: A hand placing a finished mummy pretzel into a clear individual treat bag, with a pile of other individually packaged treats in the background.]

Allergy-Conscious Hacks & School-Safe Alternatives 🍎
As a Food Safety Expert, I can’t stress enough the importance of clear communication and careful ingredient selection when preparing treats for a classroom. A mistake I always see is people forgetting to check for hidden allergens. Here are crucial hacks to ensure everyone’s safety:
- Nut-Free Zone: Always check ingredient labels for “may contain nuts” warnings. Opt for certified nut-free brands for all ingredients, especially chocolate and candy melts.
- Gluten-Free Options: Use gluten-free pretzel rods or consider alternatives like rice cakes or fruit for dipping. Many candy melts are naturally GF, but always verify.
- Dairy-Free & Vegan: Explore dairy-free chocolate chips or vegan candy melt alternatives. Coconut oil can sometimes be used to thin dairy-free chocolate for dipping.
- Pre-Packaged Power: When in doubt, individually wrapped fruit snacks, mini bags of chips, allergy-friendly cookies (e.g., MadeGood, Enjoy Life), or small toys are excellent, no-prep alternatives.
- Ingredient Labels are Your Friend: Always provide a clear, written ingredient list to the teacher, even for homemade treats. This allows them to cross-reference with known allergies.
Variations & Customizations for Classroom Fun 👻
After testing dozens of these, I’ve found a few other simple ideas that are always a hit with kids and easy on parents. If you want to mix it up, try these adorable and school-safe Halloween snacks:
- “Monster Mouths”: Apple slices with sunflower seed butter (for nut-free classrooms) and mini marshmallows for teeth.
- “Ghostly Bananas”: Half bananas dipped in white chocolate (or yogurt) with mini chocolate chip eyes, individually wrapped.
- “Pumpkin Cutie Oranges”: Draw jack-o’-lantern faces on mandarin oranges with a food-safe marker. Simple, healthy, and naturally allergen-friendly!
- “Spider Web Crackers”: Spread cream cheese or sunflower seed butter on round crackers, then pipe concentric circles of black gel icing. Drag a toothpick from the center outwards to create a web.
Classroom Halloween Treat FAQs 🤔
Q1: How can I ensure my homemade treats are truly allergy-safe for a classroom with multiple restrictions, beyond just nuts?
The best strategy is to communicate directly with the teacher first to get a list of specific allergies. When shopping, read every single label for warnings like “processed in a facility that also handles…” for all known allergens. To be extra safe, prepare the treats in a freshly cleaned kitchen to avoid cross-contamination and send a complete, typed ingredient list with the treats.
Q2: My school has a strict “no homemade treats” policy. What are the best store-bought, individually wrapped options that are still fun and festive for Halloween?
This is so common now! My top picks are brands known for being allergy-friendly, like MadeGood granola bars or Enjoy Life cookies, which are free from most common allergens. You can also go the non-food route with Halloween-themed pencils, erasers, stickers, or small containers of Play-Doh. These are always a safe and exciting option for every child.
Q3: What if the candy melts seize or become too thick while I’m working? How can I fix them, or what’s a good alternative for dipping?
I’ve been there! This usually happens if a tiny drop of water gets into the candy. Never add water to thin it out. Instead, stir in about a teaspoon of vegetable shortening or coconut oil until it’s smooth again. If it’s beyond saving, a great alternative is a simple glaze made from powdered sugar, a tiny bit of milk (or a non-dairy alternative), and a splash of vanilla.
Now you have the perfect recipe for safe, easy, and spooktacular classroom Halloween treats! I can’t wait to see your creations.
Which of these ideas are you most excited to try for your little one’s party? Let me know in the comments below! 🎃
