✨ From countless hours in my kitchen testing recipes as a food scientist and recipe developer, I’ve learned one thing: the best treats are the ones everyone can enjoy. I’ve mastered creating allergy-friendly Halloween snacks—testing, fixing fails, and discovering solutions that are both safe and spooktacular.
😅 But I know the struggle. How do you make fun Halloween party food that’s also safe for dairy allergies? Are there hidden ingredients I need to worry about? It can feel overwhelming when you just want to create a magical, worry-free celebration.
👑 That’s why in this post, I’ll show you exactly how to solve these challenges with my tested, easy dairy-free Halloween treats. Stick with me, and you’ll learn how to whip up delicious, allergy-friendly snacks that will have all your little ghouls and goblins smiling! 🎃
Tutorial At-a-Glance
Time Required: Approx. 30-60 minutes per recipe (plus chilling time)
Budget Level: Low-to-Moderate Cost
Skill Level: Beginner to Intermediate
Essential Dairy-Free Ingredients for Your Halloween Treats 🎃
A question I get all the time from my community is what to stock for dairy-free baking. My go-to trick is to have a few key staples on hand, which makes whipping up allergy-friendly Halloween treats a breeze.
✅ Dairy-Free Chocolate Chips (👑 Nancy’s Pick: I absolutely swear by Enjoy Life Foods Semi-Sweet Chocolate Chips. They are free from 14 common allergens, melt beautifully for dipping and drizzling, and have a rich flavor that’s perfect for brownies and pretzels.)
✅ Dairy-Free Butter Alternative (Look for a stick form for baking, as it behaves most like traditional butter.)
✅ Plant-Based Milk (Oat milk is fantastic for a creamy texture, but almond or soy work great too.)
✅ Coconut Cream or Dairy-Free Whipped Topping (Perfect for creating frostings or creamy toppings.)
✅ Common Baking Staples (All-purpose flour, granulated sugar, baking powder, and vanilla extract.)
Decoding Dairy-Free: An Ingredient Deep Dive for Safe Treats 🔬
As a recipe developer focused on allergy-friendly options, this is where I get serious. Ensuring a treat is truly dairy-free goes beyond just swapping out milk. Dairy can hide in the most unexpected places! A mistake I always see is grabbing a product without double-checking the full ingredient list.
Here’s what to watch for:
- Hidden Dairy Culprits: Always scan labels for words like whey, casein, lactose, and milk solids. These are all derived from milk and can trigger an allergic reaction.
- Label Reading 101: Look for products with a “Certified Dairy-Free” or “Certified Vegan” logo. These have been verified by a third party. A “dairy-free” claim on the front is good, but a “may contain milk” or “processed in a facility that also processes milk” warning on the back means there’s a risk of cross-contamination.
- Preventing Cross-Contamination: If you’re cooking for someone with a severe allergy, a clean kitchen is non-negotiable. Use separate cutting boards, wash all utensils and bowls thoroughly with hot, soapy water before you begin, and wipe down all of your counters.
⚠️ Safety First: Always, always, always read every single ingredient label before you begin, even for products you’ve used before. Formulations can change without warning!
Spooktacular Dairy-Free Halloween Treat Recipes 👻
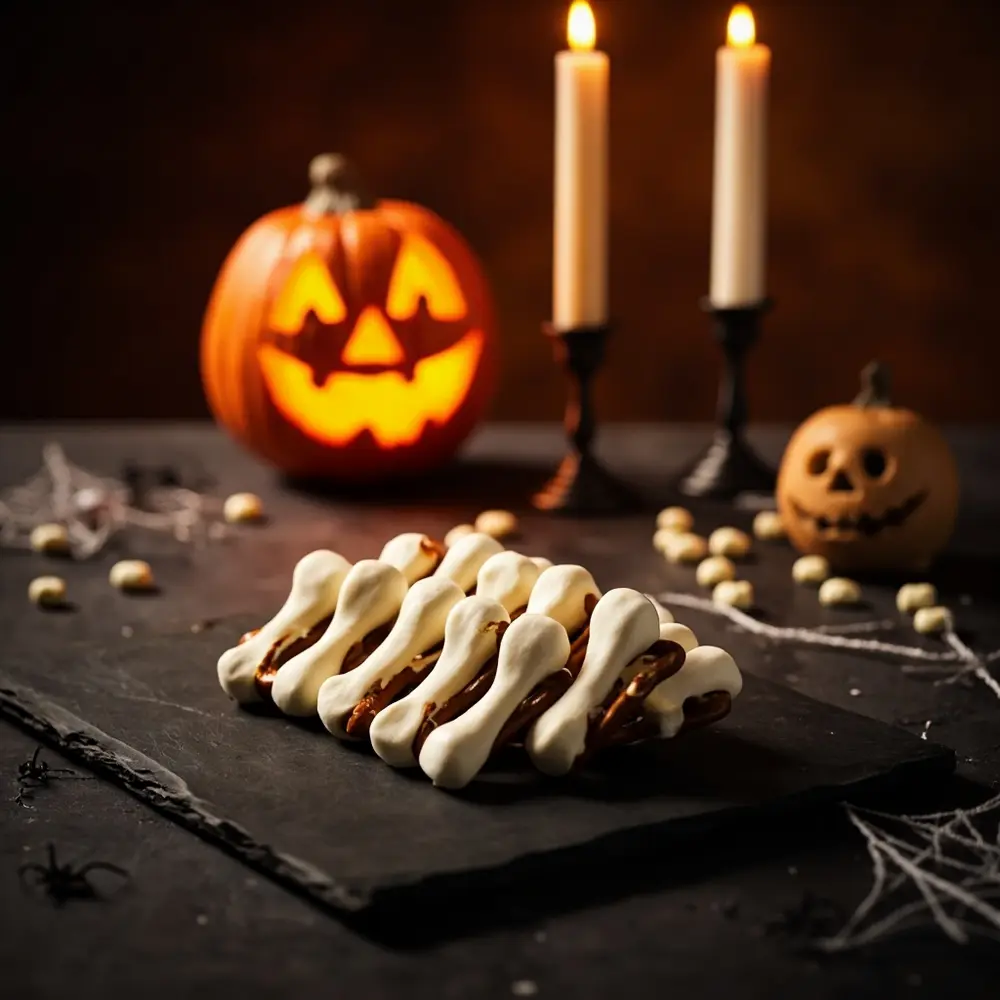
Recipe 1: Dairy-Free Chocolate-Covered Pretzel “Bones”
These are one of my favorite healthy Halloween snacks because they are ridiculously easy and look so impressive on a platter. The salty-sweet combination is a guaranteed crowd-pleaser!
Ingredients:
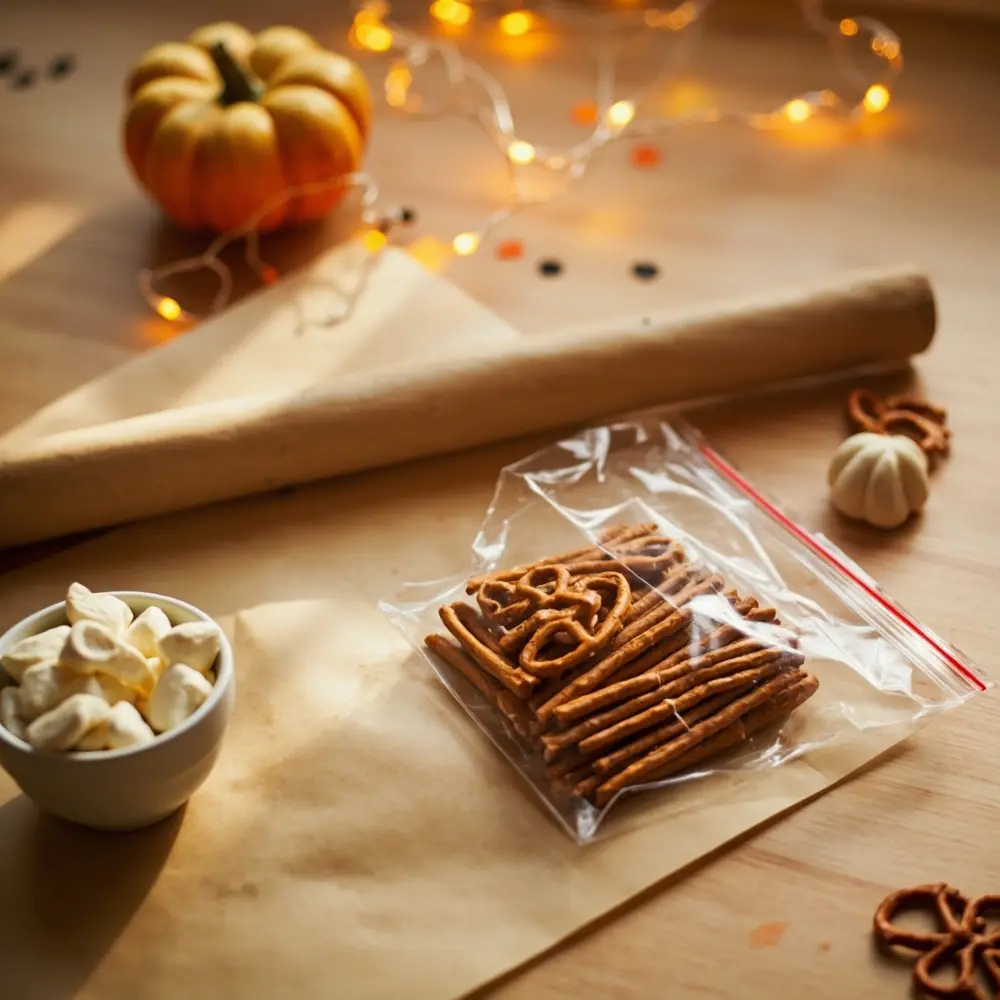
- 1 bag of pretzel rods or twists
- 1 cup of dairy-free white chocolate chips
- 2 mini marshmallows per pretzel rod (optional)
Instructions:
- 1. Line a baking sheet with parchment paper. This is my non-negotiable step for easy cleanup.
- 2. If using pretzel rods, press one mini marshmallow onto each end to create the “knobs” of the bone.
- 3. Melt the dairy-free white chocolate chips in a microwave-safe bowl in 30-second intervals, stirring in between, until smooth.
- 4. Dip each pretzel into the melted chocolate, using a spoon to coat it completely.
- 5. Place the chocolate-covered pretzels on the prepared baking sheet.
- 6. Refrigerate for at least 20 minutes, or until the chocolate is firm.
[image-1: A flat lay of ingredients for the pretzel bones: a bag of pretzel rods, a bowl of dairy-free white chocolate chips, mini marshmallows, and a roll of parchment paper.]

💡 Pro-Tip: For the smoothest melted chocolate, use a double boiler. If you don’t have one, place a heat-safe bowl over a small pot of simmering water (don’t let the bowl touch the water). Stir constantly until melted. This gentle heat prevents the chocolate from seizing.
[image-2: A close-up of the finished white chocolate-covered pretzel bones arranged artfully on a black, spooky-themed platter.]

Recipe 2: Dairy-Free “Mummy” Apple Slices
This is a fantastic way to get some fruit onto the Halloween party food table! They are fun for kids to help decorate and are a wonderfully refreshing and light treat.
Ingredients:
- 2 large apples (Granny Smith or Honeycrisp work well)
- 1/2 cup dairy-free white chocolate chips or dairy-free vanilla yogurt
- Edible googly eyes
Instructions:
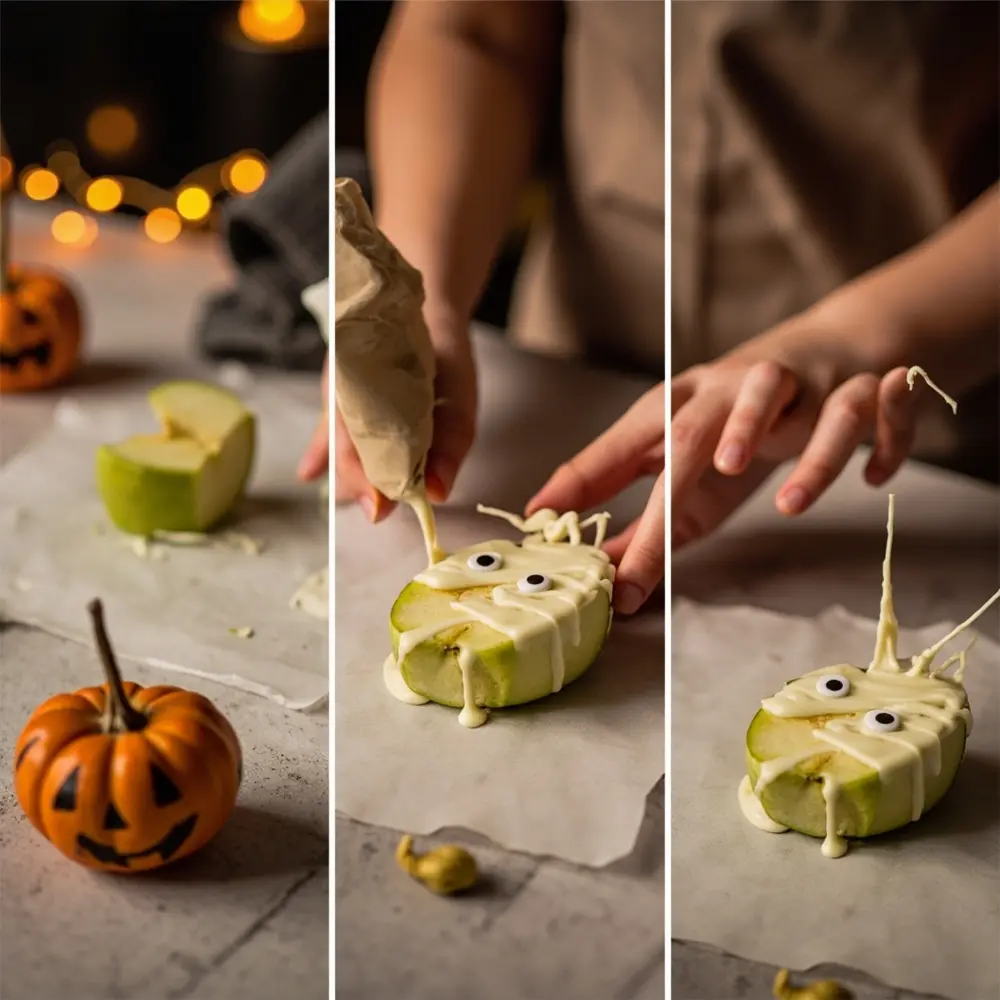
- 1. Core the apples and slice them into 1/4-inch thick rounds.
- 2. Melt the dairy-free white chocolate (if using) as described in the pretzel recipe. If using yogurt, simply place it in a small piping bag or a zip-top bag with the corner snipped off.
- 3. Drizzle the melted chocolate or yogurt back and forth over each apple slice to create “mummy bandages.”
- 4. While the drizzle is still wet, press two edible googly eyes onto each slice.
- 5. Let them set on parchment paper in the fridge for about 15 minutes.
[image-3: A step-by-step collage showing an apple slice, then the same slice being drizzled with white chocolate from a piping bag, and the final slice with two googly eyes placed on it.]

⚠️ Safety First: If you have little ones helping in the kitchen, an adult should always handle the apple slicing. Apple corers and slicers can be a great, safer alternative for kids to use with supervision.
Recipe 3: Dairy-Free “Spiderweb” Brownies
You can’t have a party without brownies! This simple decorating trick transforms a classic dessert into a spooky centerpiece. It’s one of the easiest vegan Halloween treats to adapt.
Instructions:
- 1. Prepare your favorite dairy-free brownie recipe or a box mix according to the package directions.
- 2. While the brownies are still slightly warm, prepare your “web” frosting. Melt 1/4 cup of dairy-free white chocolate chips or use a simple dairy-free vanilla frosting.
- 3. Place the melted chocolate or frosting in a piping bag or a zip-top bag with a tiny corner snipped off.
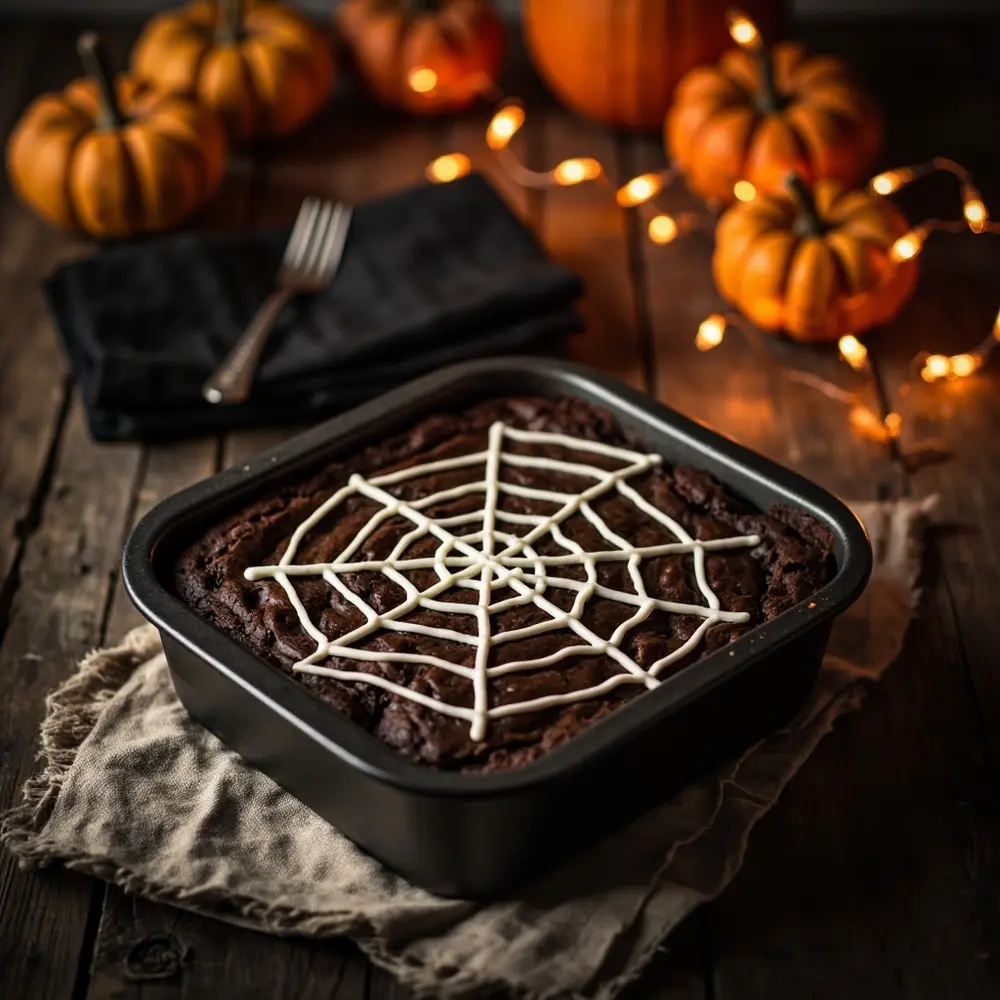
- 4. Pipe a spiral on top of the brownies, starting from the center and working your way out.
- 5. Drag a toothpick or knife from the center of the spiral to the edge to create the web effect. Repeat this every inch or so around the entire spiral.
- 6. Let the brownies cool completely before cutting and serving.
[image-4: An overhead shot of a finished square pan of dairy-free brownies with a perfectly executed white spiderweb design on top.]

👑 Nancy’s Pick: For a fantastic shortcut that tastes homemade, I recommend the King Arthur Baking Company Gluten-Free Fudge Brownie Mix. It’s certified gluten-free and easily made dairy-free by using a butter alternative and plant-based milk.
Variations & Customizations for Your Dairy-Free Treats 👻
After testing dozens of variations, I’ve found these simple swaps are the most effective for customizing your allergy-friendly Halloween treats.
- Go Vegan: My go-to trick for making these recipes fully vegan is simple! The pretzels and apples are already nearly there. For the brownies, just use a flax egg (1 tbsp ground flaxseed + 3 tbsp water) in place of regular eggs.
- Gluten-Free Options: This is an easy one! Use certified gluten-free pretzels for the “bones” and a certified gluten-free brownie mix (like my pick above) for the spiderweb brownies.
- Healthier Swaps: To reduce sugar, use a dairy-free yogurt with no added sugar for the mummy apples. You can also add 1/2 cup of pumpkin puree to your brownie batter for a boost of fiber and vitamin A!
- Spooky Decor: Don’t be afraid to get creative! Add a drop of black or orange food coloring to your white chocolate for colorful mummy wraps, or sprinkle the pretzel bones with black edible glitter for a ghoulish sparkle.
Dairy-Free Halloween Treat FAQs 🤔
Q1: How can I ensure my dairy-free chocolate melts smoothly without seizing?
The key is low, gentle heat and absolutely no water. Water is the enemy of melted chocolate! Use a double boiler or microwave it in short 20-30 second bursts, stirring well between each interval. If it starts to get too thick, you can stir in a tiny bit (1/2 teaspoon) of coconut oil to smooth it out.
Q2: What are the best dairy-free alternatives if I can’t find a specific ingredient mentioned?
No problem! If you can’t find dairy-free white chocolate, a simple powdered sugar glaze (powdered sugar + a splash of plant-based milk) works perfectly for the mummy and spiderweb designs. For butter alternatives, any vegan butter stick or coconut oil will work in the brownies.
Q3: How long do these dairy-free treats last, and what’s the best way to store them?
The pretzel bones and brownies are best stored in an airtight container at room temperature for up to 3-4 days. The mummy apple slices are best enjoyed the day they are made, but you can store them in an airtight container in the refrigerator for up to 24 hours.
Now you have three spooktacular, safe, and delicious dairy-free Halloween treats that everyone can dig into without worry. Creating an inclusive and magical celebration is what it’s all about!
Which one of these easy treats are you most excited to make for your Halloween party? Let me know in the comments below! 👻
