DIY Spooky Halloween Balloon Arch Tutorial: A Ghoulishly Good Party Backdrop
✨ From haunted party planning spreadsheets to last-minute costume fixes, I’ve mastered the art of creating Halloween magic—testing, fixing fails, and discovering solutions that actually work.
😅 But I know the struggle: How do you create a party decoration that looks professional without a professional price tag? How can you make a Halloween theme feel special for a birthday celebration? I’ve spent years figuring this out, and I’ve been there too.
👑 That’s why in this post, I’ll show you exactly how to solve these challenges with tips I’ve tested myself. Stick with me, and you’ll learn how to build a stunning, spooky balloon arch that becomes the heart of your celebration while creating magical memories with your loved ones! 🎃
Tutorial At-a-Glance
Time Required: Approx. 2-3 hours
Budget Level: Mid-Range
Skill Level: Beginner-Intermediate
What You’ll Need for Your Spooky Balloon Arch 🎃
Here’s a checklist of everything you’ll need to bring this ghoulishly good DIY party backdrop to life. My go-to trick for this is to gather everything in one spot before you start—it makes the process so much smoother!
✅ Assorted Halloween-themed balloons (black, orange, purple, green, white, clear with confetti)
✅ Balloon decorating strip or fishing line
✅ Balloon pump (manual or electric)
✅ Scissors
✅ Command hooks or strong adhesive tape
✅ Cardstock or felt for ghost cutouts
✅ String or fishing line for ghost cutouts
✅ Double-sided tape or glue dots
✅ Optional: Spider webs, plastic spiders, bat cutouts, LED string lights
✅ Optional: Backdrop stand or wall space
✅ Optional: Cake stand and table for backdrop setup (👑 Nancy’s Pick: I recommend a sturdy, multi-tiered cake stand. It not only holds your cake securely but also adds height and drama, which is key for a show-stopping backdrop. You can easily wrap it with faux spider webs or place mini pumpkins on the tiers to elevate the entire display.)
Creating Your Ghoulishly Good Balloon Arch: Step-by-Step Guide 🎈
A question I get all the time from my community is how to make DIY decorations feel personal and full of heart. Last year, I wanted to create something extra special for my nephew’s Halloween birthday (the goal). I started with a standard balloon arch, but it felt generic (the failure). That’s when I decided to add handmade ghost cutouts with his name hidden on one, turning a simple decoration into a treasured memory (the solution). This tutorial is built on that idea—making your party backdrop uniquely yours.
Step 1: Plan Your Spooky Palette & Layout
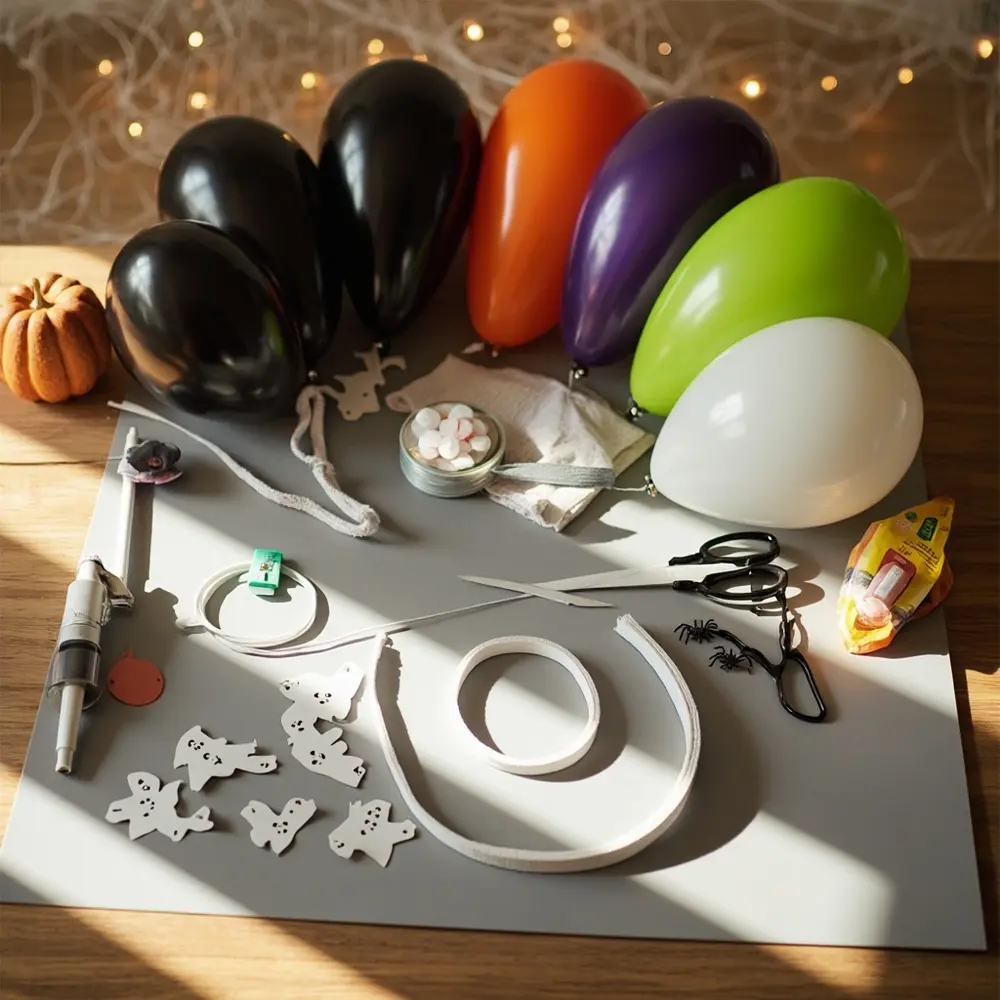
Before you inflate a single balloon, take a moment to be the creative director of your arch. Decide on your primary colors—I love a classic mix of black, orange, and purple, with pops of lime green and white for contrast. Visualize the shape you want. Will it be a full arch over a doorway, a semi-arch framing a cake table, or a free-flowing garland climbing up a wall? Sketching it out can be a huge help!
[image-1: A flat lay of assorted uninflated Halloween balloons, ghost cutouts, and the balloon strip, showing the chosen color scheme.]

Step 2: Inflate & Tie Your Balloons
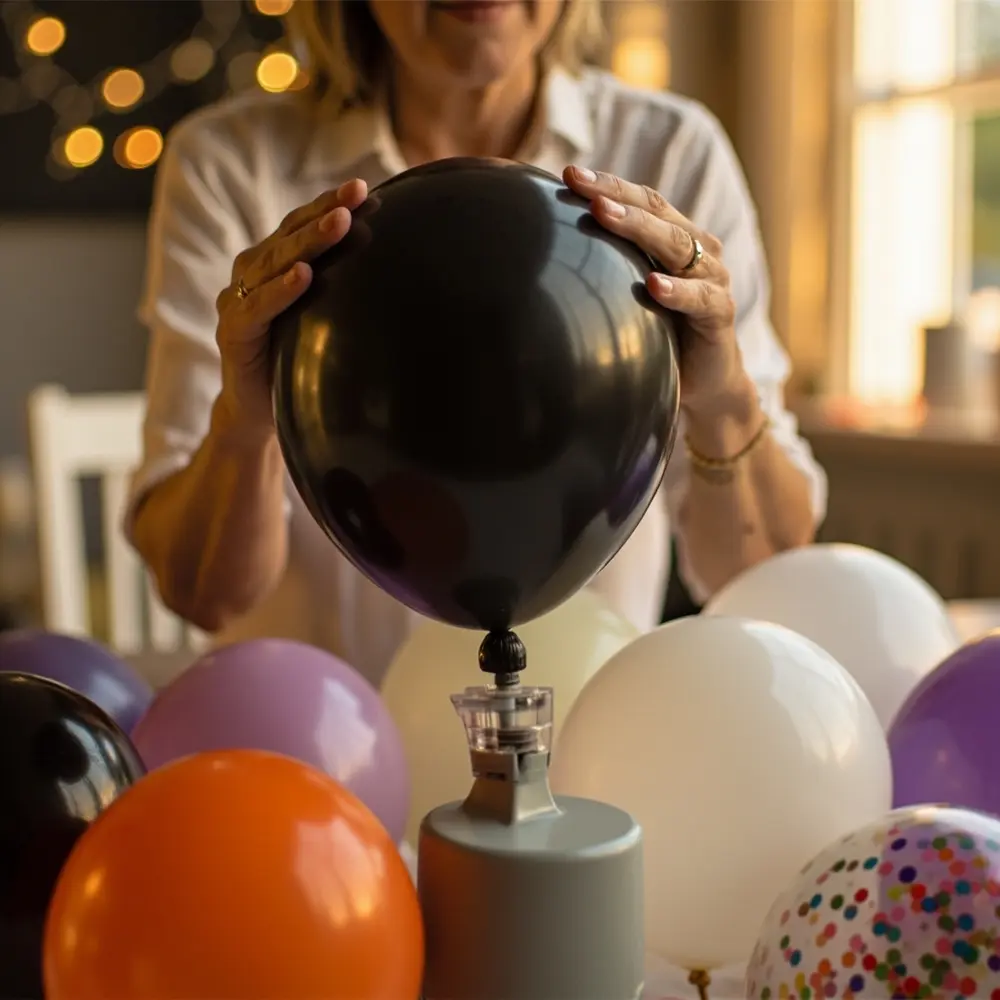
Now for the fun part! Using your balloon pump, start inflating your balloons. The secret to a professional-looking balloon garland is variation. Inflate balloons to different sizes—some large, some medium, and some small. This creates texture and depth. Tie each one off securely at the neck.
⚠️ Safety First: Be careful not to over-inflate your balloons, as they can pop unexpectedly. If you’re using an electric pump, it can be loud and fast, so consider wearing eye protection just in case.
[image-2: Hands using a balloon pump to inflate a black balloon, with a pile of already inflated balloons in the background.]

Step 3: Assemble the Arch Base
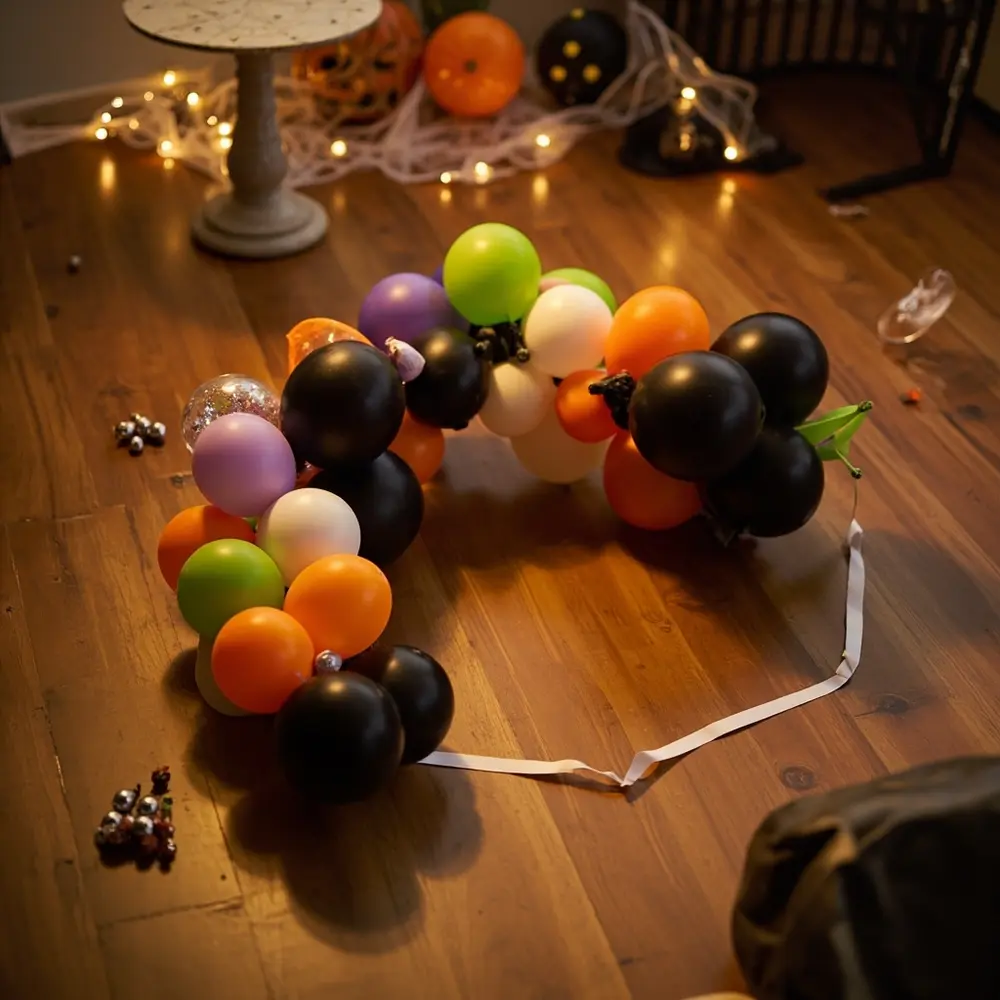
Take your balloon decorating strip and start threading the tied ends of your balloons through the pre-punched holes. My best advice is to alternate colors and sizes as you go to create a balanced, organic look. Don’t worry about making it perfect right away; you can adjust and fill in gaps later.
💡 Pro-Tip: For an extra full and lush arch, create small clusters of 2-3 balloons by tying them together at the knots. Then, attach these clusters to the decorating strip instead of single balloons. This is a game-changer for filling out the shape!
[image-3: A partially assembled balloon arch on the floor, showing balloons threaded onto the decorating strip.]

Step 4: Add Your Spooky Embellishments & Ghostly Friends
This is where your arch comes to life! Create your ghost cutouts from white cardstock or felt—simple, friendly ghost shapes work best. Use a black marker to draw on eyes and a mouth. To make them “float,” attach a small piece of clear fishing line to the back of each ghost with tape, then tie the other end to the balloon strip. For other embellishments like plastic spiders or bat cutouts, use glue dots or double-sided tape to stick them directly onto the balloons.
[image-4: Close-up of hands attaching a small, hand-drawn ghost cutout to a balloon using a glue dot, with other spooky elements visible on the arch.]

Step 5: Mount & Arrange Your Arch
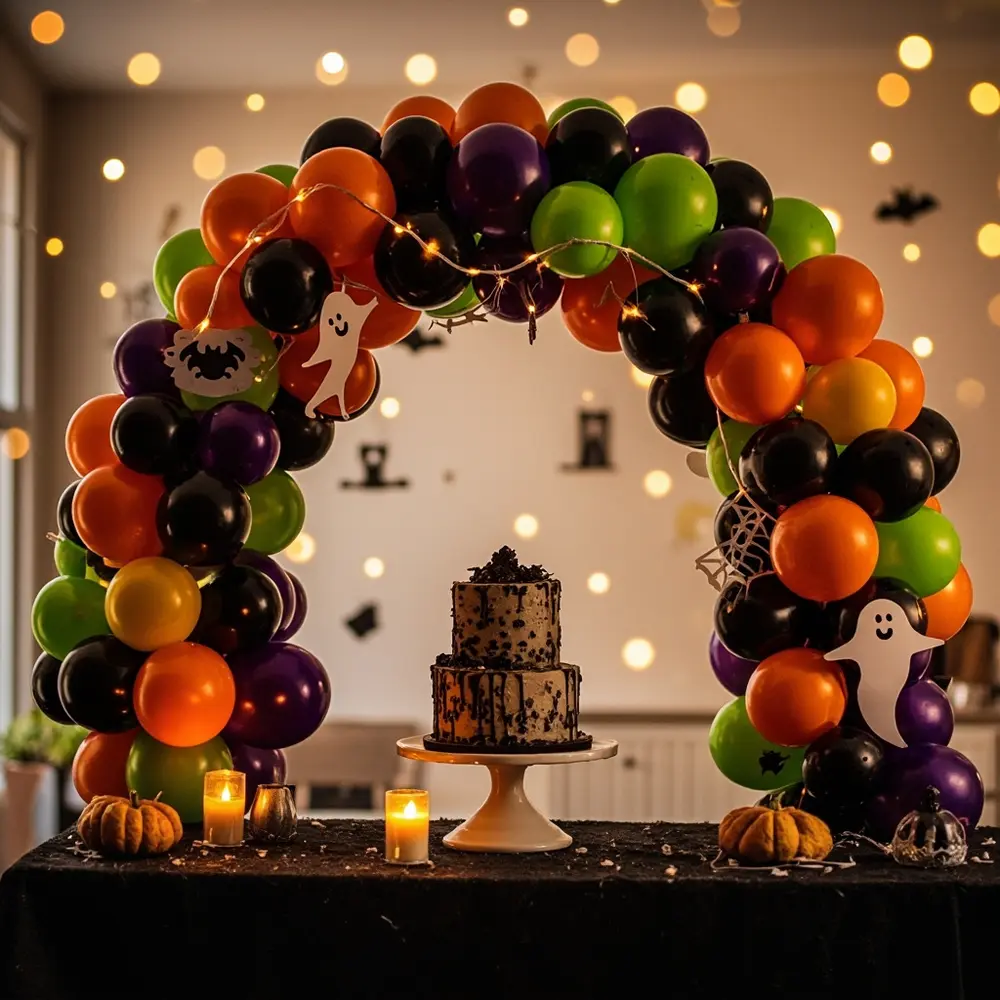
With your arch fully assembled, it’s time to hang it. Attach command hooks or strong adhesive tape to the wall or backdrop stand where you want the arch to be. Carefully lift your arch and hook the decorating strip onto the hooks. Once it’s secure, you can bend and shape the strip to get your desired curve. Fluff the balloons, adjust your ghosts, and fill in any sparse areas with smaller balloons using glue dots.
[image-5: The fully assembled spooky balloon arch, mounted on a wall or backdrop stand, ready for the next step.]

Beyond the Arch: Integrating Ghost Cutouts & Cake Backdrop Ideas 🎂
As a party planner for over a decade, I’ve learned that the most memorable celebrations are all about creating a cohesive scene. Your balloon arch isn’t just a decoration; it’s the centerpiece of your party’s story. To transform it into the perfect birthday cake backdrop, position your cake table directly in front of and slightly under the arch. This frames the cake beautifully, making it the star of the show.
To tie everything together, extend the theme beyond the arch. Let your ghostly friends escape the garland!
- Floating Ghosts: Hang more ghost cutouts from the ceiling at varying heights around the cake table using clear fishing line.
- Table Decor: Scatter mini pumpkins, faux spider webs, and battery-operated LED candles across the table.
- Themed Tablecloth: Use a black, orange, or spiderweb-themed tablecloth to ground the display.
These thoughtful details are what elevate a simple setup into an immersive and unforgettable Halloween birthday experience.
Variations & Customizations 👻
One of the best things about this DIY party backdrop is how easily you can adapt it. After testing dozens of themes, here are a few of my favorite twists:
- Theme Twist: Adapt the colors and embellishments for a “cute monster” or “witch’s brew” theme instead of general spooky.
- Mini Arch: Create smaller balloon clusters for table centerpieces or door frames.
- Interactive Elements: Add small treat bags or glow sticks within the arch for guests to grab.
- Photo Booth Fun: Incorporate a themed photo booth prop station directly in front of the arch.
Spooky Balloon Arch FAQs 🤔
Q1: How can I make my balloon arch last longer, especially if I’m preparing it in advance?
My go-to trick is to assemble the arch a day or two before the party and keep it indoors in a cool, dark room. Sunlight and heat are balloons’ worst enemies! Avoid placing it near sharp corners or high-traffic areas. For an extra glossy, long-lasting finish, you can use a balloon shine spray.
Q2: What are the best alternatives if I don’t have a balloon pump or decorating strip?
No pump? No problem! Make it a team effort and inflate them the old-fashioned way. If you don’t have a decorating strip, you can use a long piece of fishing line or sturdy string. Simply tie your balloon clusters directly onto the line, spacing them out as you go. It works just as well!
Q3: How do I securely attach ghost cutouts or other decorations without popping the balloons?
The key is to use gentle adhesives. Low-tack glue dots are my absolute favorite for this—they hold lightweight items like paper cutouts and plastic spiders perfectly without damaging the balloon. For a floating effect, tying decorations on with a thin, clear fishing line is the safest and most effective method.
I hope this tutorial helps you create a ghoulishly good backdrop for your next celebration! Building something with your own hands adds so much love and personality to a party.
What spooky theme are you planning for your Halloween party this year? Let me know in the comments below
