3 Spooky & Easy Halloween Makeup Looks Using Just One Eyeshadow Palette
✨ Looking into a mirror after hours of makeup trials, surrounded by smudged cotton swabs and open palettes, I’ve mastered the art of Halloween makeup. As a costume and makeup artist, I’ve spent years testing, fixing fails, and discovering solutions that actually work.
😅 But I know the struggle: How do you create an amazing Halloween look without buying a dozen new products? How can you get a spooky, high-impact effect if you’re not a pro? I’ve been there, trying to make magic on a budget.
👑 That’s why in this post, I’ll show you exactly how to solve these challenges with tips I’ve tested myself. Stick with me, and you’ll learn how to create three completely different, spooky looks using just one eyeshadow palette you might already own! 🎃
Tutorial At-a-Glance
Time Required: Approx. 15-30 minutes per look
Budget Level: Very Low (if you already own a palette)
Skill Level: Beginner to Intermediate
What You’ll Need for Your One-Palette Halloween Makeup 🎨
My go-to trick for budget Halloween makeup is to shop my own stash first. You’d be surprised what you can create with a few key items you already have.
✅ A versatile eyeshadow palette (👑 Nancy’s Pick: I recommend a palette with a good mix of mattes and shimmers. Look for one with a solid black, a deep brown, a bone-white or light beige, and at least one pop of color like a deep green, burgundy, or purple. This variety is the secret to creating truly diverse Halloween looks.)
✅ Eyeshadow brushes (various sizes for blending, packing, and detail work)
✅ Black liquid or gel eyeliner
✅ Mascara
✅ Makeup remover or micellar water and cotton swabs (for quick fixes)
✅ Optional: Makeup primer, setting spray (for longevity)
Unleash Your Inner Ghoul: 3 Spooky Looks with One Palette! 👻
A question I get all the time from my community is, “Nancy, how can I do cool Halloween makeup without spending a fortune?” I absolutely love this question because it challenges us to get creative. This tutorial is my answer—proof that you don’t need a professional kit to look spooktacular.
Look 1: The Ethereal Ghost or Haunting Vampire

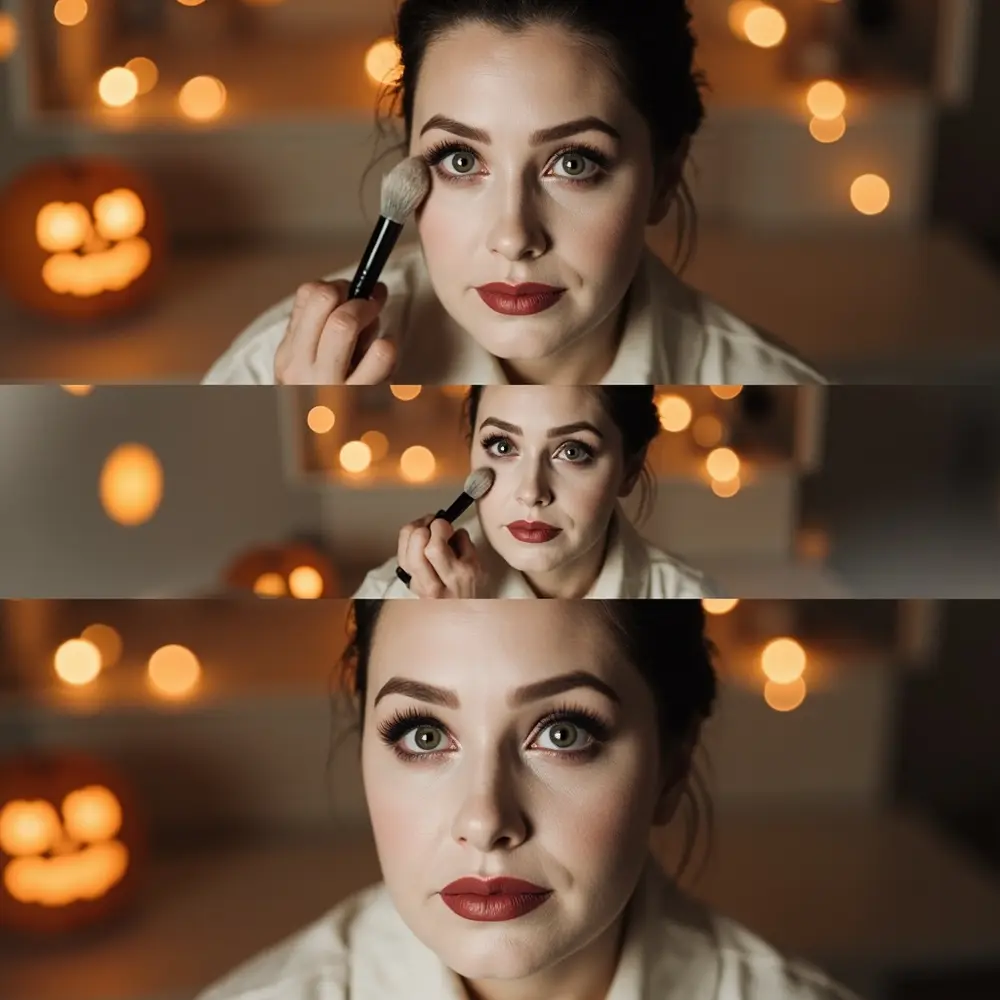
This look is all about creating a soft, gaunt, and otherworldly glow. We’ll use the lightest and coolest shades in your palette to hollow out your features for a beautifully spooky effect.
- 1. Create a Pale Base: Using a fluffy brush, sweep the lightest matte shade (a bone, white, or pale gray) all over your face to create a ghostly pallor. Don’t worry about full coverage; a sheer wash is perfect.
- 2. Hollow the Cheeks: Dip a smaller blending brush into a cool-toned brown or gray matte shadow. Suck in your cheeks and lightly apply the shadow into the hollows, blending upwards towards your ears.
- 3. Sunken Eyes: Use that same cool-toned shadow and blend it all around your eye socket, concentrating on the inner and outer corners to create a sunken, tired look.
- 4. Vampiric Flush: Take a touch of a burgundy or deep red shadow (if you have one) and lightly tap it under the center of your lower lash line. This creates a subtle, blood-flushed effect that’s perfectly vampiric.
- 5. Finish: Add a coat of mascara and you’re ready to haunt the night!
[image-1: A four-panel collage showing the steps for the Ethereal Ghost look: 1) a clean face, 2) applying the light shadow base, 3) contouring the cheeks and eyes with a cool-toned shadow, 4) the final, complete ghostly makeup.]
💡 Pro-Tip: The key to a believable gaunt effect is seamless blending. After applying your dark contour shades, go back over the edges with your fluffy brush and the light base shadow. This will soften any harsh lines and make the shadows look like they are naturally part of your face.
Look 2: The Wicked Witch or Forest Creature

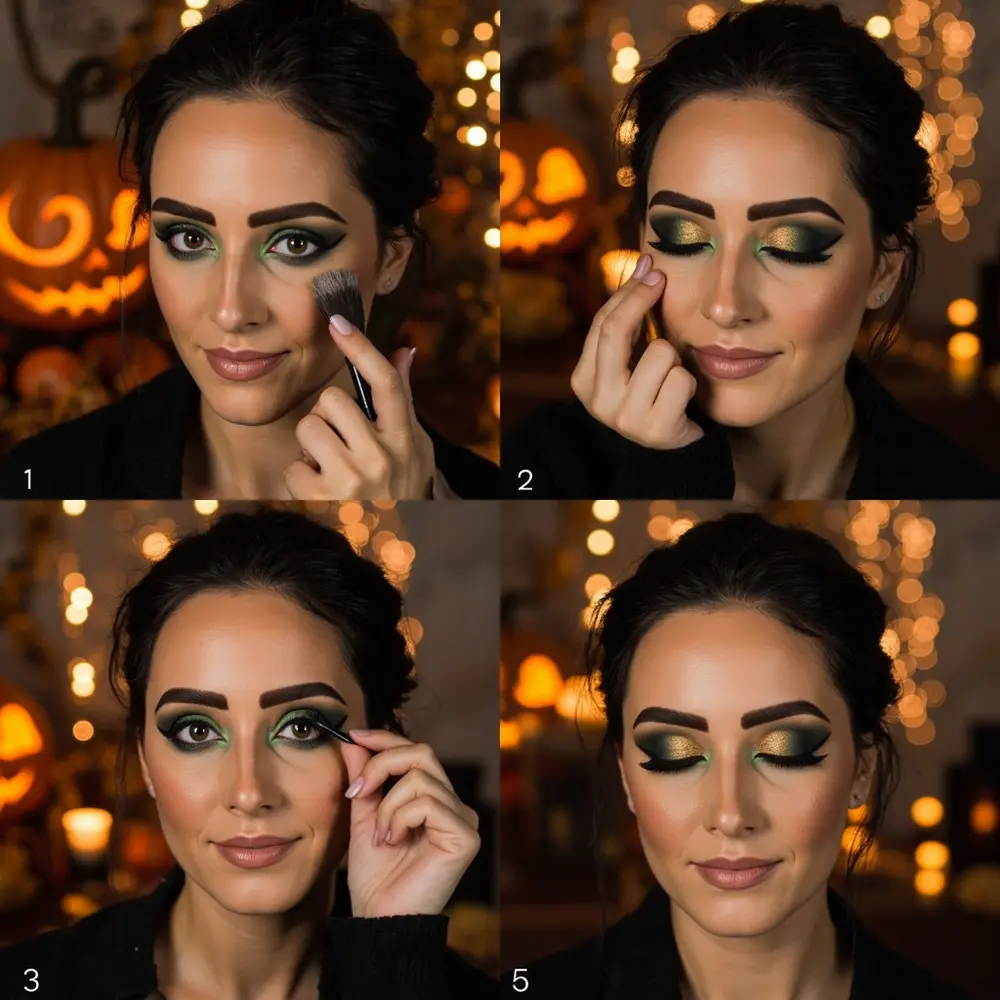
For this look, we’re diving into the darker, earthier tones of the palette. Think deep, smoky, and a little bit magical. This is perfect for a classic witch, a dark fairy, or an ancient forest spirit.
- 1. Smoky Base: Pack a deep green, brown, or gray matte shadow all over your eyelid, from the lash line up to the crease.
- 2. Add Depth: Take the matte black shadow on a smaller, denser brush and apply it to the outer corner of your eye in a “V” shape. Blend it into the crease to create dramatic depth. A mistake I always see is not blending enough, so take your time here!
- 3. Lower Lash Line: Smudge the same dark green or brown shadow along your lower lash line to balance the look. For extra intensity, run the black shadow very close to your lower lashes.
- 4. Magical Shimmer: Tap a shimmery green, gold, or bronze shadow onto the center of your eyelid with your finger. This adds a pop of light that makes the look feel more magical and dimensional.
- 5. Finish: Line your upper lash line with black eyeliner, add plenty of mascara, and you’re ready to cast some spells.
⚠️ Safety First: When using dark, highly-pigmented eyeshadows so close to your eyes, make sure your brushes are clean to avoid irritation. If you get any powder in your eye, flush it gently with water.
[image-2: A four-panel collage showing the steps for the Wicked Witch look: 1) a clean face, 2) applying the dark green base shadow, 3) adding depth with black shadow in the outer corner, 4) the final, complete smoky and magical eye makeup.]
Look 3: The Creepy Doll or Pop Art Zombie

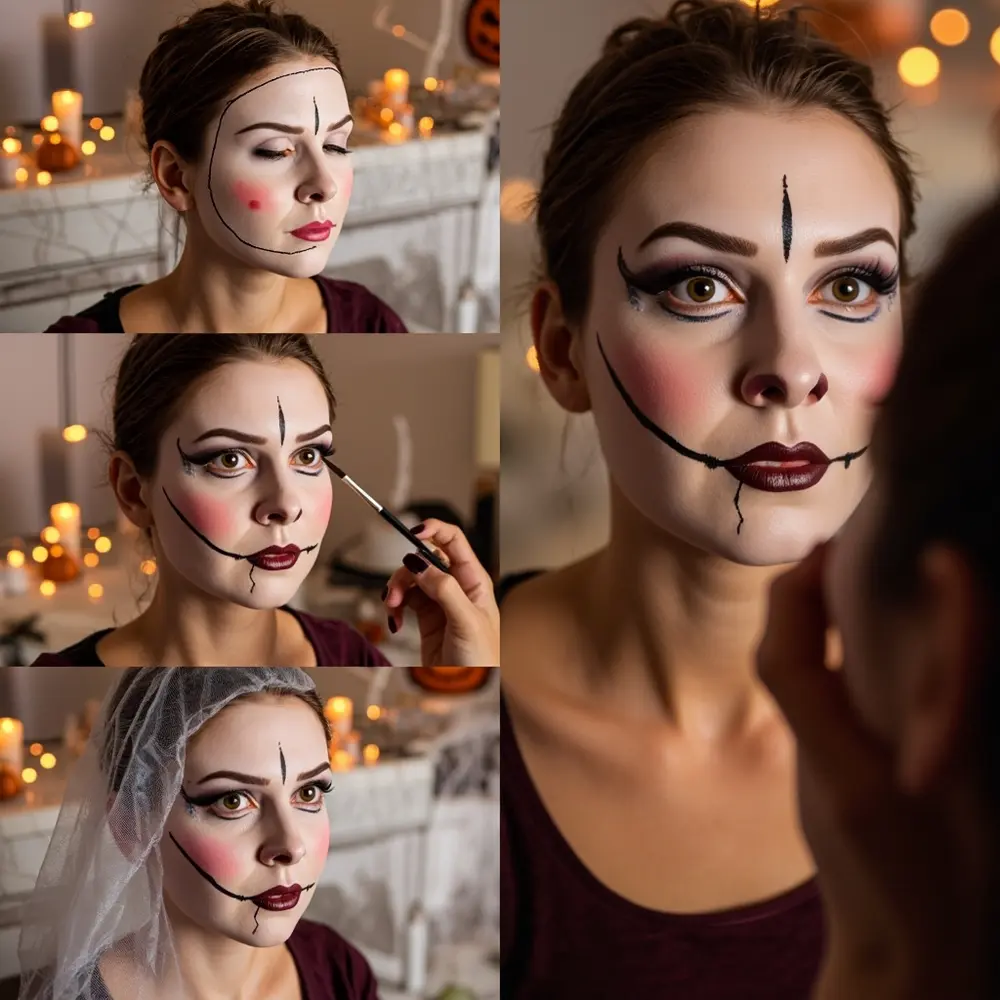
Time to get graphic! This look uses bold lines and exaggerated shapes to create a creepy, cartoonish, or broken doll effect. Precision is your friend here.
- 1. Exaggerated Eyes: Use the lightest shade to create a large, round shape around your entire eye area, extending well above your natural crease and below your lower lash line. This creates the illusion of a large doll eye.
- 2. Create a New Crease: Take a dark brown or black shadow on a thin, angled brush and draw a new, rounded crease line just below your eyebrow.
- 3. Cracks and Lines: Use that same dark shadow to draw “cracks” coming from the corner of your eye or mouth. For a pop art zombie, use it to outline your features like your cheekbones and nose.
- 4. Hollow Details: Use a bright or contrasting color from your palette to fill in some of the zombie features or to create an exaggerated, colorful blush on the apples of your cheeks for the doll look.
- 5. Finish: Use your black liquid eyeliner to draw oversized lower lashes underneath your eye.
[image-3: A four-panel collage showing the steps for the Creepy Doll look: 1) a clean face, 2) applying the large, light circle around the eye, 3) drawing the new crease and cracks with a dark shadow, 4) the final, complete creepy doll makeup with drawn-on lashes.]
💡 Pro-Tip: To get super sharp, ink-like lines without a liquid liner, dip a thin, angled brush in water or setting spray before dipping it into your dark eyeshadow. This creates a creamy paste that you can paint on with incredible precision for those doll cracks or cartoon outlines.
Palette Power: Variations & Customizations 🎨
After testing dozens of these one-palette challenges, I’ve learned that the real magic is in adapting the techniques to what you have. Here are a few ideas to customize these looks:
- Switch Up the Colors: Have a warm-toned palette with oranges and reds? Use it to create a fiery demon or a pumpkin-inspired look. A cool-toned palette with blues and silvers is perfect for an ice queen or a frozen zombie.
- Add Some Sparkle: If you have some craft glitter or face rhinestones, adding them to the inner corner of your eye or along your cheekbones can instantly elevate any of these looks.
- Multi-Task Your Mattes: The matte brown or taupe shades in your palette can double as contour. A matte pink or peach can work as a blush to complement your look.
- Enhance with Props: A little bit of fake blood dribbling from the corner of your vampire mouth or a few fake cobwebs stretched across your forest creature cheek can take your makeup to the next level.
One-Palette Makeup FAQs 🤔
Q1: How do I choose the best versatile eyeshadow palette if I don’t already own one suitable for these looks?
Look for a palette that has a good balance of finishes (at least 50% mattes) and a smart color story. A great versatile palette should include a light matte (for highlighting/basing), a mid-tone matte (for transition), a dark matte (for lining/depth), and a few shimmers or a pop of color that inspires you.
Q2: Can I make these one-palette looks last all night without smudging or fading, especially if I’m dancing?
Absolutely! The secret is in the prep and finish. Always start with an eyeshadow primer on your lids—it gives the shadows something to grip onto. When you’re completely finished with your look, a generous spritz of a good makeup setting spray will lock everything in place for hours.
Q3: What if my chosen palette doesn’t have a specific color (e.g., a bright red or deep green) needed for one of the looks?
Get creative and mix! You can often create custom shades by layering. For example, layering a black shadow lightly over a brown can create a deep, mossy tone. If you need a specific color for a small detail, like a red vampiric flush, you can often use a lipstick or a blush you already own in a pinch.
I hope these looks show you just how powerful that one little eyeshadow palette can be! Halloween is all about creativity, not about having the most expensive products.
Which of these three looks are you most excited to try? Let me know in the comments below! 🎃
