Creative & Budget-Friendly DIY Halloween Treat Bags for Parties
✨ After countless hours covered in glitter and glue while hosting seasonal crafting workshops, I’ve mastered the art of turning simple supplies into something magical. I’ve tested, failed, and discovered the absolute best solutions for creating unforgettable DIY Halloween treat bags.
😅 But I know the struggle: are you tired of spending money on generic plastic bags that everyone else has? Do you want to add a personal, creative touch to your party favors without a huge budget or complicated steps? I’ve been there, too.
👑 That’s why in this post, I’ll show you exactly how to solve these challenges with my favorite tested tips. Stick with me, and you’ll learn how to create unique, budget-friendly treat bags that will have your party guests raving! 🎃
Tutorial At-a-Glance
Time Required: Approx. 30-60 minutes per batch (depending on complexity)
Budget Level: Very Low-Cost
Skill Level: Beginner
What You’ll Need for Your DIY Treat Bags 🎃
A mistake I always see is people thinking they need expensive, specialized materials. My go-to trick is to start with simple, versatile basics you probably already have! Here’s what to gather:
✅ Plain paper bags (lunch bag size)
✅ Construction paper or cardstock (black, orange, purple, green)
✅ Scissors
✅ Craft glue or glue stick
✅ Markers (black, white, various colors)
✅ Googly eyes (various sizes)
✅ Felt scraps or fabric remnants
✅ Ribbon, twine, or string
✅ Empty cereal boxes or small cardboard boxes (for upcycling)
✅ White tissue paper or cellophane
✅ Candy or small treats (for demonstration/filling)
✅ (👑 Nancy’s Pick: A multi-pack of plain brown or white paper bags is my absolute must-have. They are the perfect blank canvas for endless creativity and are incredibly cost-effective, especially when you’re making favors for a large party.)
Solving the Generic Bag Problem: Creative & Budget-Friendly DIY Treat Bag Ideas 👻
A question I get all the time from my community is, “Nancy, how can I make my party favors feel special without spending a fortune?” The problem is that store-bought treat bags are often generic, flimsy, and don’t reflect your party’s unique vibe. The solution is to get a little crafty! These four ideas are my tested-and-true methods for creating memorable packaging that’s as fun to make as it is to receive.
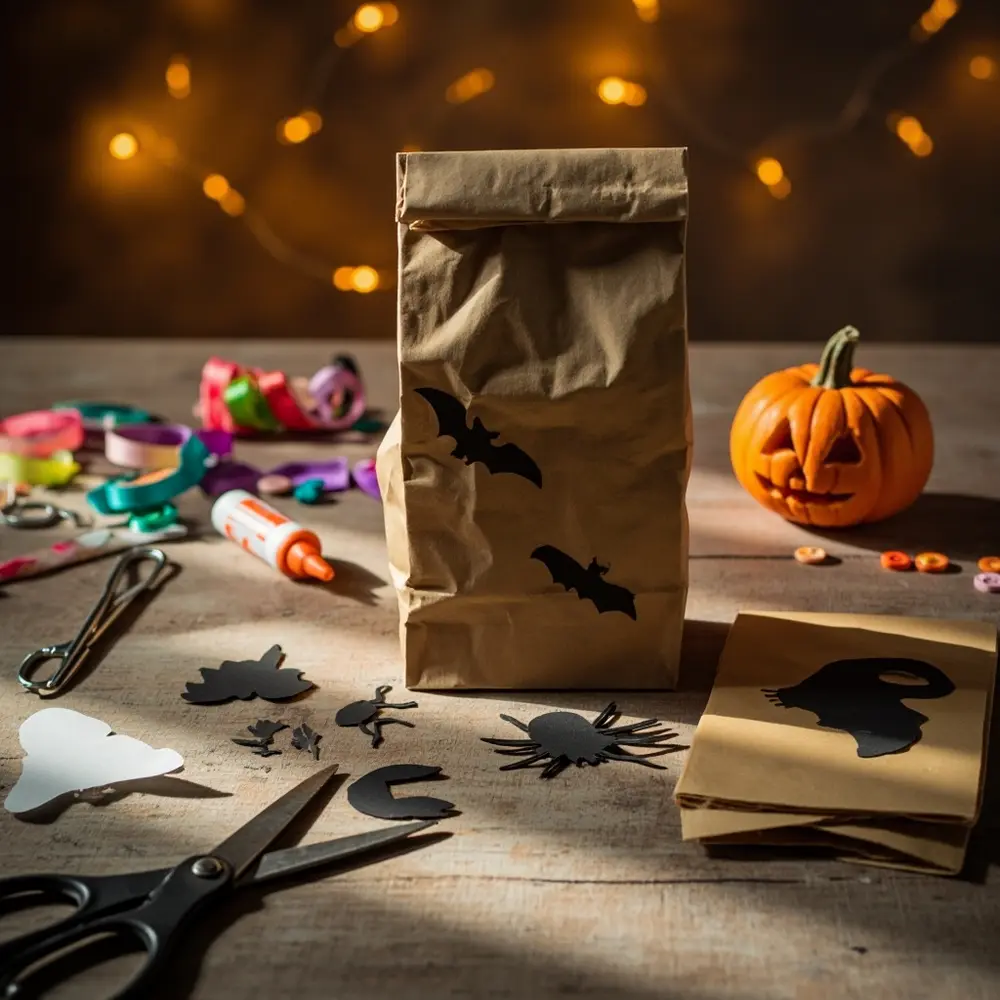
Idea 1: Spooky Silhouette Paper Bags
This is a classic for a reason—it’s simple, striking, and so easy to customize. You’ll transform a plain paper bag into a piece of spooky art with just a few cuts.
First, choose your silhouette. Think classic Halloween shapes like bats, ghosts, spiders, or even a creepy haunted house. You can draw these freehand or find a simple template online to print and trace onto black construction paper. Carefully cut out your shapes. Then, apply a thin layer of craft glue to the back of your silhouette and press it firmly onto the front of a paper bag. Let it dry completely before filling!
⚠️ Safety First: Always use scissors with care, especially when making small or intricate cuts. Adult supervision is recommended for younger crafters.
[image-1: A plain paper bag next to various paper cut-out silhouettes of a bat, ghost, and spider, then a finished bag with a black cat silhouette glued on.]

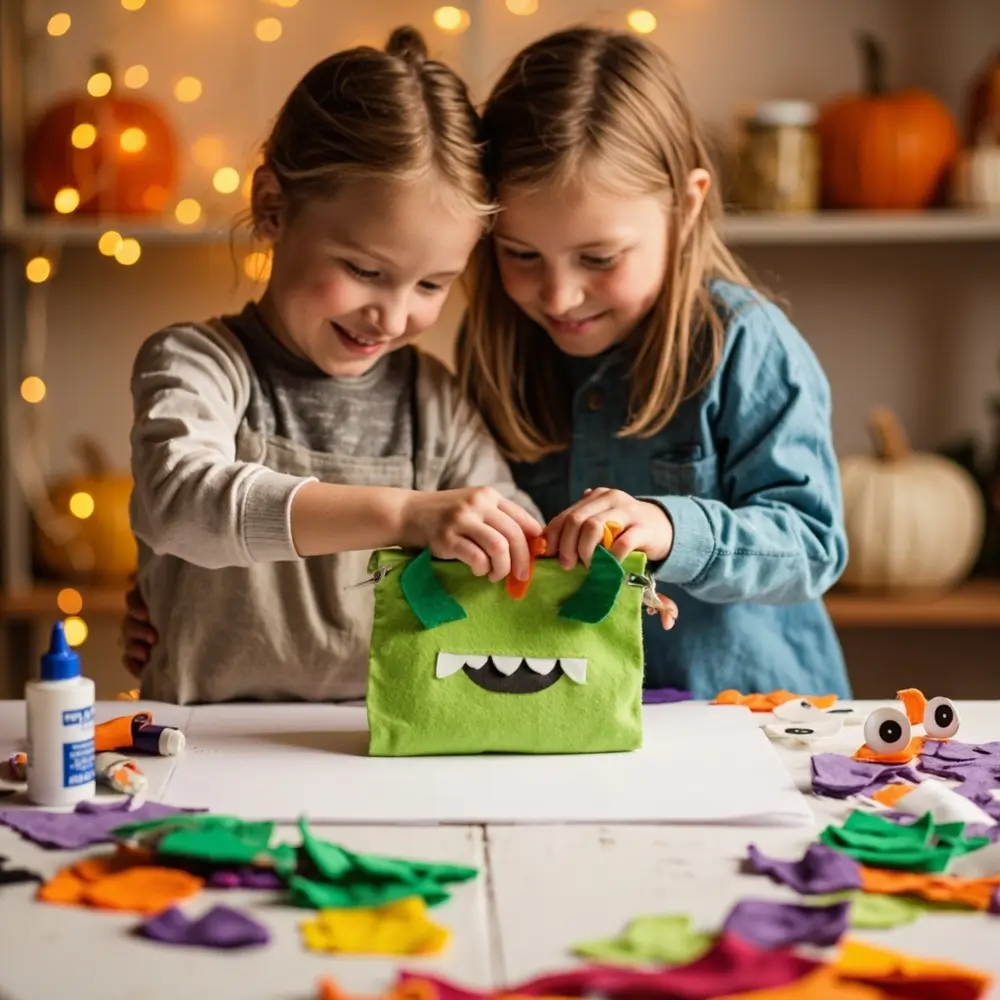
Idea 2: Monster Mash-Up Fabric Pouches (No-Sew)

For a soft, reusable option, these no-sew monster pouches are perfect. After testing dozens of methods, I found this to be the quickest way to get a super cute result.
Take a rectangular piece of felt or fabric scrap and fold it in half to create your pouch shape. Use fabric glue along the two open sides, leaving the top open. Press the edges together firmly. While it dries, cut out monster features from other felt scraps—think pointy teeth, silly tongues, or funky horns. Once the pouch is sealed, glue on the features and a few googly eyes to bring your little monster to life!
💡 Pro-Tip: Use fabric glue sparingly to avoid it seeping through the material. A thin, even line is all you need. Allow at least an hour of drying time before you handle or fill the pouch.
[image-2: Brightly colored felt scraps, googly eyes, and a bottle of fabric glue laid out, then a close-up of hands gluing felt teeth onto a green fabric pouch, and finally a finished, googly-eyed monster pouch filled with candy.]
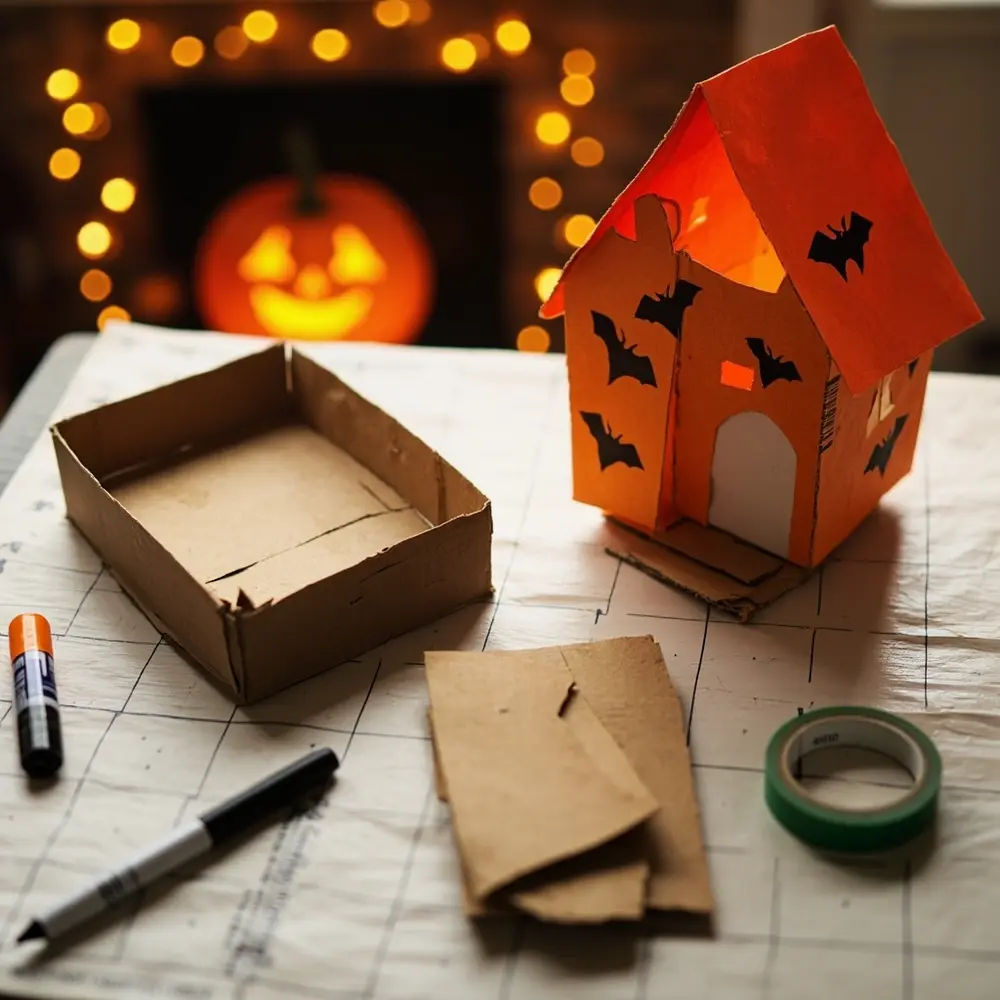
Idea 3: Upcycled Cereal Box Treat Boxes
Don’t throw away those empty snack boxes! With a little creativity, they become sturdy, custom treat boxes. This is one of my favorite budget-friendly Halloween crafts because it’s practically free.
First, carefully open up an empty cereal or snack box at the seams so it lays flat. Cut it down to your desired size for a small treat box. You can fold it back into a simple box shape or get creative and shape it like a coffin or a tiny haunted house. Secure the new shape with glue or tape. Finally, the fun part: decorate it! Cover the box with construction paper, paint it, or draw a monster face directly on it with markers.
[image-3: An empty cereal box being cut and folded into a smaller box shape, then a finished treat box decorated to look like a mini haunted house.]

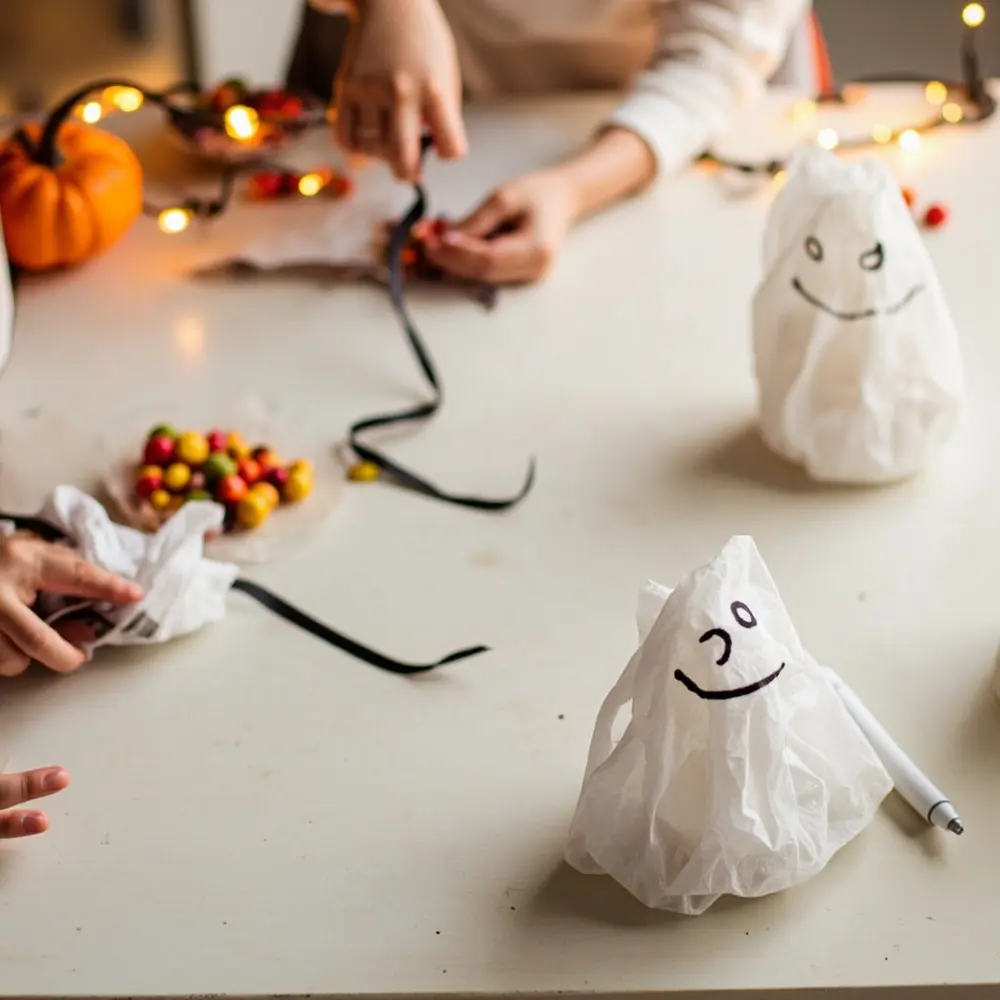
Idea 4: Ghostly Goodie Bags (Simple & Quick)
When you’re short on time but still want something cute, these ghostly goodie bags are the answer. This is my go-to for last-minute party prep.
Place a small pile of candy or treats in the center of a piece of white tissue paper or a square of cellophane. Gather the edges up and around the treats, twisting the paper at the top to create a “head” and a flowy “body.” Secure the neck with a piece of ribbon or twine. To finish, just take a black marker and draw a simple ghost face—two ovals for eyes and a bigger one for a spooky mouth. That’s it!
[image-4: A pile of candy being placed in the center of white tissue paper, then the paper being tied with black ribbon, and a final shot of a simple ghost face drawn on with a marker.]

Personalizing Your Treat Bags: Tips from a Crafting Expert 🎨
As a crafting expert who has styled countless events, I know that the little details make all the difference. Once you’ve made your basic bags, here are a few of my favorite tricks to make them truly one-of-a-kind:
- Add personalized name tags or labels to each bag using a fun, spooky font.
- Incorporate glow-in-the-dark paint or stickers for an extra spooky effect when the lights go down.
- Use different colored papers or fabrics to match specific party themes (e.g., classic orange/black, pastel goth, or vibrant monster).
- Attach small Halloween-themed charms or ribbons to the handles or ties for a bit of flair.
- Set up a decorating station and let kids customize their own bags as a fun pre-party activity!
DIY Halloween Treat Bags FAQs 🤔
Q1: How can I make these treat bags durable enough to hold a lot of candy without tearing?
My go-to trick for paper bags is to reinforce the bottom. Cut a piece of cardboard that fits snugly inside the base of the bag and glue it down. For heavier treats, you can even use two paper bags, one inside the other, for double the strength. For the upcycled boxes, using a strong craft glue or a hot glue gun (with adult supervision) on the seams will make them very sturdy.
Q2: What are some eco-friendly or reusable alternatives for treat bag materials?
I love this question! The Monster Mash-Up Fabric Pouches are fantastic because they are inherently reusable. Kids can use them long after Halloween to store small toys or treasures. You could also use small, reusable cloth drawstring bags and decorate them with fabric paint or iron-on patches. For tags, consider using seed paper that guests can plant later!
Q3: Can these DIY ideas be adapted for other holidays or party themes beyond Halloween?
Absolutely! That’s the beauty of a good DIY framework. The Spooky Silhouette idea works for any holiday—just swap the bats and ghosts for hearts on Valentine’s Day, snowflakes for Christmas, or birthday cakes for a party. The upcycled boxes and fabric pouches can be decorated in any color scheme to match any theme you can dream up.
Now that you have these simple, creative ideas, you’re ready to ditch the boring store-bought bags for good. You can create something personal and memorable that makes your Halloween celebration feel extra special.
Which of these DIY treat bag ideas are you most excited to try for your party? Let me know in the comments below
