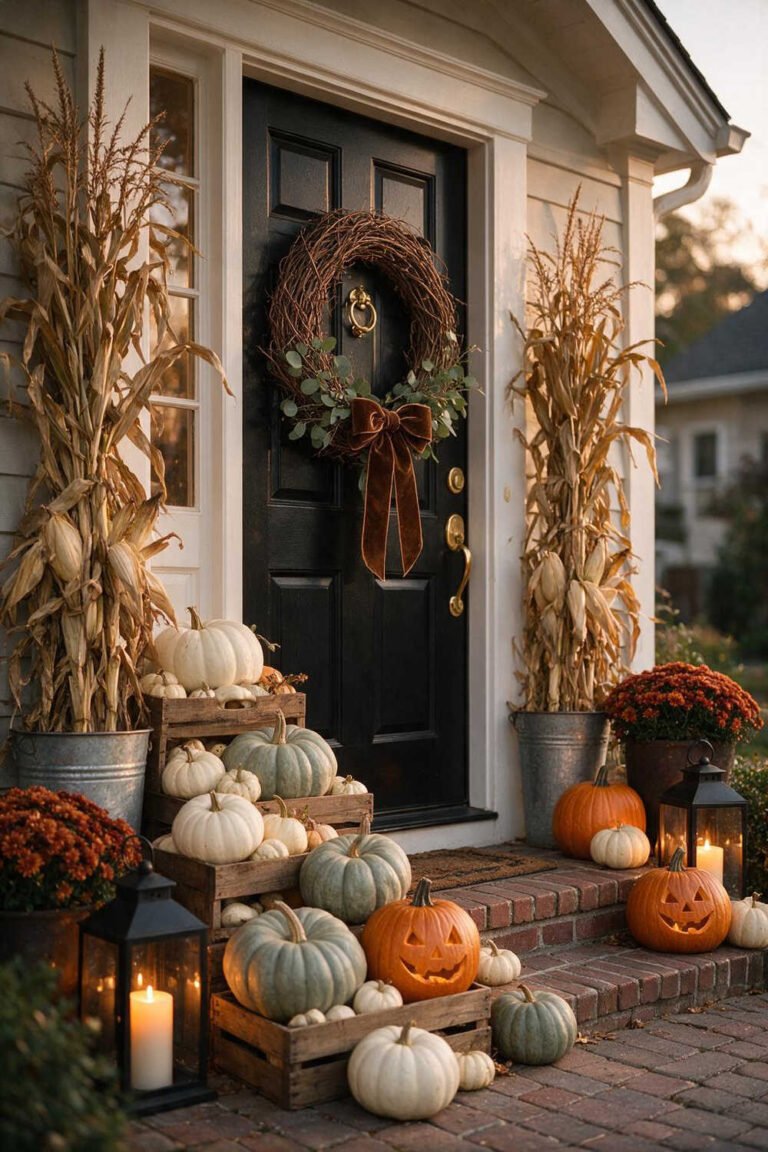
20 No-Carve Pumpkin Ideas That Will Save Your Sanity This Halloween!

Discover 20 stunning no carve pumpkin ideas that will save your sanity this Halloween with chic, mess-free family designs! 🎃✨
💬 The Real Mom Question (from Reddit’s r/Parenting):
“Every Halloween I dread carving pumpkins. Between slimy pumpkin guts all over the floor, kids crying because knives are too dangerous, and the pumpkins rotting into gray mush three days later, it’s exhausting. What are the best no-carve pumpkin decorating ideas that look gorgeous on a front porch, keep kids happy, and don’t require surgical tools?”If you’ve ever stared at a messy pumpkin gut catastrophe while swearing you’ll never buy a carving kit again, take a deep breath mama: you are in the right place! 💛
Grab a warm mug of reheated coffee ☕—we are skipping the sticky pumpkin guts and pulling together 20 chic, mess-free no carve pumpkin ideas that will keep your porch looking like a magazine cover and keep your pumpkins fresh all season!

📌 Quick Pin for Busy Moms: Tap this image or the Pinterest button on your screen to pin these ideas directly to your Fall & Halloween Home Decor board!
– Zero Rot & Long Lasting: Uncarved pumpkins keep their natural protective skin, staying firm and gorgeous outdoors for 8 to 12 weeks instead of molding in 4 days.
– The 2-Minute Baking Soda Magic: Mix equal parts household baking soda and matte acrylic paint to instantly give cheap craft pumpkins high-end European terracotta texture.
– Damage-Free Toddler Fun: Use washable tempera paint, Mod Podge decoupage, or colorful washi tape so toddlers can participate 100% knife-free.
– Weatherproof Outdoor Sealing: Protect painted and decoupaged pumpkins from crisp fall rain with a quick 5-second mist of exterior matte UV clear sealer.
🏆 Nancy’s Top 3 Quick Picks for No-Carve Pumpkins
When October calendars are packed and you need a quick 15-minute decorating win before dinner, here are our three family favorites:
| Category Award | Nancy’s Score | Featured Decor Display | Why It Won |
|---|---|---|---|
| 🥇 Best High-End Designer Dupe | ⭐ 9.9 / 10 | The Baking Soda & Terracotta Matte Pumpkin | Transforms dollar-store pumpkins into $48 catalog pottery using kitchen baking soda and acrylic paint. |
| 🥈 Best Zero-Mess Toddler Favorite | ⭐ 9.8 / 10 | The Thrifty Washi Tape Geometric Plaid Pumpkin | Completely mess-free; little hands simply peel and stick colorful Japanese paper tape without a single drop of paint. |
| 🥉 Best Cottagecore Porch Showstopper | ⭐ 9.7 / 10 | The Pressed Botanical & Mod Podge Heirloom Pumpkin | Preserves real fallen autumn leaves and ferns onto creamy white heirloom gourds for breathtaking organic beauty. |
🧺 Nancy’s Real-Mom Decor Supply Swap Table
Please never feel pressured to spend a fortune at upscale craft boutiques to create a breathtaking fall porch! 💛
Here are the clever kitchen and pantry swaps we use in our own Tennessee home, paired with our favorite reliable Amazon staples:
| If You Don’t Have… | Use This Pantry / Household Swap! | Recommended Amazon Decor Staple |
|---|---|---|
| Expensive Chalk Paint ($18+) | Mix 2 tablespoons kitchen baking soda into 1/2 cup leftover wall sample paint. | Apple Barrel Matte Acrylic Craft Paint Set |
| Specialty Craft Pumpkins | Grab fresh real grocery pumpkins or inexpensive dollar foam gourds. | Assorted Mini Faux White Craft Pumpkins |
| Boutique Decoupage Medium | Water down Elmer’s white school glue with 1 teaspoon of water. | Mod Podge Waterbase Sealer in Matte Finish |
| Permanent Sharpies (Ruins Mistakes) | Let little ones draw with washable dry-erase markers that wipe clean with a baby wipe. | Liquid Chalk & Dry Erase Reversible Markers |
| High-End Patterned Stencils | Repurpose kitchen lace ribbons, doilies, or textured masking tape. | Washi Tape Set Decorative Masking Tape |
👀 People Also Read
20 Stunning No-Carve Pumpkin Ideas That Will Save Your Sanity
1. The Baking Soda & Terracotta Matte Pumpkin

💬 Real Mom Question (from Reddit’s r/HomeDecorating):
“How do you get that ultra-matte, textured ceramic look on pumpkins without paying $50 each at high-end home boutiques?”
Nancy’s Fix: Mix two tablespoons of ordinary baking soda into half a cup of matte acrylic craft paint! Stippling it with a sponge brush creates an authentic sand-cast pottery texture in minutes.
Give ordinary orange pumpkins the velvety, handcrafted feel of European terracotta pottery without the boutique price tag.
How to Style & Assemble It:
- Anchor the Base: Wipe down your pumpkin with a damp cloth and rubbing alcohol to strip off slippery natural waxes.
- Mix the Texture: Stir 2 tablespoons of kitchen baking soda into 1/2 cup of terracotta or warm beige acrylic paint until it forms a creamy paste.
- Stipple the Surface: Dab the thick mixture across the pumpkin using an up-and-down sponge brush motion to erase all brush strokes.
- Accentuate the Stem: Paint the stem in deep charcoal and dust with a pinch of cinnamon powder while wet for realistic dried botanical stems.
- Mom-Proof Stability: Mist the fully dried pumpkin outdoors with matte clear acrylic sealer so autumn rain never softens the chalky finish.
Recommended Decor Materials & Accents:
| Decor Item | Where to Buy |
|---|---|
| Apple Barrel Matte Acrylic Paint Set | Buy on Amazon ➔ |
| Assorted Mini Faux White Craft Pumpkins | Buy on Amazon ➔ |
🎥 Helpful DIY Tutorial Walkthrough (Watch on YouTube)
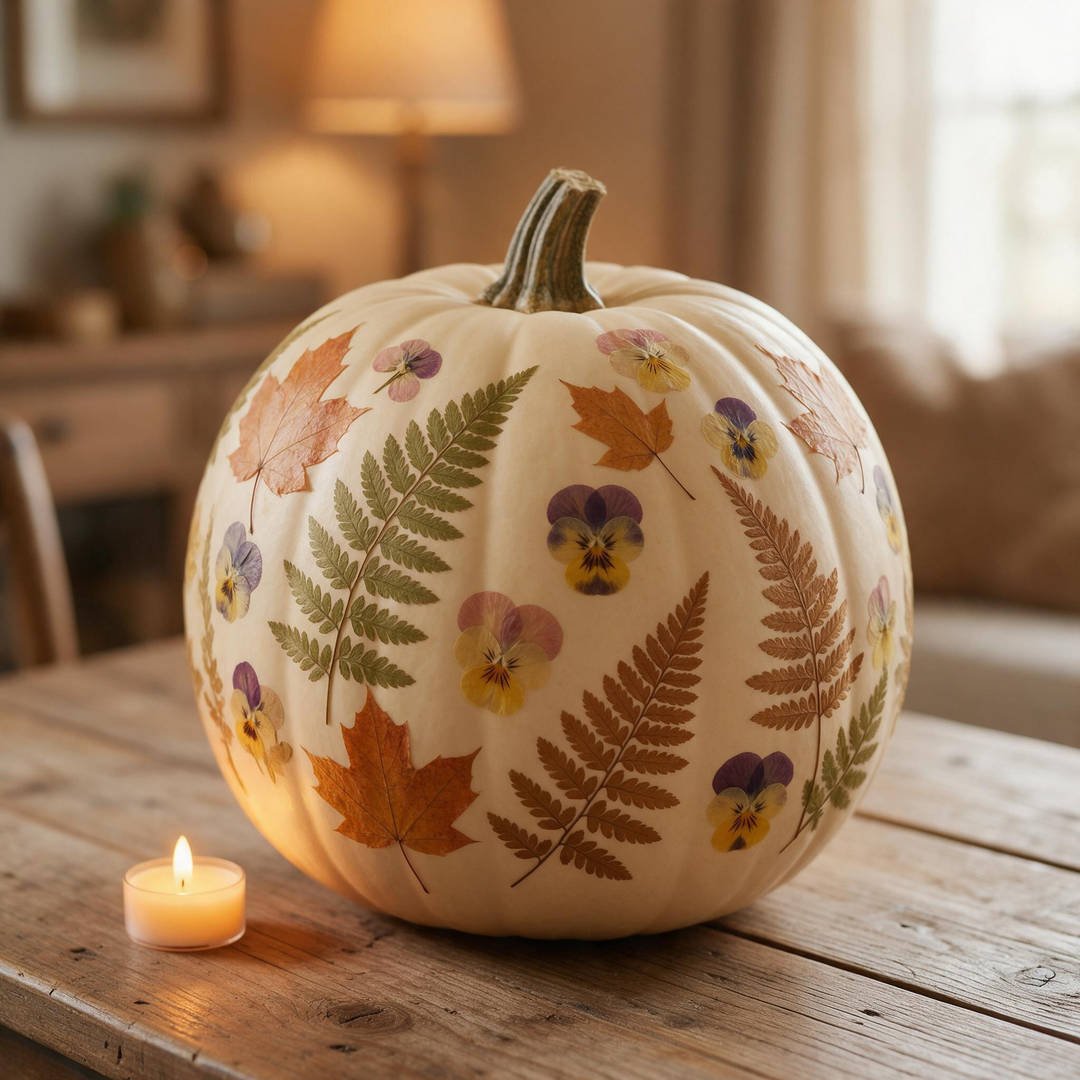
2. The Pressed Botanical & Mod Podge Heirloom Pumpkin
💬 Real Mom Question (from Reddit’s r/DIY):
“Every time I try decoupage on real pumpkins, the leaves crinkle up and bubble. How do you get delicate botanicals to lay completely flat?”
Nancy’s Fix: Press real leaves between heavy books inside parchment paper for 48 hours first, or brush Mod Podge both underneath AND over top with a soft silicone brush.
Turn yard walks with your kids into a stunning piece of live autumn art by decoupaging pressed leaves onto creamy white gourds.
How to Style & Assemble It:
- Anchor the Base: Choose a smooth, flat-ribbed white pumpkin like a Luminary or Casper variety.
- Prep the Foliage: Gather flat fall leaves, delicate ferns, and pansies, pressing them flat under heavy books for two days.
- Apply the Adhesive: Brush a thin, even coat of matte Mod Podge directly onto the pumpkin skin where you want your first leaf.
- Smooth from Center Out: Gently press the dried leaf into the wet glue, smoothing outward with your fingertips to eliminate air bubbles.
- Seal for Weather: Seal the entire botanical display with two topcoats of matte Mod Podge, allowing 20 minutes between coats.
Recommended Decor Materials & Accents:
| Decor Item | Where to Buy |
|---|---|
| Mod Podge Waterbase Sealer in Matte Finish | Buy on Amazon ➔ |
| FolkArt Multi-Surface Acrylic Paint Set | Buy on Amazon ➔ |
🎥 Helpful DIY Tutorial Walkthrough (Watch on YouTube)
3. The Gold Foil Confetti & Polka Dot Pumpkin

💬 Real Mom Question (from Reddit’s r/cozyplaces):
“What is a fast way to make plain white craft pumpkins look upscale and celebratory without spending an entire evening painting intricate designs?”
Nancy’s Fix: Use metallic gold circle sticker labels or gold leaf foil dabbed with glue stick dots! Kids can place the dots randomly while you paint the stem bright metallic gold.
Add instant warmth and light reflection to your entryway with playful, shimmering metallic gold polka dots against clean ivory.
How to Style & Assemble It:
- Anchor the Base: Start with a clean white craft pumpkin or paint an orange pumpkin with two coats of warm ivory craft paint.
- Gild the Stem: Brush metallic gold acrylic paint or liquid gilding across the curly stem for a rich boutique contrast.
- Arrange the Confetti: Place 1/2-inch metallic gold adhesive dots randomly across the upper half of the pumpkin, scattering them lighter toward the base.
- Burnish Flat: Rub each gold dot firmly with a clean microfiber cloth to ensure the edges seal completely against the rind.
- Mom-Proof Stability: Place on a thrifted brass charger plate or black pedestal riser to protect your entryway table from scratches.
Recommended Decor Materials & Accents:
| Decor Item | Where to Buy |
|---|---|
| Apple Barrel Matte Acrylic Craft Paint Set | Buy on Amazon ➔ |
| Washi Tape Set Decorative Masking Tape | Buy on Amazon ➔ |
🎥 Helpful DIY Tutorial Walkthrough (Watch on YouTube)
4. The Cozy Yarn & Chunky Jute Sweater Pumpkin

💬 Real Mom Question (from Reddit’s r/Frugal):
“I have leftover skeins of chunky cream yarn from last winter’s knitting. Can I wrap cheap dollar-store foam pumpkins without them unraveling?”
Nancy’s Fix: Secure the yarn end inside the pumpkin stem depression with a dab of low-temp glue, then wrap snugly in vertical ridges around the ribs!
Bring cozy living room comfort to your seasonal decor with soft chunky cream yarn and fragrant whole cinnamon stick stems.
How to Style & Assemble It:
- Anchor the Base: Pop the plastic stem off a dollar-store foam pumpkin and push a 1/2-inch indentation into the top center.
- Anchor the First Loop: Hot glue the end of thick cream chunky yarn deep inside the top depression.
- Wrap Vertical Ridges: Wind the yarn down around the pumpkin base and back up to the top, pressing along the natural pumpkin grooves.
- Insert Cinnamon Stem: Dab hot glue into the top core and press three bundled whole cinnamon sticks down into the center for a fragrant stem.
- Finishing Touch: Tie a small strip of frayed rust-colored velvet ribbon around the cinnamon bundle for effortless rustic texture.
Recommended Decor Materials & Accents:
| Decor Item | Where to Buy |
|---|---|
| Gorilla Dual Temp Mini Hot Glue Gun | Buy on Amazon ➔ |
| Gorilla Dual Temp Mini Glue Sticks 30-Pack | Buy on Amazon ➔ |
🎥 Helpful DIY Tutorial Walkthrough (Watch on YouTube)
5. The Drippy Pastel Crayon Melt Pumpkin

💬 Real Mom Question (from Reddit’s r/Parenting):
“Our crayon basket is overflowing with broken bits. Does the melted crayon pumpkin hack really work, or does it just splatter wax everywhere?”
Nancy’s Fix: Put the pumpkin inside a tall cardboard shipping box while blow-drying! It completely catches all stray wax splatters while creating gorgeous dripping color runs.
Transform broken school crayons into a cascade of vibrant, glossy color that keeps kids completely mesmerized during assembly.
How to Style & Assemble It:
- Anchor the Base: Place a white craft pumpkin inside an open cardboard box to catch warm wax drips.
- Unwrap & Arrange: Peel the paper off broken crayons in pastel shades (blush pink, sky blue, butter yellow, and mint green).
- Glue Crayon Tips: Glue 8 to 10 crayon halves in a circle around the pumpkin stem with a drop of low-temp glue.
- Apply Gentle Heat: Hold a household hair dryer on the low-speed, high-heat setting 4 inches above the crayons until they soften and liquefy.
- Guide the Drips: Tilt the pumpkin slightly as the wax melts to create organic, cascading drip trails down the white ridges.
Recommended Decor Materials & Accents:
| Decor Item | Where to Buy |
|---|---|
| Gorilla Dual Temp Mini Hot Glue Gun | Buy on Amazon ➔ |
| Assorted Mini Faux White Craft Pumpkins | Buy on Amazon ➔ |
🎥 Helpful DIY Tutorial Walkthrough (Watch on YouTube)
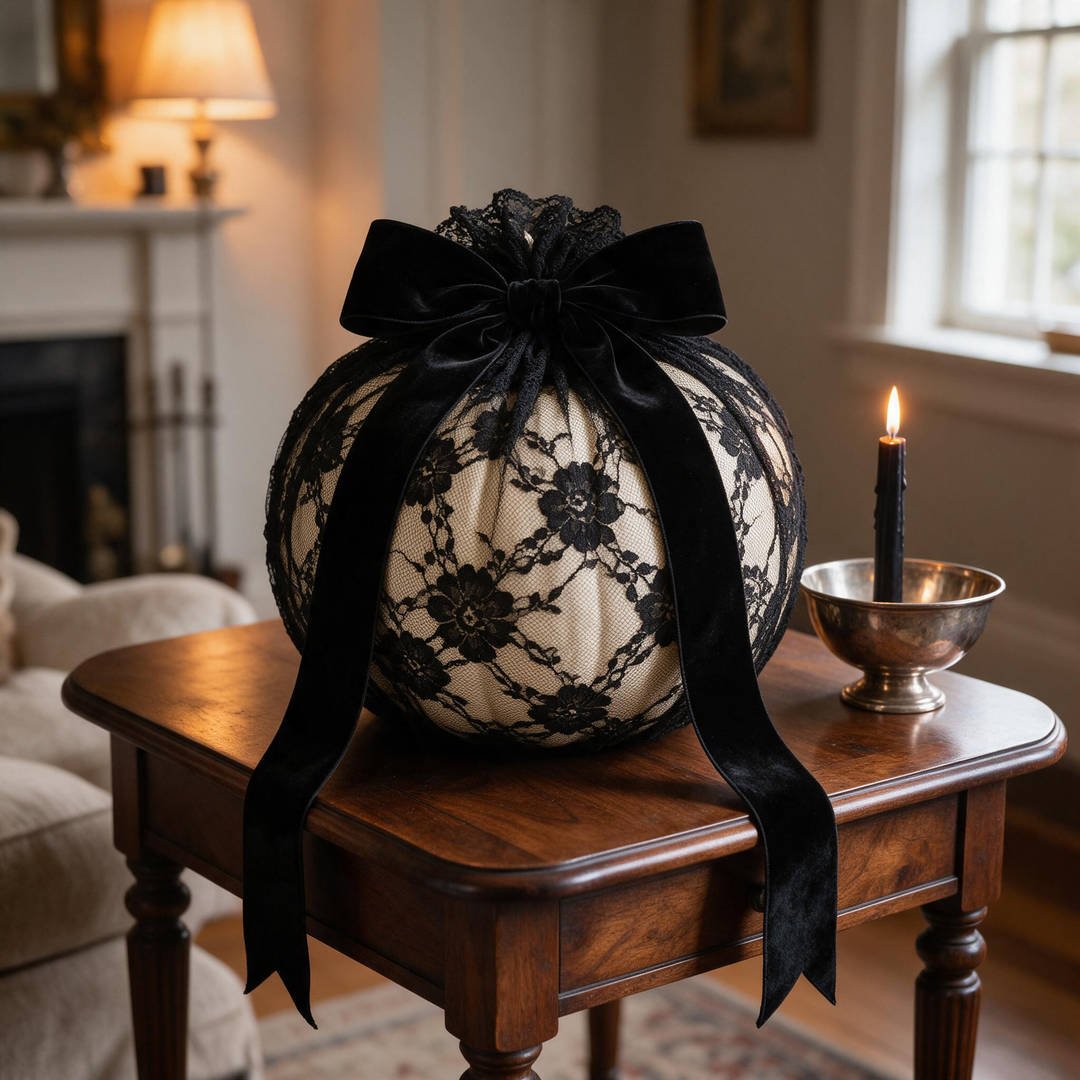
6. The Black Lace & Velvet Ribbon Gothic Pumpkin
💬 Real Mom Question (from Reddit’s r/HomeDecorating):
“How do you wrap lace around a rounded pumpkin without weird bunching and bulky seam lines?”
Nancy’s Fix: Repurpose a pair of patterned black stretch lace tights! Cut a 10-inch tube, slide the pumpkin inside like an orange in a sock, and tie both ends with black ribbon.
Capture high-drama Victorian gothic romance with zero paint and zero mess using stretch lace and vintage black velvet ribbon.
How to Style & Assemble It:
- Anchor the Base: Pick a round, smooth ivory pumpkin or spray-paint a thrifted gourd with matte chalk paint.
- Slide the Lace Sleeve: Cut an 8-to-10-inch section of patterned black lace tights and slide it over the pumpkin from bottom to top.
- Gather at the Stem: Pull the top lace tightly around the base of the pumpkin stem and gather the bottom lace under the flat base.
- Tie with Ribbon: Fasten the lace top securely with a 2-inch wide wired black velvet ribbon tied into a fluffy double bow.
- Secure with Glue Dots: Press two clear glue dots into the bottom lace gather so the pumpkin sits perfectly flat on your tabletop.
Recommended Decor Materials & Accents:
| Decor Item | Where to Buy |
|---|---|
| Gorilla Dual Temp Mini Glue Sticks 30-Pack | Buy on Amazon ➔ |
| Assorted Mini Faux White Craft Pumpkins | Buy on Amazon ➔ |
🎥 Helpful DIY Tutorial Walkthrough (Watch on YouTube)
7. The Glow-in-the-Dark Constellation Galaxy Pumpkin

💬 Real Mom Question (from Reddit’s r/Parenting):
“My kids love outer space and constellations. How can we make a glow-in-the-dark pumpkin that looks like real starry night skies?”
Nancy’s Fix: Base-coat in matte midnight navy, sponge on soft purple galaxy clouds, and flick glow-in-the-dark acrylic paint using an old toothbrush!
Bring the magic of crisp October star-gazing indoors with a dreamy galaxy design that glows brightly when the lights go out.
How to Style & Assemble It:
- Anchor the Base: Apply two coats of deep matte navy or charcoal chalk paint across the entire pumpkin surface.
- Sponge Nebulas: Lightly dab plum, violet, and sky-blue paint with a sea sponge in swirling spiral bands around the ribs.
- Splatter Micro Stars: Dip an old stiff-bristle toothbrush into glow-in-the-dark acrylic paint and pull your thumb across bristles to flick fine stars.
- Connect Constellations: Use a fine-tip white paint pen to draw Big Dipper, Cassiopeia, and Orion constellations connecting the brightest dots.
- Charge the Glow: Shine a flashlight or UV blacklight against the surface for 30 seconds before bedtime for hours of soft starry illumination.
Recommended Decor Materials & Accents:
| Decor Item | Where to Buy |
|---|---|
| FolkArt Multi-Surface Acrylic Paint Set | Buy on Amazon ➔ |
| Liquid Chalk & Dry Erase Reversible Markers | Buy on Amazon ➔ |
🎥 Helpful DIY Tutorial Walkthrough (Watch on YouTube)
8. The Toddler Fingerprint & Painted Ghost Pumpkin

💬 Real Mom Question (from Reddit’s r/Mommit):
“What is a simple Halloween pumpkin craft that my 2-year-old and 5-year-old can do together that doubles as a sweet keepsake?”
Nancy’s Fix: Press your toddler’s thumb into non-toxic white paint and stamp prints all over the pumpkin! Once dry, use a black fine-tip marker to give each ghost tiny eyes and an ‘O’ shaped mouth.
Capture precious little handprints in a darling Halloween keepsake that will make you smile every time you glance at your kitchen counter.
How to Style & Assemble It:
- Anchor the Base: Clean a medium natural orange pumpkin and wipe thoroughly dry.
- Stamp the Ghost Bodies: Pour a tablespoon of washable white tempera paint on a paper plate, press your toddler’s thumb into the paint, and stamp prints around the pumpkin.
- Add Ghost Tails: While the paint is still damp, swipe your baby’s pinky finger lightly downward from each print to create a whimsical wavy ghost tail.
- Draw Cute Faces: Let dry for 10 minutes, then use a black paint pen or Sharpie to add two sweet black dot eyes and an open smile.
- Date the Memory: Write your children’s names and the year in small letters beside the stem with a gold metallic pen.
Recommended Decor Materials & Accents:
| Decor Item | Where to Buy |
|---|---|
| Apple Barrel Matte Acrylic Craft Paint Set | Buy on Amazon ➔ |
| Liquid Chalk & Dry Erase Reversible Markers | Buy on Amazon ➔ |
🎥 Helpful DIY Tutorial Walkthrough (Watch on YouTube)
9. The Thrifty Washi Tape Geometric Plaid Pumpkin

💬 Real Mom Question (from Reddit’s r/DIY):
“I want zero paint mess in my kitchen this year. Does washi tape actually stick to natural pumpkin rinds without peeling off after a day?”
Nancy’s Fix: Wipe the pumpkin with rubbing alcohol first to strip off oily natural coatings, and choose smooth heirloom varieties rather than heavily ribbed pumpkins!
Enjoy the ultimate 100% mess-free decorating session with colorful washi tape strips that create clean designer lines in minutes.
How to Style & Assemble It:
- Anchor the Base: Wipe down a pale white or green Jarrahdale pumpkin with rubbing alcohol to ensure strong tape adhesion.
- Lay Vertical Stripes: Run strips of black-and-white buffalo check or houndstooth washi tape vertically from the stem depression down to the base.
- Add Horizontal Rings: Crisscross with horizontal strips of thinner solid black and gold tape, creating an intentional plaid grid pattern.
- Trim Clean Edges: Snip tape ends neatly at the bottom with small craft scissors and press firmly with your thumb.
- Clear Seal (Optional): If placing outdoors in moist air, brush a single thin coat of matte Mod Podge over the tape to keep edges sealed tight.
Recommended Decor Materials & Accents:
| Decor Item | Where to Buy |
|---|---|
| Washi Tape Set Decorative Masking Tape | Buy on Amazon ➔ |
| Mod Podge Waterbase Sealer in Matte Finish | Buy on Amazon ➔ |
🎥 Helpful DIY Tutorial Walkthrough (Watch on YouTube)
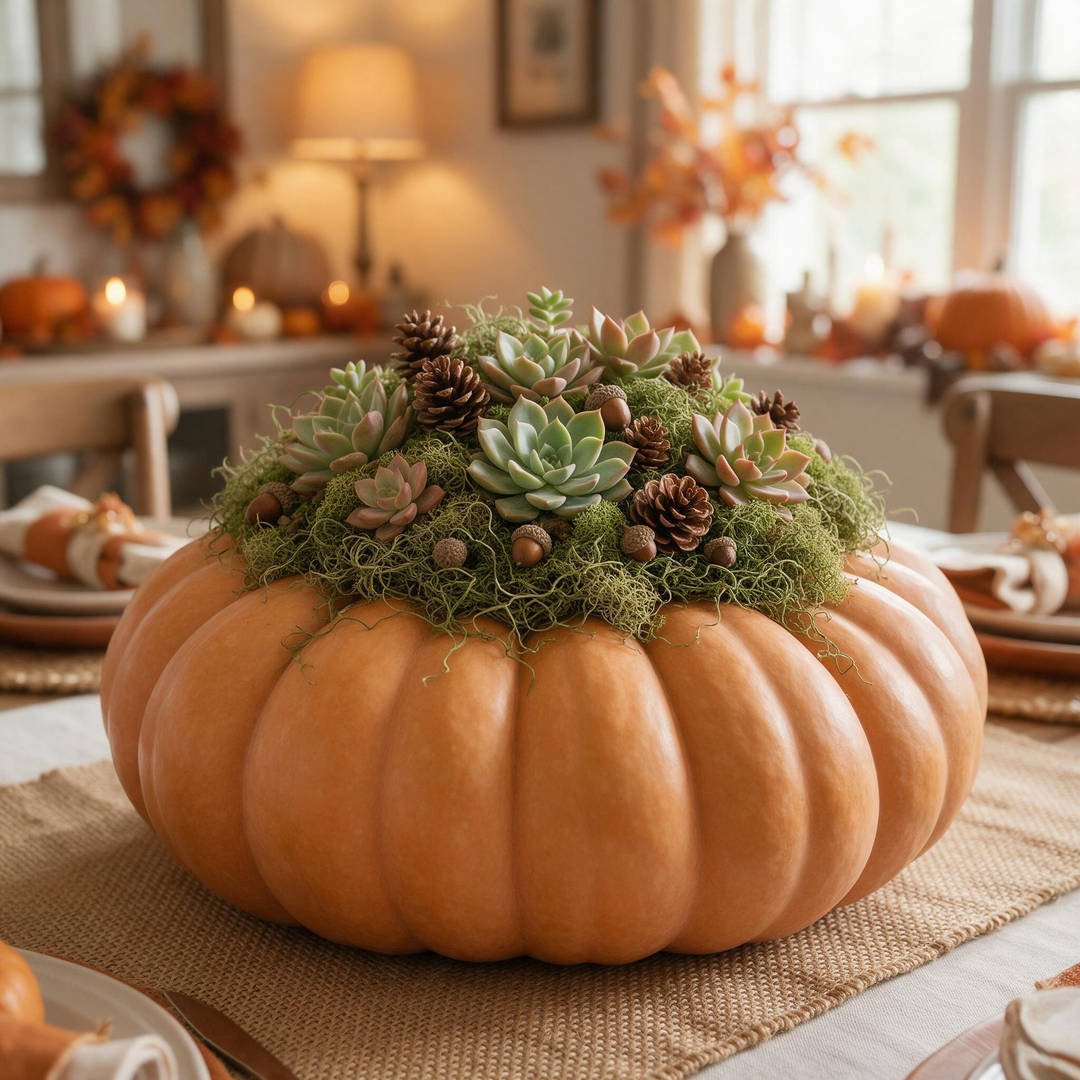
10. The Succulent & Preserved Moss Pumpkin Planter
💬 Real Mom Question (from Reddit’s r/HomeDecorating):
“How do you make a live succulent pumpkin that lasts through Thanksgiving without carving a giant hollow hole that rots the pumpkin?”
Nancy’s Fix: Never carve the top! Simply glue preserved Spanish moss directly onto the intact pumpkin crown and nestle succulent cuttings into the moss with hot glue. The pumpkin rind stays 100% unbroken and lasts for months.
Create an architectural living centerpiece that transitions seamlessly from October Halloween celebrations straight through Thanksgiving dinner.
How to Style & Assemble It:
- Anchor the Base: Select a squat, flat-topped Cinderella (Rouge Vif d’Etampes) or flat white Luminary pumpkin.
- Bed of Spanish Moss: Apply generous dabs of hot glue around the pumpkin stem and press a thick 2-inch cushion of preserved Spanish moss into place.
- Arrange Succulents: Take succulent cuttings or faux mini succulents and glue their stem ends into the moss bed, staggering shades of sage, plum, and rose.
- Layer Autumn Accents: Nestle dried acorns, baby pinecones, and hypericum berries around the succulent skirts for rich woodland depth.
- Gentle Watering Care: If using live cuttings, simply spritz the moss lightly with water from a spray bottle once a week; the intact pumpkin never rots!
Recommended Decor Materials & Accents:
| Decor Item | Where to Buy |
|---|---|
| Gorilla Dual Temp Mini Hot Glue Gun | Buy on Amazon ➔ |
| Gorilla Dual Temp Mini Glue Sticks 30-Pack | Buy on Amazon ➔ |
🎥 Helpful DIY Tutorial Walkthrough (Watch on YouTube)
10 More Fast & Fun No-Carve Pumpkin Hacks
- The Chalkboard Countdown Pumpkin: Paint the front face with chalkboard paint so kids can count down the days until trick-or-treating with colorful chalk!
- The Thumbtack & Brass Stud Glam Pumpkin: Push metallic brass upholstery tacks into natural pumpkin ribs to create gleaming geometric borders without any glue.
- The Pom-Pom Polka Dot Pumpkin: Let toddlers glue colorful felt craft pom-poms all over a painted gourd using washable glue dots.
- The Cinnamon Spice Scented Pumpkin: Dust wet craft paint with ground cinnamon and nutmeg for a delicious autumn kitchen fragrance.
- The Gauze & Googly Eye Mummy Pumpkin: Wrap white first-aid gauze around an orange pumpkin and pop two giant googly eyes peeking out from the folds.
- The Marble Swirl Nail Polish Dip Pumpkin: Drip three colors of leftover nail polish into a bucket of warm water and dip a white pumpkin for an instant marble effect.
- The Dried Orange Slice Harvest Display: Hot-glue dehydrated blood orange wheels and whole star anise stars onto a rustic burlap-tied pumpkin.
- The Metallic Copper Leaf Dipped Pumpkin: Mask off the bottom third of a white pumpkin with painter’s tape and spray with metallic rose gold or copper leafing.
- The Felt Animal Mask Pumpkin: Cut bat wings, kitty ears, or puppy faces out of stiff craft felt and stick them onto miniature gourds.
- The Confetti Paper Party Pumpkin: Brush Mod Podge over a pastel pumpkin and roll it through colorful metallic paper party confetti for celebratory sparkle.
❓ Real Mom Questions Answered (From Reddit & Parenting Forums)
Q1: How long do uncarved pumpkins last outdoors compared to carved jack-o’-lanterns?
As asked by moms on Reddit’s r/Parenting:
“Every year our carved pumpkins turn into moldy, sunken mush within 4 days. How long will these no-carve decorated pumpkins realistically last on our porch?”
Nancy’s Answer:
Because the pumpkin’s outer rind remains completely sealed and unbroken, uncarved decorated pumpkins easily last 8 to 12 weeks outdoors!
- Quick Fix: Keep them elevated on a wooden riser or outdoor mat away from damp concrete, and bring them inside during freezing frost nights.
Q2: What is the best non-toxic paint for toddlers to use on pumpkins?
As asked by moms on Reddit’s r/Mommit:
“My 2-year-old puts everything near her mouth. What paint is completely safe for toddlers to use when decorating pumpkins?”
Nancy’s Answer:
Washable non-toxic tempera paint or child-safe water-based acrylics are your best friend for little crafters!
- Quick Fix: If paint beads up on slick natural pumpkin skins, add one drop of liquid dish soap into the paint cup so it glides smoothly onto the rind.
Q3: How do you stop outdoor rain from washing away acrylic paint on front porch pumpkins?
As asked by moms on Reddit’s r/HomeDecorating:
“If I paint pumpkins with my kids, will one rainy October night completely wash all their hard work away?”
Nancy’s Answer:
Acrylic paint will dissolve under heavy rain unless sealed, so give your finished pumpkins a quick 5-second mist of matte clear exterior spray sealer outdoors!
- Quick Fix: Two light coats of clear sealer protect both the paint and any glued moss or leaves from humidity and morning dew.
Q4: Can you eat or cook no-carve pumpkins after Halloween is over?
As asked by moms on Reddit’s r/Frugal:
“Since we didn’t carve into the flesh, can we roast or bake our no-carve pumpkins for Thanksgiving pies?”
Nancy’s Answer:
Yes, absolutely—as long as you decorated with non-toxic washables or did a wrap method like lace, yarn, or washi tape!
- Quick Fix: Avoid cooking pumpkins that were coated in spray paint, metallic waxes, or chemical sealers; compost those in your garden instead.
Q5: How do you get stickers and washi tape to stay stuck to bumpy pumpkin rinds?
As asked by moms on Reddit’s r/DIY:
“Our washi tape and stickers keep peeling up at the edges after a few hours on real pumpkins. What are we doing wrong?”
Nancy’s Answer:
Pumpkins produce a natural oily protective sheen that repels adhesives, so wipe the rind thoroughly with rubbing alcohol on a cotton ball first!
- Quick Fix: Once the skin is clean and dry, press the tape down firmly with a warm cloth to activate the adhesive backing.
Q6: What can we do to keep hungry squirrels and deer from nibbling our painted pumpkins?
As asked by moms on Reddit’s r/cozyplaces:
“Local squirrels love taking giant bites out of our porch pumpkin displays! How do you protect no-carve pumpkins from hungry wildlife?”
Nancy’s Answer:
Squirrels and outdoor critters despise the scent of heat and strong peppermint oil!
- Quick Fix: Spritz your pumpkins and porch steps with a mixture of water and 10 drops of peppermint essential oil, or dust lightly with cayenne pepper.
🧹 Real-Mom Takedown & Weatherproof Storage Checklist
- ✓Pantry Roasting Prep for Wrap Designs: If you used washi tape, yarn, or lace on sugar pie pumpkins, peel them clean and roast the flesh for Thanksgiving freezer purées!
- ✓Eco-Friendly Yard Composting: Smash painted natural pumpkins and bury them in your flower beds or drop them off at a neighborhood community compost bin.
- ✓Clean & Box Faux Craft Pumpkins: Gently wipe dust off reusable foam and ceramic pumpkins with a microfiber cloth and pack them into clear labeled totes.
- ✓Spool Leftover Ribbon & Washi Tape: Wind unused ribbon rolls and tape securely and store them in your family craft caddy for next autumn.
🛡️ Home Safety & Weatherproofing Guidelines
- Strictly 100% Flameless LED Lighting Only: Always pair porch pumpkin displays with cool-touch battery LED fairy lights or timer tea lights; never place open flames near ribbons or yarn.
- Non-Toxic Crafting for Toddlers: Use only AP-certified non-toxic paints and low-temperature glue guns when crafting with elementary kids and toddlers.
- Porch Slip Hazard Prevention: Keep pumpkins clustered on steps or risers away from the main walking path so visitors and trick-or-treaters never trip in the dark.
- Wildlife Protection Standard: Never coat edible pumpkins in toxic chemical solvents or floor waxes that neighborhood wildlife might accidentally ingest.
📚 Citations & Authoritative Home Decor References
- U.S. Consumer Product Safety Commission (CPSC) Holiday Safety Guidelines: Federal safety benchmarks on non-toxic crafting materials, child safety standards, and fire hazard prevention.
- National Fire Protection Association (NFPA) Seasonal Home Fire Prevention: Mandatory safety standards recommending battery-operated LED illumination over open flames in residential autumn displays.
- University of Illinois Extension Pumpkin Varieties & Preservation Guide: Horticultural research on rind preservation, natural wax barriers, and mold prevention for uncarved decorative gourds.
- HGTV Designer Curb Appeal & Seasonal Styling Principles: Design benchmarks for proportion, visual clustering, and color harmony across porch and tabletop displays.
- Reddit r/HomeDecorating Community Design Discussions: Real homeowner consensus, tested baking-soda paint ratios, and damage-free autumn decorating hacks.