10 Easy Construction Paper Halloween Crafts for Kids

Craft with paper! Explore 10 construction paper halloween crafts with 3D pumpkins, accordion bats, and zero-mess glue stick techniques. 🎃
💬 The Real Mom Question (from Reddit’s r/preschoolers):
“Whenever my 4-year-old glues construction paper, he uses an ocean of liquid school glue! The paper ripples into a translucent soggy mess that tears. What are the best mess-free paper crafts for young kids?”
Nancy’s Fix: Ban liquid school glue completely! Switch to disappearing purple glue sticks: they apply a micro-thin layer of adhesive that bonds instantly without soaking into paper fibers, keeping construction paper 100% flat and crisp. Combine that with simple straight scissor cuts and folded accordion strips to create vibrant 3D paper pumpkins and flapping bats with zero frustration!
10 Easy Construction Paper Halloween Crafts for Kids
There is a timeless, cozy joy in pulling a thick stack of colorful construction paper from the cupboard on a crisp October afternoon. The rich autumn spectrum of pumpkin orange, jet black, emerald green, and deep violet immediately sets little imaginations spinning with ideas for friendly ghosts, spooky mansions, and goofy monsters.
Yet for parents and teachers, paper crafting often brings unexpected frustrations: runny school glue soaking through sheets, intricate Pinterest shapes that tiny fingers cannot yet cut, and flimsy projects that collapse under their own weight. The wonderful truth is that you don’t need fancy tools or complex origami folds to create breathtaking holiday decorations. With simple straight cuts, gentle accordion pleats, and clean glue stick techniques, simple paper transforms into dimensional keepsakes kids are immensely proud to display.
Whether you have a toddler who loves tearing colorful scraps or an elementary crafter mastering symmetrical paper snipping, these 10 construction paper halloween crafts deliver hours of festive creativity with zero drying delays and virtually no cleanup. For more paper-based holiday inspiration, explore our guide to halloween paper crafts.
⚡ The Quick Mom Skim (TL;DR)
- Glue Sticks Over Liquid Bottles: Disappearing purple glue sticks prevent paper ripples, soggy warping, and messy glue puddles entirely.
- The Accordion Fold Secret: Pleating paper back and forth like a fan creates bouncing 3D bat wings and animated spider legs with zero tape.
- Fold-and-Cut Symmetry: Teach kids to fold paper in half to snip identical ghost eyes, pumpkin teeth, and bat wings in a single snip.
- Save Every Scrap: Store snipped paper scraps in a plastic baggie for torn-paper mosaic monster collages later in the week.
🏆 Nancy’s Top 3 Quick Picks for Construction Paper Halloween Crafts
| Pick Category | Recommended Supply & Link | Real-Mom Why |
|---|---|---|
| Best Bulk Construction Paper | Crayola Construction Paper Bulk Pack (480 Sheets) | Heavyweight sheets with vibrant, fade-resistant pigments in 10 classic colors that fold cleanly without tearing. |
| Best Preschool Training Scissors | CepuXozi 3-Pack Toddler Safety Scissors Kit | Spring-assist levers push blades open automatically, reducing hand fatigue while mastering scissor skills. |
| Best Mess-Free Glue Sticks | Elmer’s Disappearing Purple School Glue Sticks (3pk) | Visual purple application guide prevents missed spots and dries crystal-clear with zero paper warping. |
🧺 Nancy’s Real-Mom Supply Swap Table
| Standard Craft Supply | Nancy’s Frugal Kitchen Swap | The Secret Mom Advantage |
|---|---|---|
| Runny Liquid White Glue | Disappearing Purple Glue Sticks | Bonds instantly with zero soggy moisture soaking into paper fibers; paper stays perfectly flat. |
| Adult Heavy Metal Shears | Toddler Spring-Assist Safety Scissors | Blunt rounded tips and lightweight spring-open design prevent accidental cuts and finger strain. |
| Thin Copy / Printer Paper | Crayola Bulk Construction Paper | Dense fibrous paper stock holds crisp folds, 3D curves, and accordion pleats without collapsing. |
| Loose Plastic Glitter | Metallic Crayola Broad Line Markers | Delivers shimmering festive accents and spooky details with zero loose micro-glitter cleanup. |
10 Fun Construction Paper Halloween Crafts
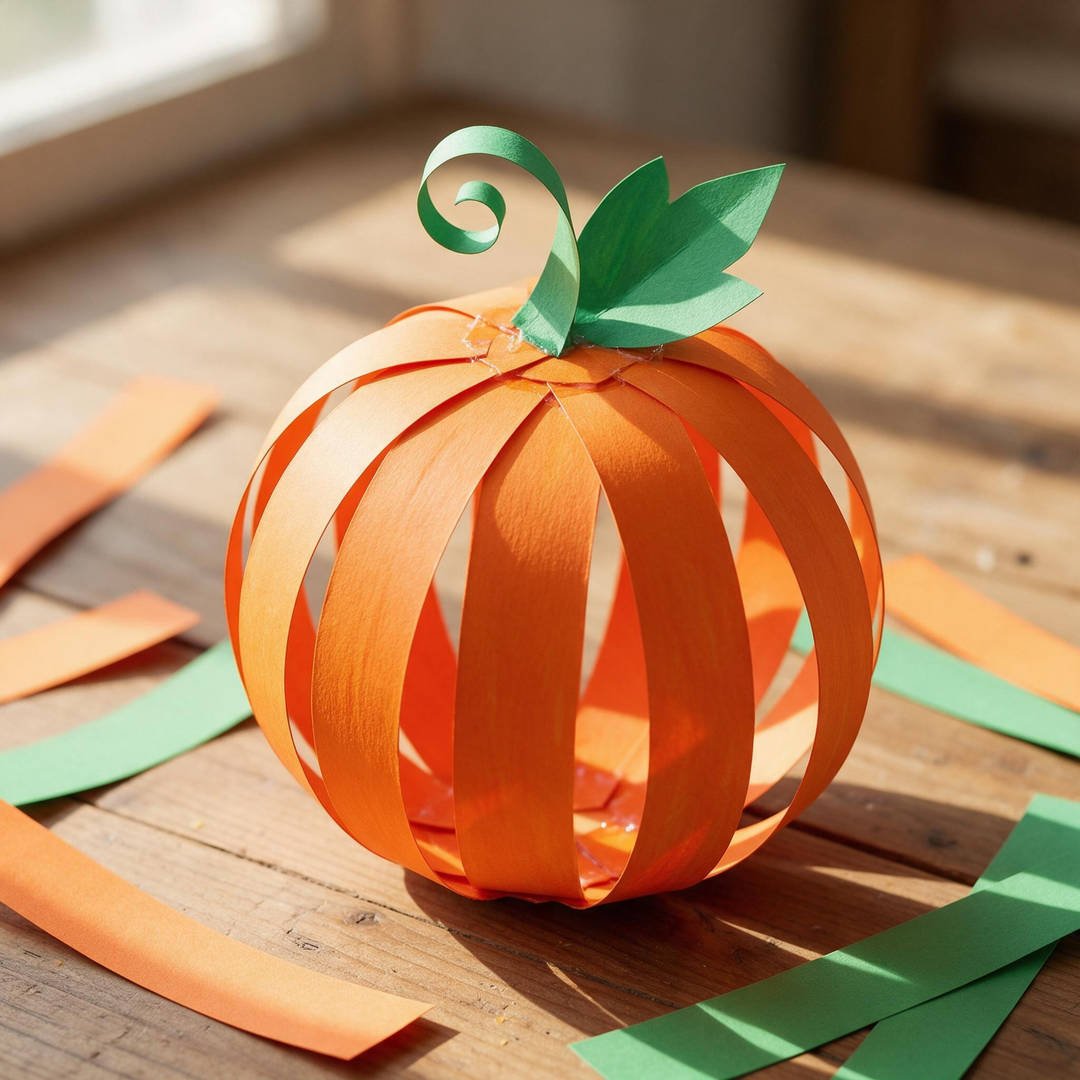
1. 3D Strip Paper Jack-O’-Lantern Pumpkin
⏱️ Active & Dry Time: 15 mins prep, 0 mins dry | 🧼 Mess Level: 1/5 | 👶 Age Adaptation: Ages 3+ (Looping straight paper strips builds spatial reasoning) | 💰 Est. Cost: ~$1.20 total
💬 Real Mom Question (from Reddit’s r/toddlers): “How can kids make 3D pumpkins out of flat paper without complicated origami?”
Nancy’s Fix: Cut orange construction paper into six 1-inch strips, hole punch both ends, fan them into a circle, and secure the tops together with a green paper leaf! The strips bow outward into a perfect 3D paper pumpkin sphere.
Turning flat paper into a freestanding 3D sphere feels like real magic to young crafters. This clever strip-looping technique requires only straight cuts, making it ideal for preschoolers who are still developing scissor accuracy.
Set a cluster of these paper pumpkins on your kitchen table or window ledge for an instant pop of cozy autumn warmth.
How to Craft It:
- Cut six 1-inch wide by 9-inch long strips from heavy orange construction paper.
- Stack the strips together and punch a single hole 1/2 inch from each end using a handheld hole punch.
- Thread a small brass paper fastener or pipe cleaner through the bottom holes and fan the strips out into a starburst circle.
- Bring the top holes together over the center so the paper strips bow outward into a 3D pumpkin globe.
- Secure the top with a second fastener, then glue a curled green paper strip stem and leaf on top.
Amazon Craft Materials You Should Buy:
| Material Name | Buy on Amazon |
|---|---|
| Crayola Construction Paper Bulk Pack (480 Sheets) | Buy on Amazon ➔ |
| Single Hole Punch 1/4″ Paper Hole Puncher for Crafts | Buy on Amazon ➔ |
👉 Watch the DIY Paper Pumpkin Craft Tutorial on YouTube
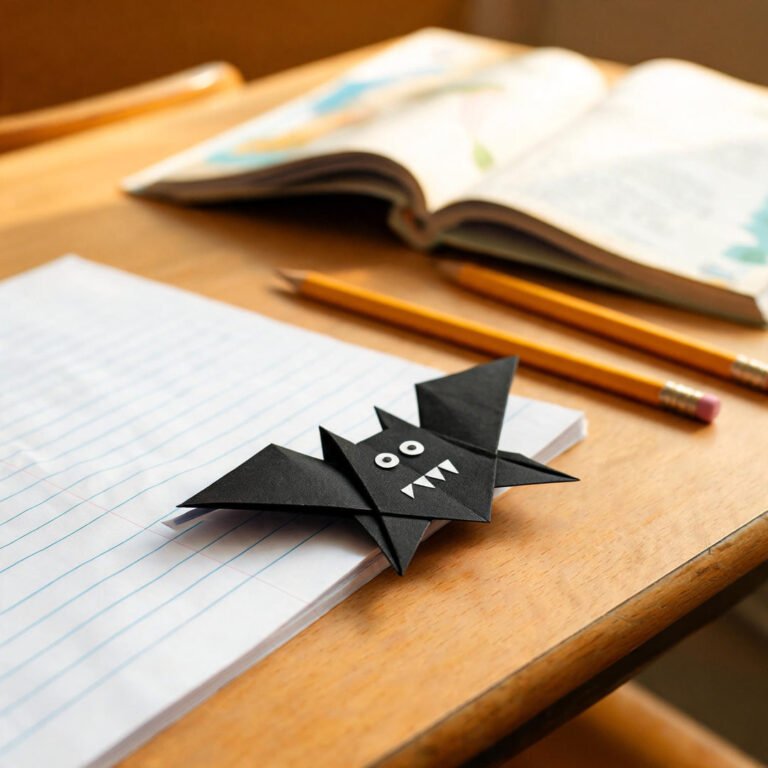
2. Accordion Pleated Black Bat with Bouncing Wings
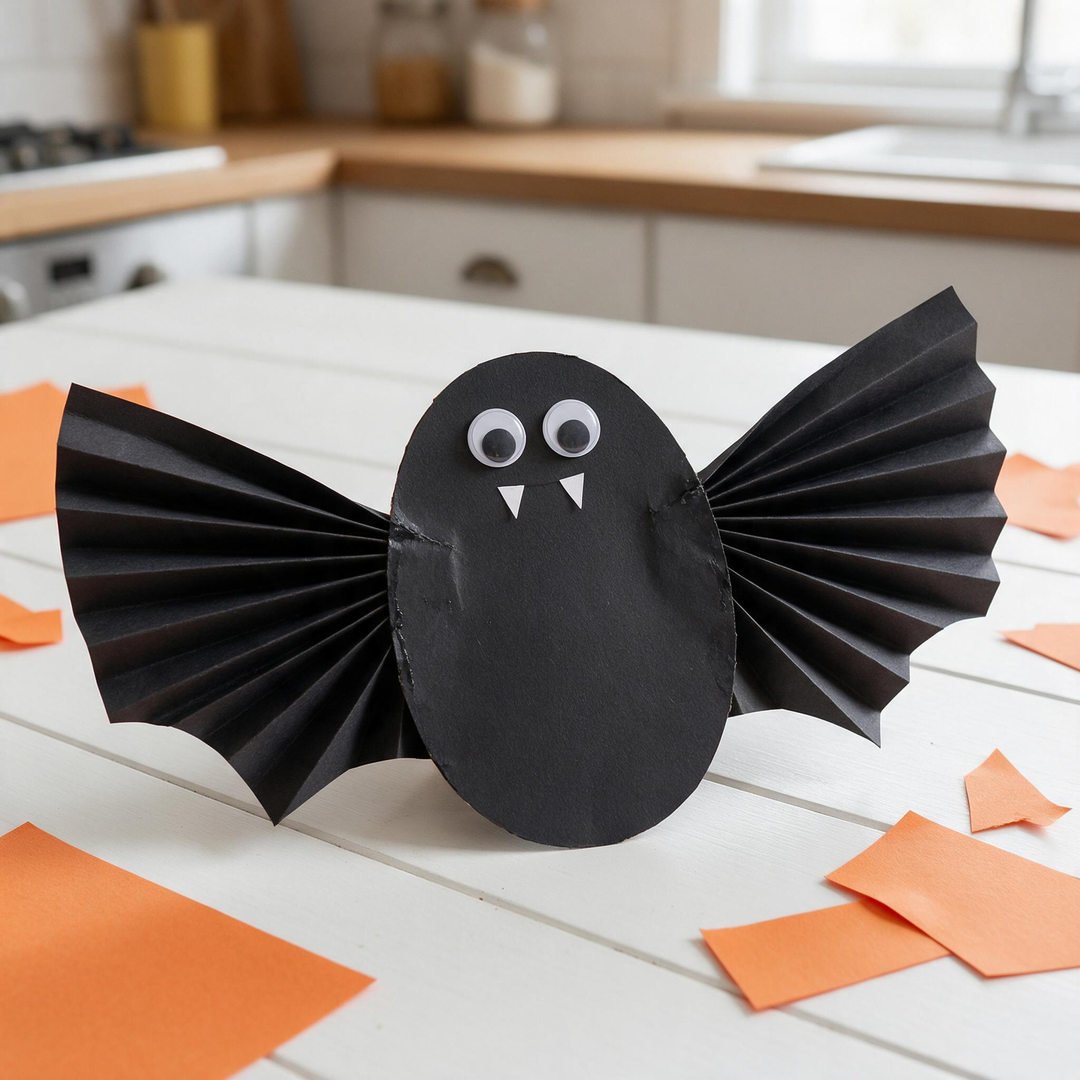
⏱️ Active & Dry Time: 12 mins prep, 0 mins dry | 🧼 Mess Level: 1/5 | 👶 Age Adaptation: Ages 4+ (Accordion folding strengthens fine-motor finger muscles) | 💰 Est. Cost: ~$1.00 total
💬 Real Mom Question (from Reddit’s r/preschoolers): “My preschooler’s paper bats always look stiff and flat taped to the wall.”
Nancy’s Fix: Accordion fold the paper wings like a fan before gluing them to a black oval bat body! The accordion pleats create a 3D bouncing texture that looks like real flapping wings when hung from a ceiling string.
Accordion folding is one of the most rewarding paper techniques for building finger strength and rhythm. Watching a flat black sheet transform into springy, flexible bat wings brings instant smiles.
When you hang these bats from ceiling fans or chandelier arms, the pleated wings gently bounce and flap in the room’s natural air currents.
How to Craft It:
- Cut a 4×9-inch strip of black construction paper and fold it accordion-style back and forth in 1/2-inch pleats.
- Pinch the folded strip in the center to form two fan-shaped pleated bat wings.
- Cut a 3-inch black paper oval for the bat body and two tiny triangle ears.
- Glue the pleated wings behind the oval body using an Elmer’s purple glue stick.
- Peel and stick two googly wiggle eyes onto the face and snip tiny white paper fangs for a friendly smile.
Amazon Craft Materials You Should Buy:
| Material Name | Buy on Amazon |
|---|---|
| Crayola Construction Paper Bulk Pack (480 Sheets) | Buy on Amazon ➔ |
| FEBSNOW 200Pcs Googly Wiggle Eyes (Self-Adhesive) | Buy on Amazon ➔ |
👉 Watch the DIY Halloween Paper Garland & Bat Ideas on YouTube
3. Paper Handprint Black Cat on Full Moon
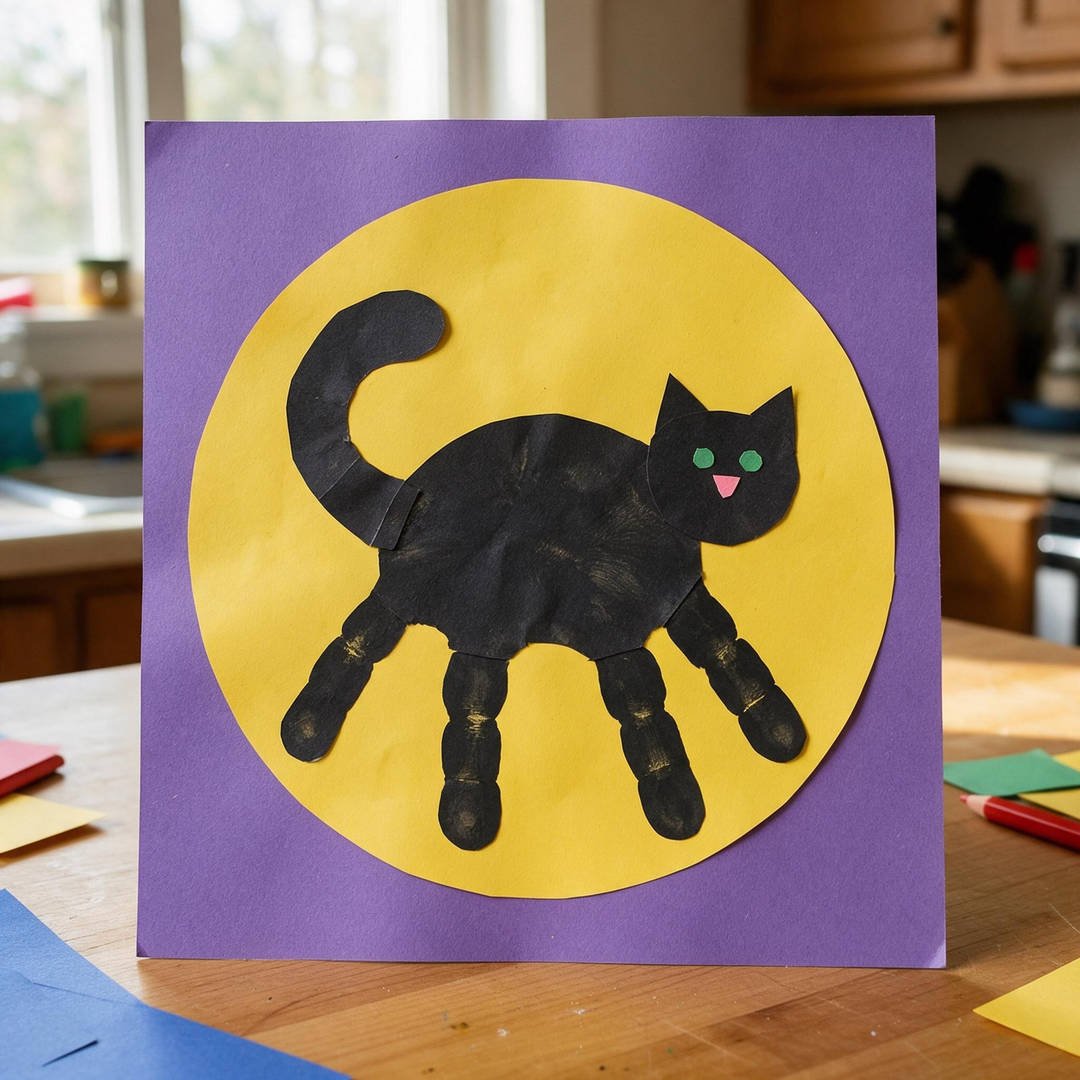
⏱️ Active & Dry Time: 10 mins prep, 0 mins dry | 🧼 Mess Level: 1/5 | 👶 Age Adaptation: Ages 2+ (Trace and snip activity; zero paint required) | 💰 Est. Cost: ~$1.10 total
💬 Real Mom Question (from Reddit’s r/toddlers): “How can we do handprint crafts without any paint mess on our clothes?”
Nancy’s Fix: Trace your child’s hand onto black construction paper with a pencil and cut it out! The thumb becomes the cat’s tail and the four fingers become the legs. Glue a round cat head with green paper eyes on top of the wrist edge.
Capturing your child’s hand size doesn’t require dipping hands into wet paint! Tracing paper handprints gives you all the nostalgic keepsake value with zero washcloths or bathtub scrubs needed.
Mounting the black silhouette onto a glowing yellow full moon creates a dramatic contrast that grandparents love framing.
How to Craft It:
- Trace your child’s hand with fingers spread slightly onto black construction paper with a white chalk or pencil.
- Cut out the traced handprint using toddler safety scissors.
- Turn the handprint horizontally so the thumb arches upward like a swishing cat tail and the fingers form four walking paws.
- Cut a 2-inch black paper circle with triangle ears for the cat head and glue it over the palm/wrist joint.
- Cut a large 8-inch yellow paper circle for a glowing harvest moon and glue the black cat silhouette right across the center.
Amazon Craft Materials You Should Buy:
| Material Name | Buy on Amazon |
|---|---|
| Crayola Construction Paper Bulk Pack (480 Sheets) | Buy on Amazon ➔ |
| CepuXozi 3-Pack Toddler Safety Scissors Kit, Preschool Training Scissors | Buy on Amazon ➔ |
👉 Watch the Easiest Origami & Paper Halloween DIY on YouTube
4. Spooky Cutout Haunted House Collage
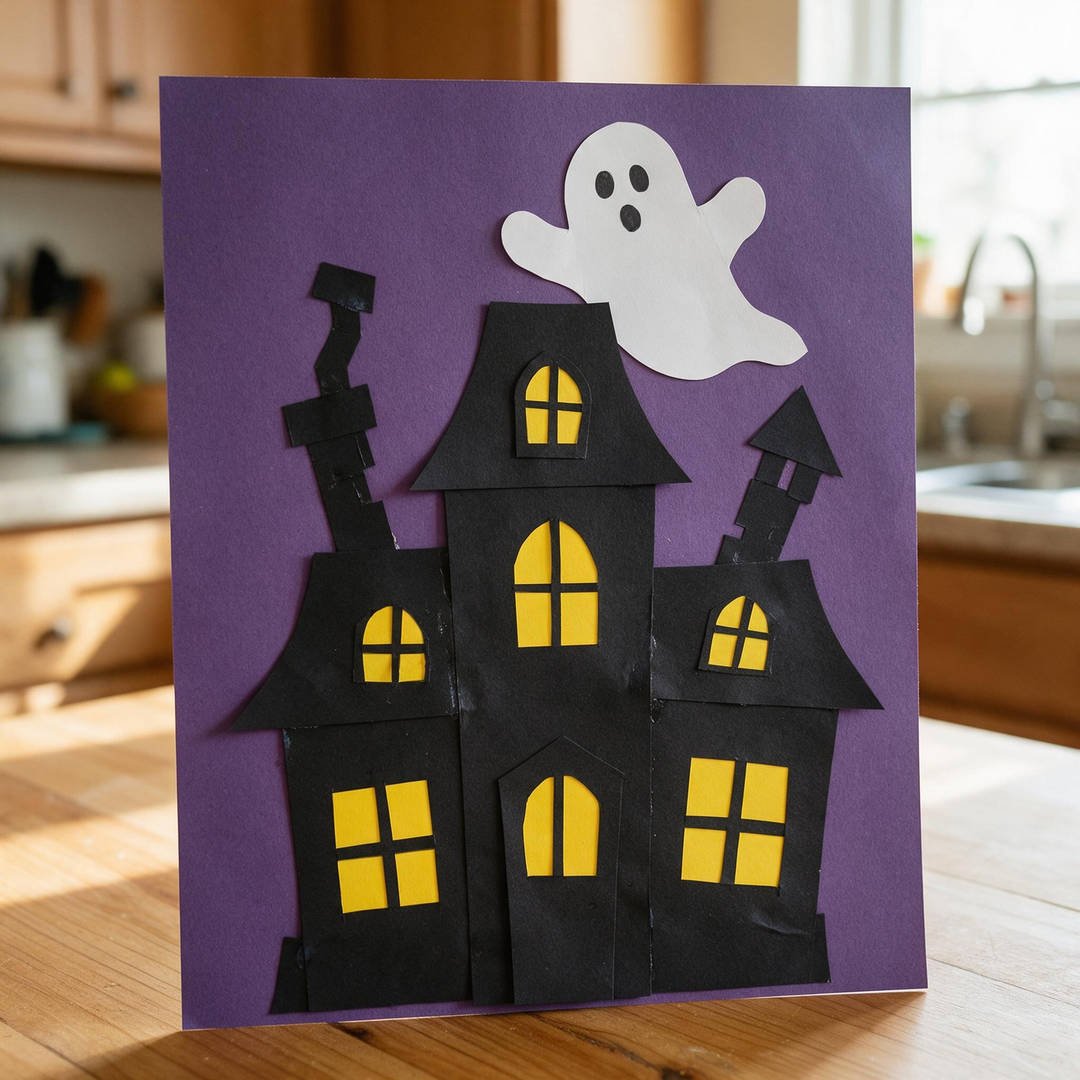
⏱️ Active & Dry Time: 15 mins prep, 0 mins dry | 🧼 Mess Level: 1/5 | 👶 Age Adaptation: Ages 3+ (Layering geometric shapes builds spatial awareness) | 💰 Est. Cost: ~$1.50 total
💬 Real Mom Question (from Reddit’s r/preschoolers): “How can preschoolers make haunted houses without getting frustrated by tiny window frames?”
Nancy’s Fix: Pre-cut simple black geometric shapes—large rectangles for house towers and triangles for roof peaks! Let kids glue bright yellow squares behind window cutouts to make glowing spooky rooms.
Building a paper haunted house is like assembling a puzzle where there are no wrong answers. Crooked roofs, leaning chimneys, and mismatched towers only add to the creepy storybook charm.
Kids love deciding who lives behind each glowing yellow window: a spooky ghost, a friendly bat, or a hidden black cat silhouette.
How to Craft It:
- Cut assorted rectangles, squares, and tall triangles from black construction paper to serve as house walls and rooflines.
- Layer and glue the black shapes onto a rich purple or dark blue construction paper background.
- Cut 1-inch bright yellow squares and glue them across the house facade to represent glowing candlelight in windows.
- Cut crooked chimney shapes and snip tiny black paper window grilles to glue across the yellow panes.
- Snip a little white paper ghost silhouette and glue it peeking out from an attic window or floating above the chimney.
Amazon Craft Materials You Should Buy:
| Material Name | Buy on Amazon |
|---|---|
| Crayola Construction Paper Bulk Pack (480 Sheets) | Buy on Amazon ➔ |
| Elmer’s Disappearing Purple School Glue Sticks, Washable, 22 Grams, 3 Count | Buy on Amazon ➔ |
👉 Watch the DIY Halloween Decor Easy Ideas on YouTube
5. Torn Paper Mosaic Scrap Halloween Monster
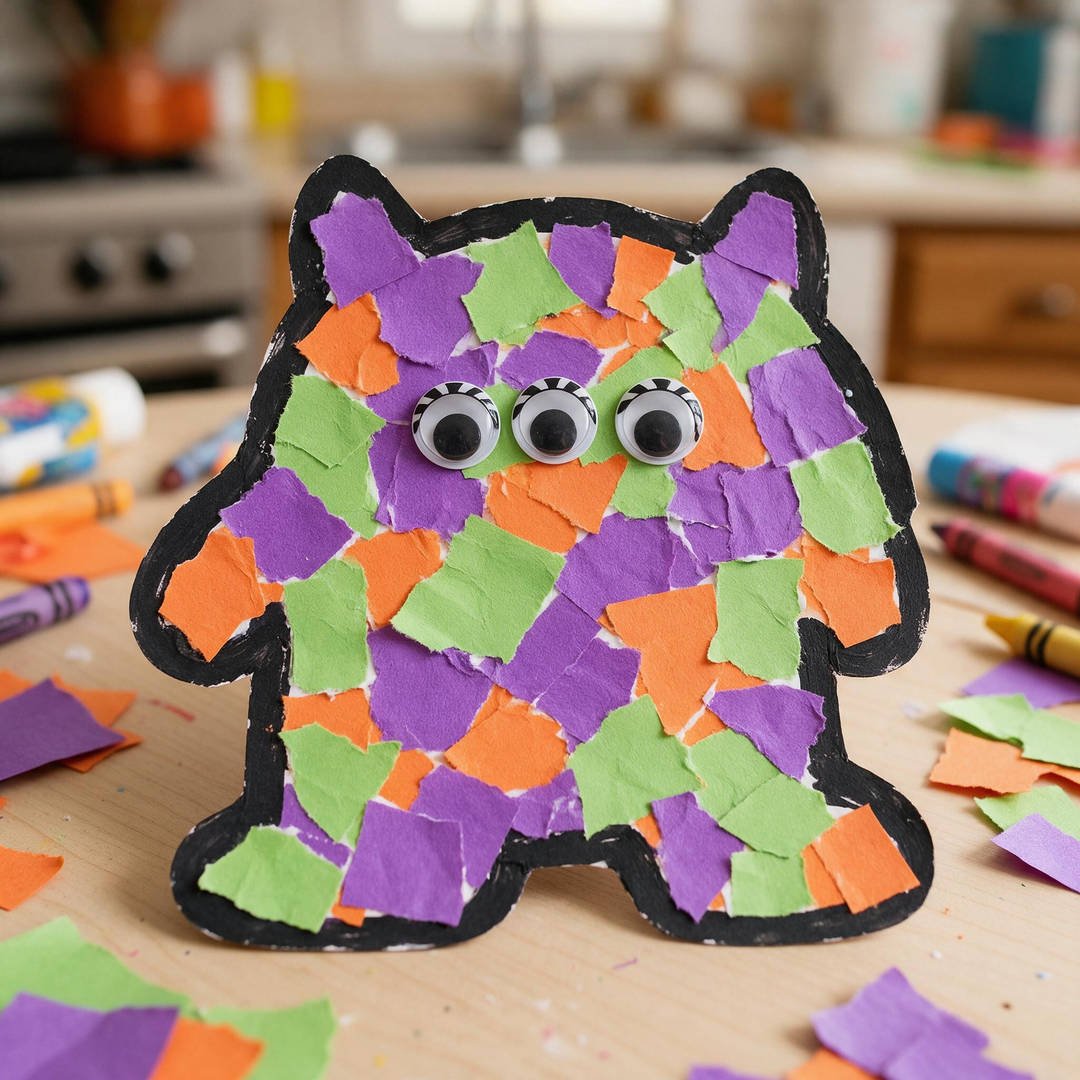
⏱️ Active & Dry Time: 15 mins prep, 0 mins dry | 🧼 Mess Level: 1/5 | 👶 Age Adaptation: Ages 18m+ (Sensory tearing exercise for small fingers) | 💰 Est. Cost: ~$0.90 total
💬 Real Mom Question (from Reddit’s r/toddlers): “What can you make with a shoebox full of leftover construction paper scraps?”
Nancy’s Fix: Torn paper mosaic monsters! Draw a big goofy monster outline on cardstock, swipe a purple glue stick inside the lines, and let your toddler tear and press colorful scrap squares to fill the body.
Never throw away leftover paper trims and snippings! Paper tearing is an essential early childhood developmental exercise that builds finger muscle tone, hand-eye coordination, and sensory focus.
The rich, fuzzy torn edges give this mosaic monster an authentic, furry storybook creature texture that looks remarkably sophisticated.
How to Craft It:
- Sketch a large, rounded monster silhouette onto a sturdy sheet of white 110lb cardstock.
- Set out dishes filled with leftover orange, lime green, and purple construction paper scraps.
- Show your toddler how to pinch paper between their thumbs and index fingers to tear nickel-sized pieces.
- Coat a section of the monster body with a purple glue stick and let your child press torn paper squares into the glue.
- Once the monster’s body is covered, press three assorted self-adhesive googly eyes in the middle and draw a toothy marker smile.
Amazon Craft Materials You Should Buy:
| Material Name | Buy on Amazon |
|---|---|
| Crayola Construction Paper Bulk Pack (480 Sheets) | Buy on Amazon ➔ |
| YINUOYOUJIA Cardstock 12×12 Thick Paper (300gsm/110lb) | Buy on Amazon ➔ |
👉 Watch the Spooky Fun Playbook Boo-tiful Crafts on YouTube
6. Spiral Hanging Construction Paper Ghost
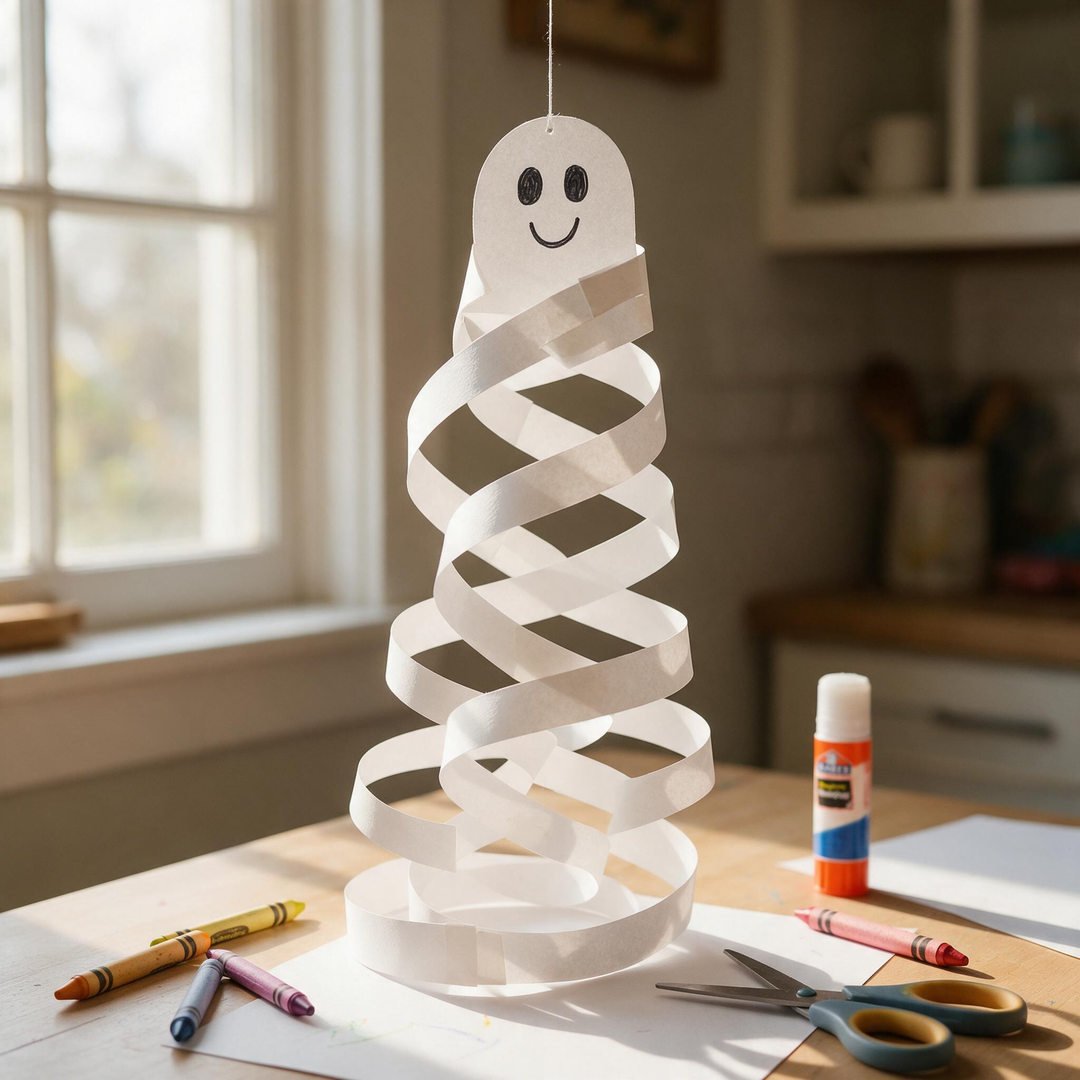
⏱️ Active & Dry Time: 10 mins prep, 0 mins dry | 🧼 Mess Level: 1/5 | 👶 Age Adaptation: Ages 4+ (Continuous circular cutting practice) | 💰 Est. Cost: ~$0.80 total
💬 Real Mom Question (from Reddit’s r/parenting): “What paper craft spins and twirls from air conditioning vents?”
Nancy’s Fix: Cut a white construction paper circle, draw a spiral line inward toward the center, and cut along the line! When lifted by the center, it unfolds into a dancing, twirling 3-foot ghost coil.
Kinetic crafts bring a whole new layer of wonder to children’s craft tables. This simple cut-paper spiral turns a flat 9-inch circle into a bouncy three-foot hanging ghost that twirls with the slightest breeze.
It’s one of the best exercises for older preschoolers to practice continuous steering and turning with safety scissors.
How to Craft It:
- Trace a large dinner plate onto white construction paper and cut out the outer circular shape.
- In the center of the circle, draw a cute ghost face with black washable marker—two oval eyes and an open ‘O’ mouth.
- Draw a smooth pencil spiral starting from the outer edge and winding inward toward the center face.
- Guide your child to cut along the pencil spiral line until reaching the ghost head in the center.
- Poke a tiny hole in the top of the ghost head, thread clear fishing line or yarn through, and hang it above a doorway.
Amazon Craft Materials You Should Buy:
| Material Name | Buy on Amazon |
|---|---|
| Crayola Construction Paper Bulk Pack (480 Sheets) | Buy on Amazon ➔ |
| Crayola Broad Line Markers (12 Count), Washable Markers for Kids | Buy on Amazon ➔ |
👉 Watch the Easy Ghost Halloween Craft for Kids on YouTube
7. Rolled Cone Witch Hat with Gold Paper Buckle
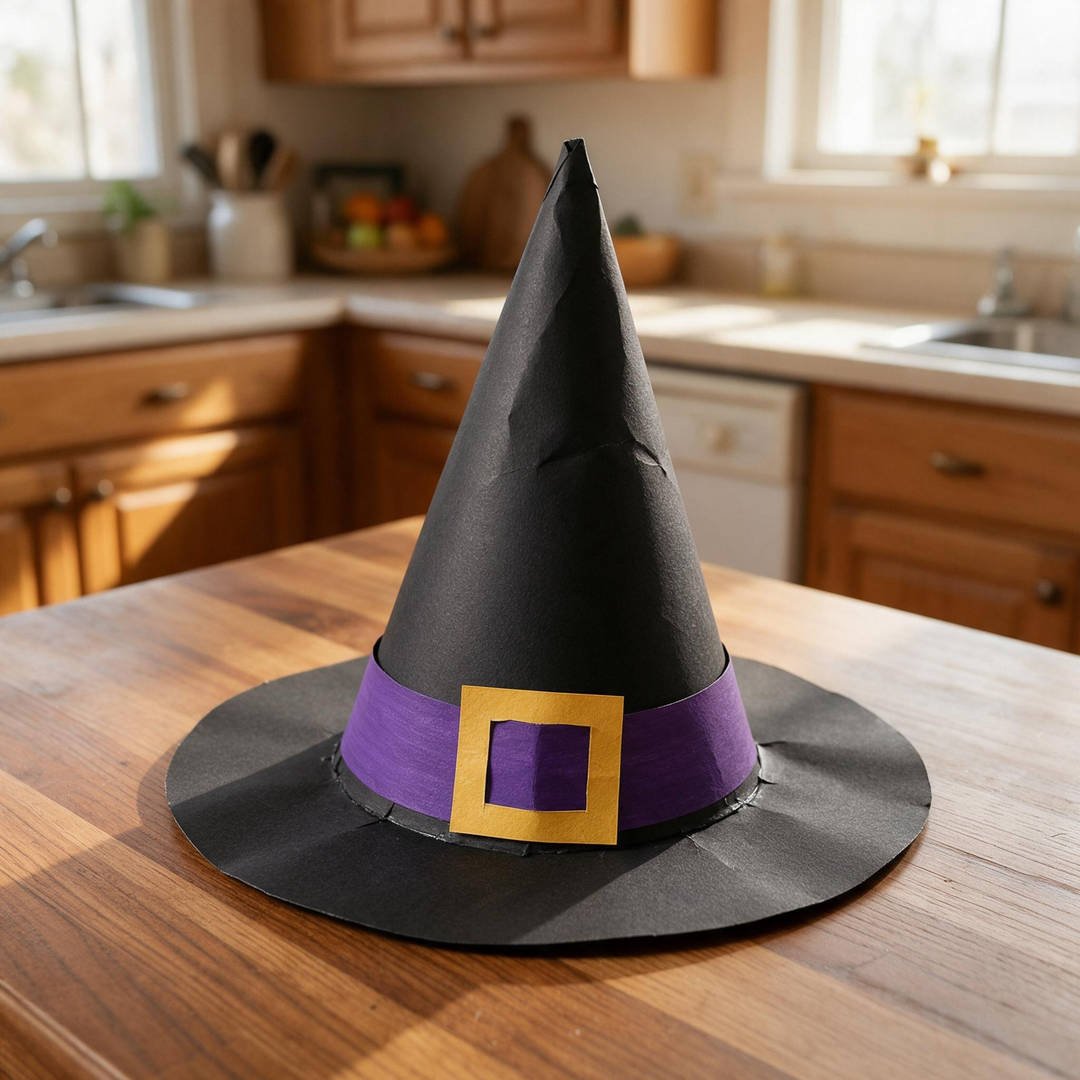
⏱️ Active & Dry Time: 12 mins prep, 0 mins dry | 🧼 Mess Level: 1/5 | 👶 Age Adaptation: Ages 3+ (Curving flat paper into 3D wearable party hats) | 💰 Est. Cost: ~$1.20 total
💬 Real Mom Question (from Reddit’s r/preschoolers): “How do you roll construction paper into a cone without it buckling in the middle?”
Nancy’s Fix: Cut a quarter-circle from black paper and roll the curved edge toward the point! Glue the seam with a purple glue stick, clip small vertical tabs along the bottom rim, and glue down onto a paper donut brim.
Every little crafter loves wearing their artwork! This lightweight construction paper witch hat makes an adorable costume accessory or festive centerpiece for a holiday snack table.
Adding a royal purple hatband and golden-yellow paper buckle makes it look like a charming accessory straight out of a fairy tale book.
How to Craft It:
- Cut a 10-inch quarter-circle from black construction paper to serve as the hat cone.
- Roll the straight edges toward each other until a sharp pointed cone forms, securing the overlapping seam with glue.
- Snip 1/4-inch vertical slits all the way around the bottom rim of the cone and fold them outward like little tabs.
- Cut an 8-inch circular black paper brim with a 4-inch hole cut in the middle (like a flat paper donut).
- Slide the brim over the cone, glue the folded tabs to the underside, and wrap a 1-inch purple paper band with a yellow paper buckle around the base.
Amazon Craft Materials You Should Buy:
| Material Name | Buy on Amazon |
|---|---|
| Crayola Construction Paper Bulk Pack (480 Sheets) | Buy on Amazon ➔ |
| Elmer’s Disappearing Purple School Glue Sticks, Washable, 22 Grams, 3 Count | Buy on Amazon ➔ |
👉 Watch How to Make a Paper Witch Hat on YouTube
8. Fold-and-Cut Kirigami Paper Spider Web
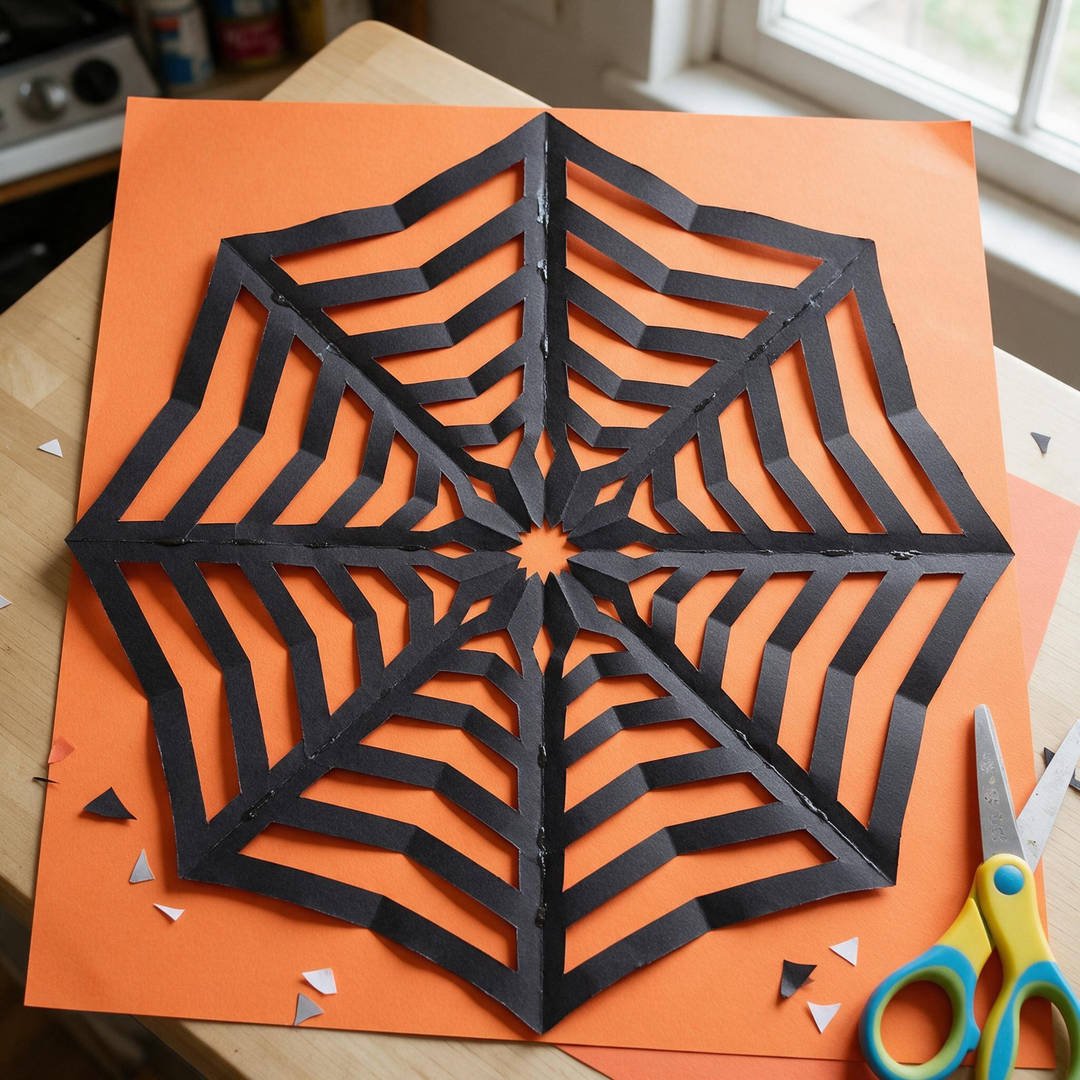
⏱️ Active & Dry Time: 10 mins prep, 0 mins dry | 🧼 Mess Level: 1/5 | 👶 Age Adaptation: Ages 5+ (Snowflake-style geometric snipping) | 💰 Est. Cost: ~$0.75 total
💬 Real Mom Question (from Reddit’s r/elementary): “How do you make paper spiderwebs look authentic without using messy strings?”
Nancy’s Fix: Fold a black construction paper square into a triangle three times (like a paper snowflake), then snip curved notches along the sides! When unfolded, it reveals a gorgeous symmetrical spider web.
If your kids love cutting paper snowflakes in December, they will be utterly enthralled making kirigami spiderwebs in October! The big reveal when unfolding the folded paper triangle is pure excitement.
Tape these intricate black webs across front window glass so the outdoor sunshine illuminates the geometric patterns.
How to Craft It:
- Cut an 8.5×8.5-inch square from black construction paper.
- Fold the square in half diagonally into a triangle, then fold in half two more times into a narrow pie wedge.
- Draw curved parallel lines across the wedge from one folded edge stopping just short of the opposite fold.
- Use safety scissors to snip out the curved negative-space strips along your drawn lines.
- Carefully unfold the paper wedge to reveal an intricate, symmetrical eight-point spider web, then tape a small paper spider in the center.
Amazon Craft Materials You Should Buy:
| Material Name | Buy on Amazon |
|---|---|
| Crayola Construction Paper Bulk Pack (480 Sheets) | Buy on Amazon ➔ |
| CepuXozi 3-Pack Toddler Safety Scissors Kit, Preschool Training Scissors | Buy on Amazon ➔ |
👉 Watch the Easy Paper Spider Web Tutorial on YouTube
9. Paper Fringe Frankenstein Face Mask
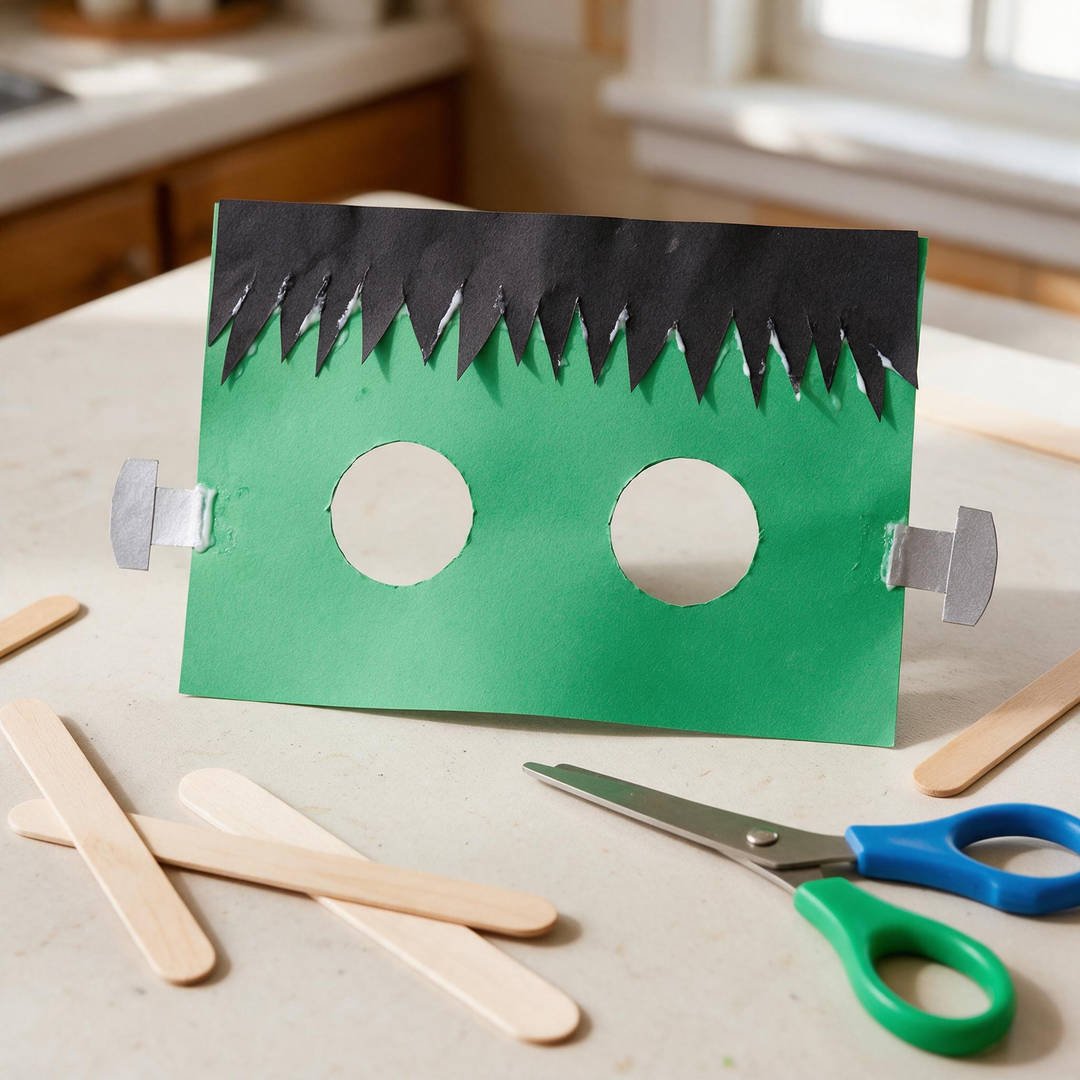
⏱️ Active & Dry Time: 15 mins prep, 0 mins dry | 🧼 Mess Level: 1/5 | 👶 Age Adaptation: Ages 3+ (Fringe cutting practice develops scissor rhythm) | 💰 Est. Cost: ~$1.30 total
💬 Real Mom Question (from Reddit’s r/preschoolers): “What easy wearable paper craft can kids make for costume day?”
Nancy’s Fix: Cut a green construction paper rectangle with eye holes, snip spiky black fringe paper for hair, and glue two gray paper neck bolts to the sides! Attach a craft stick or yarn loop to wear it like a masquerade mask.
Fringe snipping is one of the easiest ways for preschoolers to practice repetitive scissor cuts without needing to follow complex curvy lines. It builds hand rhythm and finger endurance in a fun, relaxed way.
Kids love holding this mask up to their faces and stomping around the playroom with funny Frankenstein monster voices.
How to Craft It:
- Cut a 5×8-inch rectangle from bright green construction paper and round off the four corners slightly.
- Mark and snip two almond-shaped eye holes in the center using blunt safety scissors.
- Cut a 2×8-inch strip of black construction paper and snip vertical fringe cuts 1/2-inch apart along one edge.
- Glue the fringed hair across the top of the green mask so the spiky black hair falls over the forehead.
- Cut two small gray paper rectangles for neck bolts, glue them to the bottom sides, and draw black marker scar stitches across the cheeks.
Amazon Craft Materials You Should Buy:
| Material Name | Buy on Amazon |
|---|---|
| Crayola Construction Paper Bulk Pack (480 Sheets) | Buy on Amazon ➔ |
| Crayola Broad Line Markers (12 Count), Washable Markers for Kids | Buy on Amazon ➔ |
👉 Watch How to Cut Halloween Jack-O-Lantern & Monster Shapes on YouTube
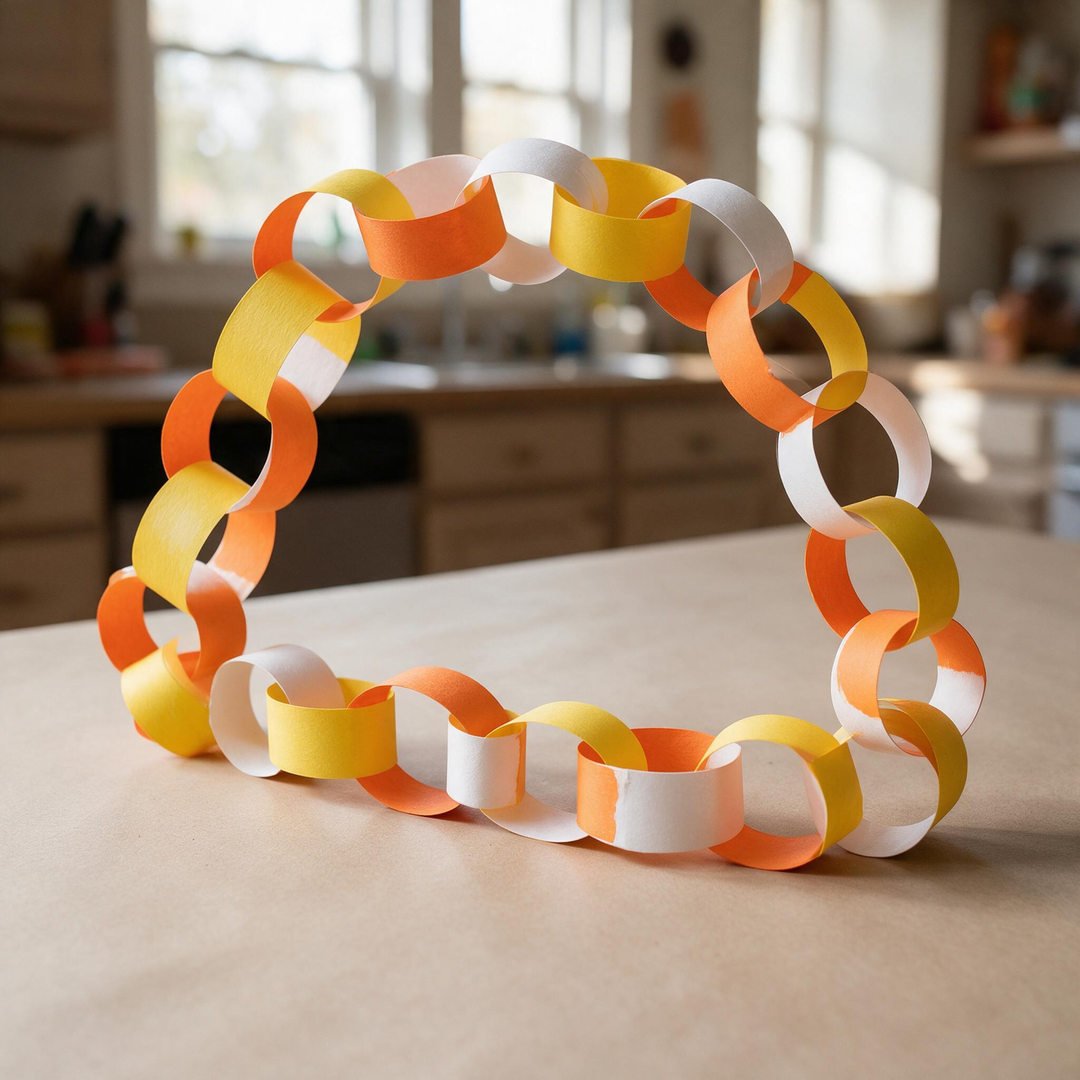
10. Tri-Color Candy Corn Paper Link Garland
⏱️ Active & Dry Time: 15 mins prep, 0 mins dry | 🧼 Mess Level: 1/5 | 👶 Age Adaptation: Ages 2+ (Looping paper chain links builds sequencing skills) | 💰 Est. Cost: ~$1.00 total
💬 Real Mom Question (from Reddit’s r/toddlers): “What classic paper chain can we make that looks distinctly festive for Halloween?”
Nancy’s Fix: Cut 1×6-inch strips of yellow, orange, and white construction paper. Connect them in repeating trios (yellow, orange, white) to make a festive candy corn paper garland to drape across classroom windows!
Paper chains are a cornerstone of early childhood crafting because they provide instant visual reward with very simple repetitive actions. Linking loops also teaches toddlers color sequencing and pattern recognition.
Making a candy corn garland gives little ones ownership of decorating the family home for holiday dinner guests.
How to Craft It:
- Cut equal numbers of 1-inch by 6-inch strips from yellow, pumpkin orange, and white construction paper.
- Form the first yellow strip into a circle and glue the overlapping ends with a swipe of purple glue stick.
- Thread an orange strip through the center of the yellow circle, curl it into a ring, and glue the ends together.
- Thread a white strip through the orange circle and glue shut to complete the first candy corn color trio.
- Repeat the sequence (yellow, orange, white) until the paper garland reaches your desired length to drape across windows or stair railings.
Amazon Craft Materials You Should Buy:
| Material Name | Buy on Amazon |
|---|---|
| Crayola Construction Paper Bulk Pack (480 Sheets) | Buy on Amazon ➔ |
| Elmer’s Disappearing Purple School Glue Sticks, Washable, 22 Grams, 3 Count | Buy on Amazon ➔ |
👉 Watch the DIY Witch Hat Lantern & Paper Crafts on YouTube
❓ Real Mom Questions Answered (From Reddit & Parenting Forums)
How can I stop my child’s hands from getting tired when cutting paper?
The Real Mom Question (from Reddit’s r/preschoolers): “My 4-year-old gives up on cutting paper after only 2 minutes because his thumb and fingers ache. How can I help build his endurance?”
Nancy’s Strategic Fix: Make sure you are using spring-assist training scissors! The internal spring mechanism does half the physical work by pushing the blades back open automatically after each snip. Also, give them narrower strips of paper (1 to 2 inches wide) so they only need one single snip to cut through the paper rather than multiple struggling chomps.
What is the best way to clean sticky glue stick residue off dining tables?
The Real Mom Question (from Reddit’s r/toddlers): “Even though glue sticks are less messy, my table ends up with a cloudy sticky film where my toddler swipes the glue stick past the paper edge. What cleans it best?”
Nancy’s Strategic Fix: Never use harsh chemical cleaners that can strip tabletop sealants! Disappearing purple glue sticks are 100% water-soluble. Simply lay a warm, damp microfiber cloth over the sticky spots for 60 seconds to soften the adhesive, then wipe across in one gentle swipe. The glue dissolves instantly and leaves the wood completely clean and shiny.
How do I store construction paper so the sheets don’t fade or tear?
The Real Mom Question (from Reddit’s r/parenting): “My construction paper stack always ends up crumpled, mixed up, and sun-faded in our art cabinet. How do organized moms store it?”
Nancy’s Strategic Fix: Use a clear horizontal 12×12 scrapbook paper tray or a hanging file folder tote! Separate colors into individual hanging folders (orange, black, purple, green, yellow, white). Storing sheets flat and inside a closed cabinet prevents sunlight exposure from fading the vibrant autumn dyes.
🧹 Real-Mom Cleanup & Storage Checklist
- The Scrap Paper Tupperware: Place a shallow plastic dish on the center of the table; teach kids that all paper snippets go directly into the dish as they cut.
- The Damp Washcloth Wipe: A quick swipe with a warm damp microfiber cloth removes any stray glue stick traces from hands and table in seconds.
- Flat Cardstock Folder: Store finished paper crafts in an accordion file folder labeled by October year so dimensional folds don’t get crushed under books.
- Repurpose Paper Snippets: Dump the scrap paper dish into a gallon freezer bag for next week’s torn-paper mosaic monster projects!
🛡️ Healthy Play & Child Safety Guidelines
All paper crafting activities should be conducted with attentive adult supervision. Ensure that all scissors feature rounded safety tips and that toddlers are taught to keep blades pointing down and away from fingers.
Choose adhesives, markers, and colored construction papers certified non-toxic (AP / ASTM D-4236 approved) by the Art and Creative Materials Institute.
Always keep small paper snippets, googly eyes, and hole punch dots out of reach of infants and toddlers under 3 years old to prevent accidental choking hazards, as advised by the U.S. Consumer Product Safety Commission (CPSC).