10 Easy Recycled Halloween Crafts for Kids to Make

Looking for easy, budget-friendly recycled halloween crafts to make with kids? Here are 10 clever upcycled Halloween decor ideas using everyday boxes and jugs. 🎃
💬 The Real Mom Question (from Reddit’s r/Parenting):
“Store-bought plastic Halloween decor has gotten wildly expensive, and heading into October with piles of delivery boxes feels like a missed opportunity. How do I make festive Halloween decorations using just our recycling bin without them looking like literal trash?”
If you’ve ever found yourself staring into an overflowing recycling bin asking this exact question, take a deep breath mama: you are in the right place! 🎃
Crafting with your kids shouldn’t mean spending fifty dollars on flimsy plastic store trinkets that end up in a landfill by the first week of November.
Every cardboard cereal box, plastic milk jug, and paper egg carton sitting in your pantry right now is an incredible blank canvas waiting for a little imagination.
These 10 upcycled projects turn ordinary household containers into charming, glow-in-the-dark Halloween keepsakes that your kids will take immense pride in creating. ✨
Best of all, every single project uses pantry staples you already own, keeping your out-of-pocket craft budget close to zero while teaching little ones the beauty of green living.
Grab an empty delivery box, pour yourself a hot mug of coffee ☕, and let’s turn everyday recycling into spooky kitchen-table magic!
⚡ The Quick Mom Skim (TL;DR)
- Zero-Dollar Budget: Made with clean household recyclables—empty milk jugs, cereal boxes, egg cartons, and paper tubes.
- Pantry Staple Bonding: Uses standard Elmer’s washable glue, child-safe markers, and scissors you already have at home.
- Kid-Led Independence: Designed for little hands (ages 2 to 7) to paint, wrap, and assemble with minimal adult intervention.
- Eco-Friendly Cleanup: When Halloween ends, paper and cardboard pieces fold flat for storage or return right back to the recycling bin.
🏆 Nancy’s Top 3 Quick Picks for Recycled Halloween Crafts
If your afternoon is packed and you need a quick win before dinner, start with our three absolute family favorites:
| Category Award | Recycled Craft Idea | Why It Won |
|---|---|---|
| 🥇 Best Zero-Prep Glowing Decor | Glowing Milk Jug Ghost Lanterns | Renders instant glowing porch appeal in 10 minutes using just an empty gallon jug, marker, and tea light. |
| 🥈 Best Fine-Motor Muscle Builder | Egg Carton Hanging Bats | Scissor scallops and black tempera let preschoolers practice scissor grip and painting independently. |
| 🥉 Best Interactive Sibling Play | Cereal Box Monster Chompers | Transforms into a hinged hand puppet that sparks hours of imaginative monster puppet shows. |
👀 People Also Read
🧺 Nancy’s Real-Mom Supply Swap Table
Never feel pressured to run to the craft store just to make sweet autumn memories with your kids! 💛
Here are the easy household swaps we use at home, alongside our favorite budget Amazon staples whenever you want to restock:
| If You Don’t Have… | Swap It With This! | Recommended Amazon Staple |
|---|---|---|
| Plastic Spiderwebs | Pull apart dollar cotton balls with fingers to drape realistic cobwebs. | Cra-Z-Art Washable Classic Paint Bulk Pack |
| Mod Podge Sealer | Whisk equal parts white school glue with warm tap water in a clean jar. | Mod Podge Waterbase Sealer (16 oz) |
| Open-Flame Candles | Drop safe, cool-touch flickering battery LED tea lights inside plastic jugs. | Battery Operated LED Tea Lights (24-Pack) |
| Craft Foam Sheets | Flatten clean cereal boxes to cut out sturdy shapes that hold glue easily. | Crayola Construction Paper Bulk Pack |
| Craft Ribbon | Collect backyard twigs and tie them with natural jute twine or scrap yarn. | PerkHomy Natural Jute Twine 600 Feet |
👻 Recycled Plastic & Carton Glowing Porch Crafts
Turn clear milk jugs, water bottles, and egg cartons from breakfast into illuminated porch lanterns and hanging ceiling critters.
On Reddit’s r/UKParenting, several parents asked how to make outdoor recycled decorations visible after dark without spending on electric inflatables. The secret is utilizing semi-opaque plastics like milk containers that act as natural light diffusers for battery LEDs.
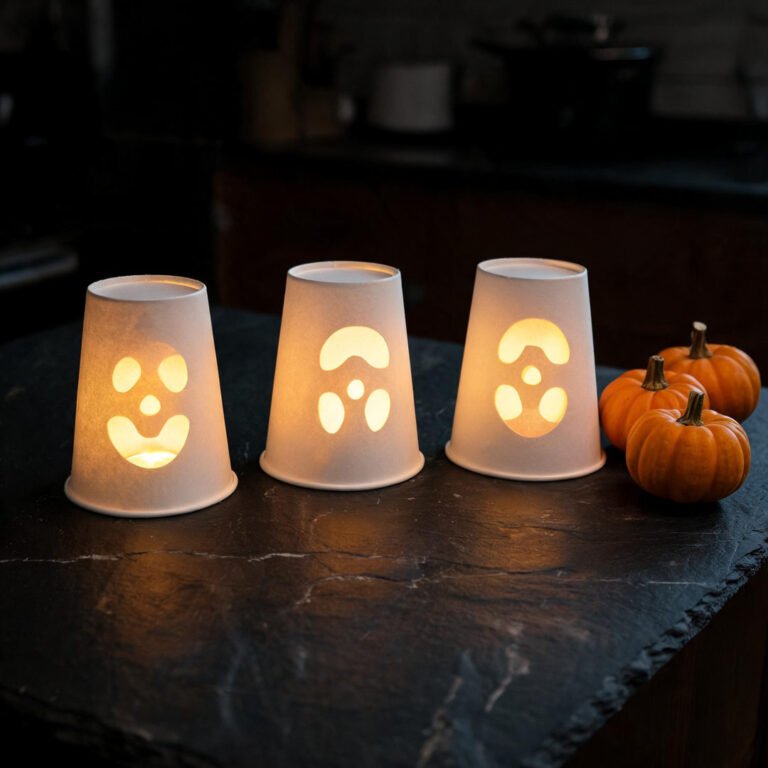
1. Glowing Milk Jug Ghost Lanterns
⏱️ Active & Dry Time: 10 mins active, 0 mins dry | 🧼 Mess Level: 1/5 | 👶 Age Adaptation: Ages 2+ (toddlers doodle; kids cut) | 💰 Est. Cost: ~$0.15/jug
💬 Real Mom Question (from Reddit’s r/UKParenting): “How do I keep lightweight plastic milk jugs from blowing over on windy October nights?”
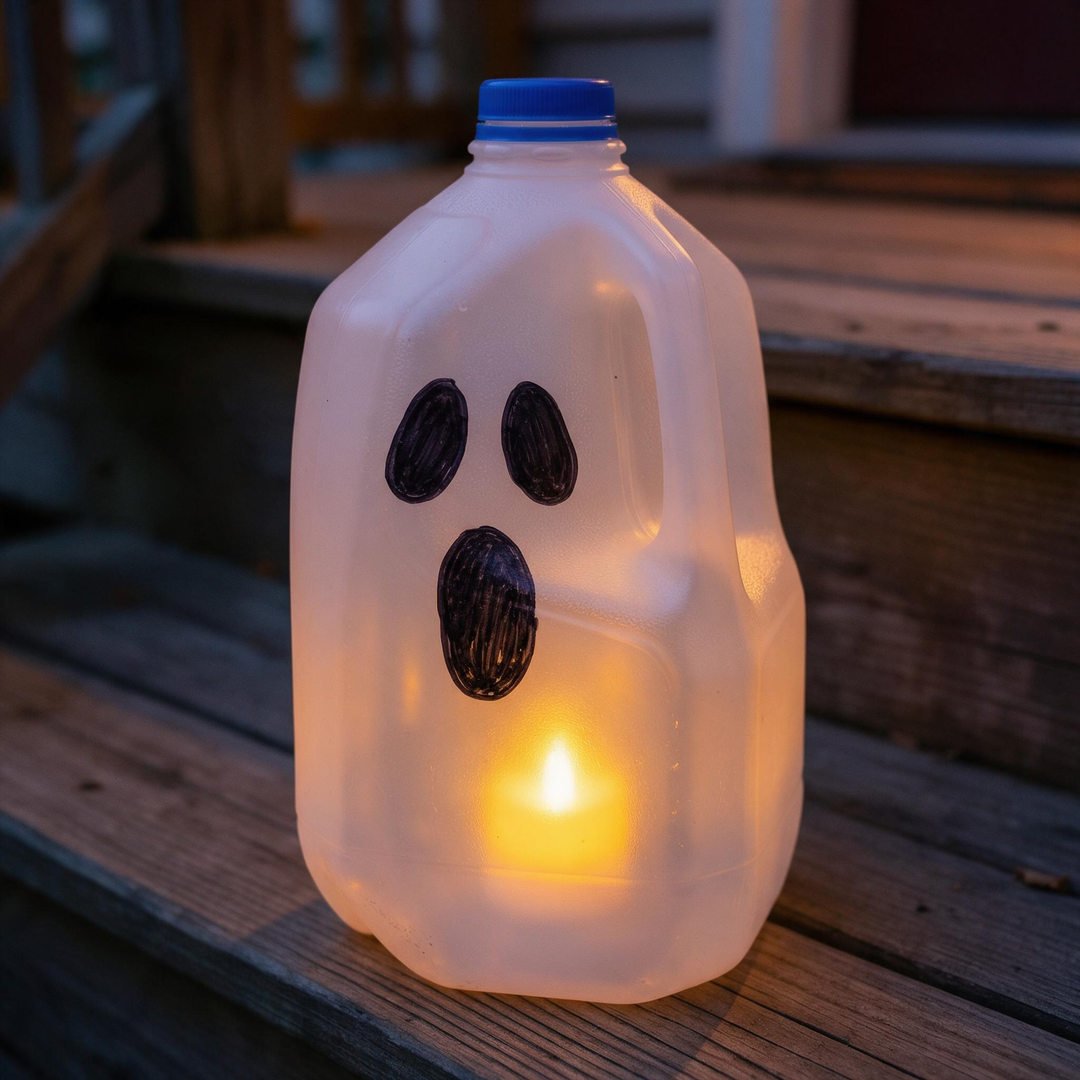
Nancy’s Fix: Drop two cups of clean dry gravel, sand, or uncooked rice into the bottom of the jug before inserting your battery tea light. The weight anchors the jug securely while the light shines bright above it!
I collect empty gallon milk jugs all September because these lanterns line our front walkway every single Halloween night.
The natural milky hue of HDPE plastic diffuses warm battery tea lights into a friendly, ethereal glow that neighbors adore.
How to Craft It:
- Step 1: Rinse an empty plastic gallon milk jug thoroughly with warm soapy water and peel off the manufacturer label.
- Step 2: Let your child draw playful ghost eyes and an open howling mouth on the flat side using a bold black permanent marker.
- Step 3: Carefully use kitchen scissors to cut a small 2-inch flap on the backside opposite the handle, about one inch above the base.
- Step 4: Turn on a battery-operated LED tea light and slide it through the backdoor flap into the center of the jug.
- Step 5: Line up four or five completed ghosts along your front porch stairs or windowsill for an instant glowing walkway.
Amazon Craft Materials You Should Buy:
| Material Name | Buy on Amazon |
|---|---|
| Battery Operated LED Tea Lights (24-Pack) | Buy on Amazon → |
| Crayola Broad Line Washable Markers (10-Count) | Buy on Amazon → |
👉 Watch the Glowing Milk Jug Ghost Tutorial on YouTube
2. Egg Carton Hanging Bats
⏱️ Active & Dry Time: 15 mins active, 25 mins dry | 🧼 Mess Level: 2/5 | 👶 Age Adaptation: Ages 3+ (preschoolers love painting the textured pulp) | 💰 Est. Cost: ~$0.20/bat
💬 Real Mom Question (from Reddit’s r/crafts): “Why does the paint keep soaking into egg cartons without looking dark black?”
Nancy’s Fix: Paper egg cartons are extremely porous. Use creamy acrylic or tempera paint with minimal water, or apply one quick base coat of glue to seal the cardboard before your black paint layer!
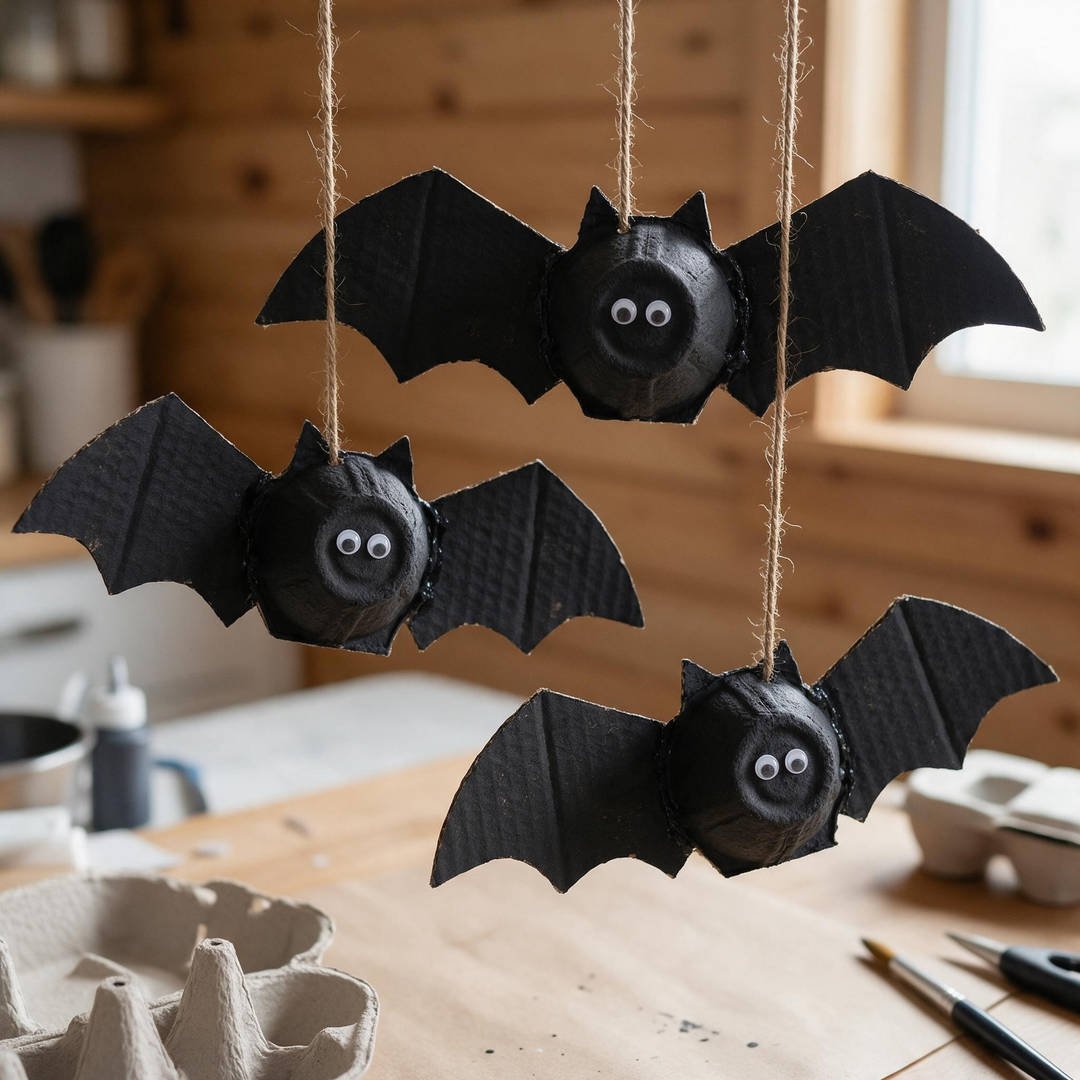
Do not toss that paper egg carton into the bin until you try making these darling scalloped bats with your kids.
Each carton yields four separate bats that flap gently whenever someone walks past your living room window.
How to Craft It:
- Step 1: Cut a 3-cup section from an empty paper egg carton using sturdy kitchen shears.
- Step 2: Snip small inverted triangles out of the bottom edges of the two outside cups to create bat wings.
- Step 3: Hand your child a sponge brush and black washable acrylic paint to completely coat the top and underside of the carton.
- Step 4: Once the paint is dry to the touch, glue two plastic googly eyes to the center egg cup.
- Step 5: Poke a small hole in the top of the middle cup, thread a loop of jute twine through, and hang your bat from the ceiling or curtain rod.
Amazon Craft Materials You Should Buy:
| Material Name | Buy on Amazon |
|---|---|
| Cra-Z-Art Washable Classic Paint Bulk Pack | Buy on Amazon → |
| PerkHomy Natural Jute Twine 600 Feet | Buy on Amazon → |
👉 Watch the Egg Carton Bats Tutorial on YouTube
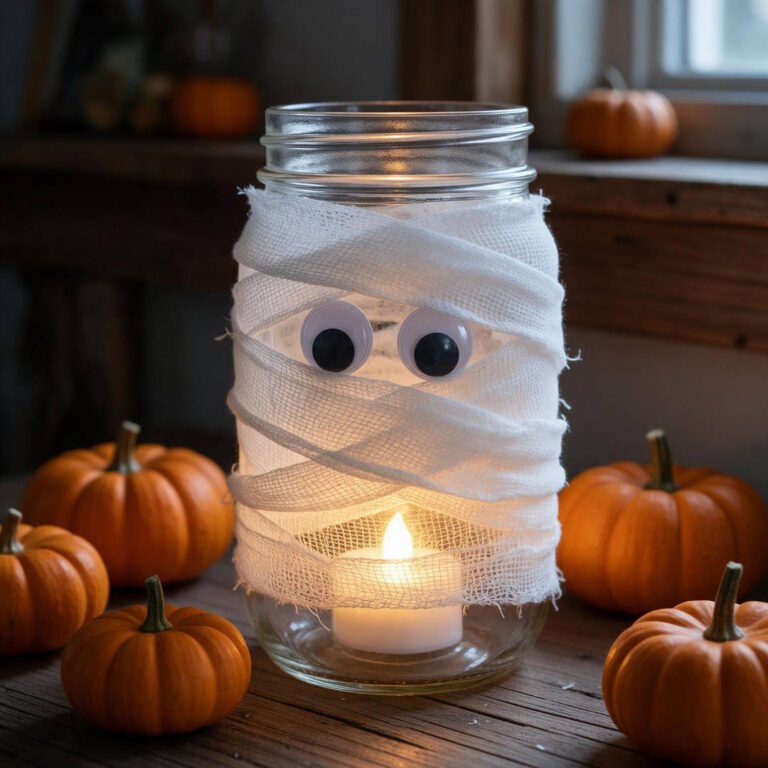
3. Cardboard Roll Gauze Mummies
⏱️ Active & Dry Time: 10 mins active, 5 mins dry | 🧼 Mess Level: 1/5 | 👶 Age Adaptation: Ages 2 to 6 (simple wrapping and sticking) | 💰 Est. Cost: ~$0.10/mummy
💬 Real Mom Question (from Reddit’s r/toddlers): “My 3-year-old struggles to hold the bandage roll while gluing. How can I make it easier?”
Nancy’s Fix: Wrap a strip of double-sided craft tape around the middle of the tube first. When your toddler wraps the gauze, it sticks instantly wherever they touch without needing wet glue!
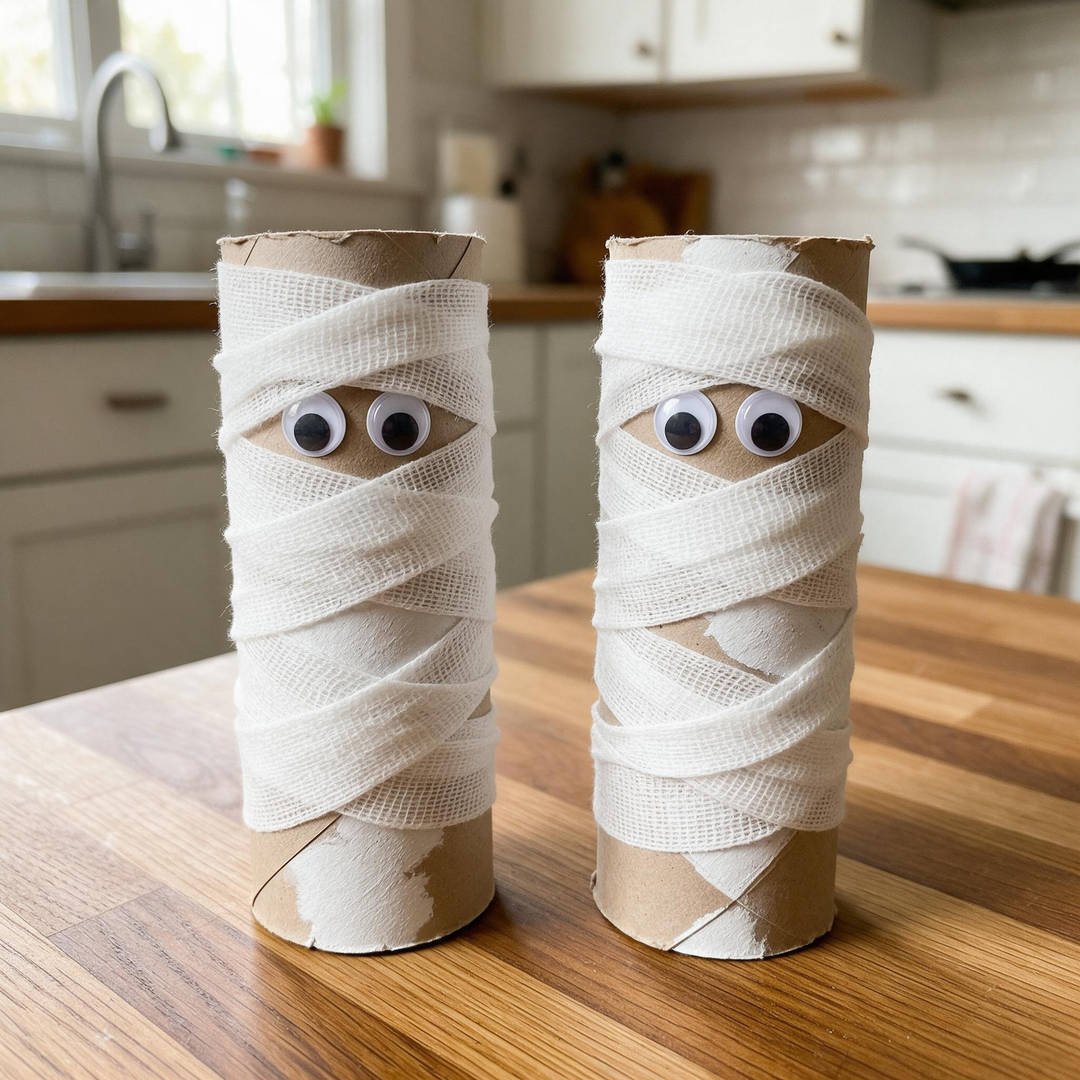
Cardboard toilet paper and paper towel rolls make the ultimate foundation for chunky, tactile mummy figures.
Kids love wrapping the bandages around and around, which provides fantastic fine-motor coordination for busy preschool fingers.
How to Craft It:
- Step 1: Save clean cardboard toilet paper tubes or cut a paper towel tube into 4-inch cylinders.
- Step 2: Dab a small bead of glue near the top of the roll and press two googly eyes side-by-side onto the surface.
- Step 3: Cut 1-inch wide strips of rolled medical gauze, white crepe paper, or torn white paper towels.
- Step 4: Start wrapping the gauze strips criss-cross around the tube, making sure to overlap the edges while leaving the eyes peeking out.
- Step 5: Secure the loose bandage tail at the bottom with a tiny swipe of glue stick or clear tape.
Amazon Craft Materials You Should Buy:
| Material Name | Buy on Amazon |
|---|---|
| AdTech Cool Tool Low-Temp Glue Gun | Buy on Amazon → |
| Crayola Construction Paper Bulk Pack | Buy on Amazon → |
👉 Watch the Cardboard Roll Mummy Tutorial on YouTube
📦 Upcycled Cardboard Box & Newspaper Play Crafts
Cereal boxes, shoe boxes, and old newsprint give kids a big canvas to fold, cut, and paint without fear of wasting expensive art store pads.
Parents on r/Anticonsumption frequently note that kids often play longer with cardboard boxes than the toys inside them. These projects tap into that organic imagination.
4. Cereal Box Monster Chomper Puppets
⏱️ Active & Dry Time: 20 mins active, 30 mins dry | 🧼 Mess Level: 2/5 | 👶 Age Adaptation: Ages 4+ (younger toddlers can operate them once built) | 💰 Est. Cost: ~$0.25/puppet
💬 Real Mom Question (from Reddit’s r/crafts): “The cereal box cardboard is glossy and the paint just bubbles off. How do I fix that?”
Nancy’s Fix: Wipe the glossy cereal box with a barely damp sponge and a pinch of baking soda, or simply flip the cereal box inside out before taping it into a puppet shape so you paint the raw matte brown side!
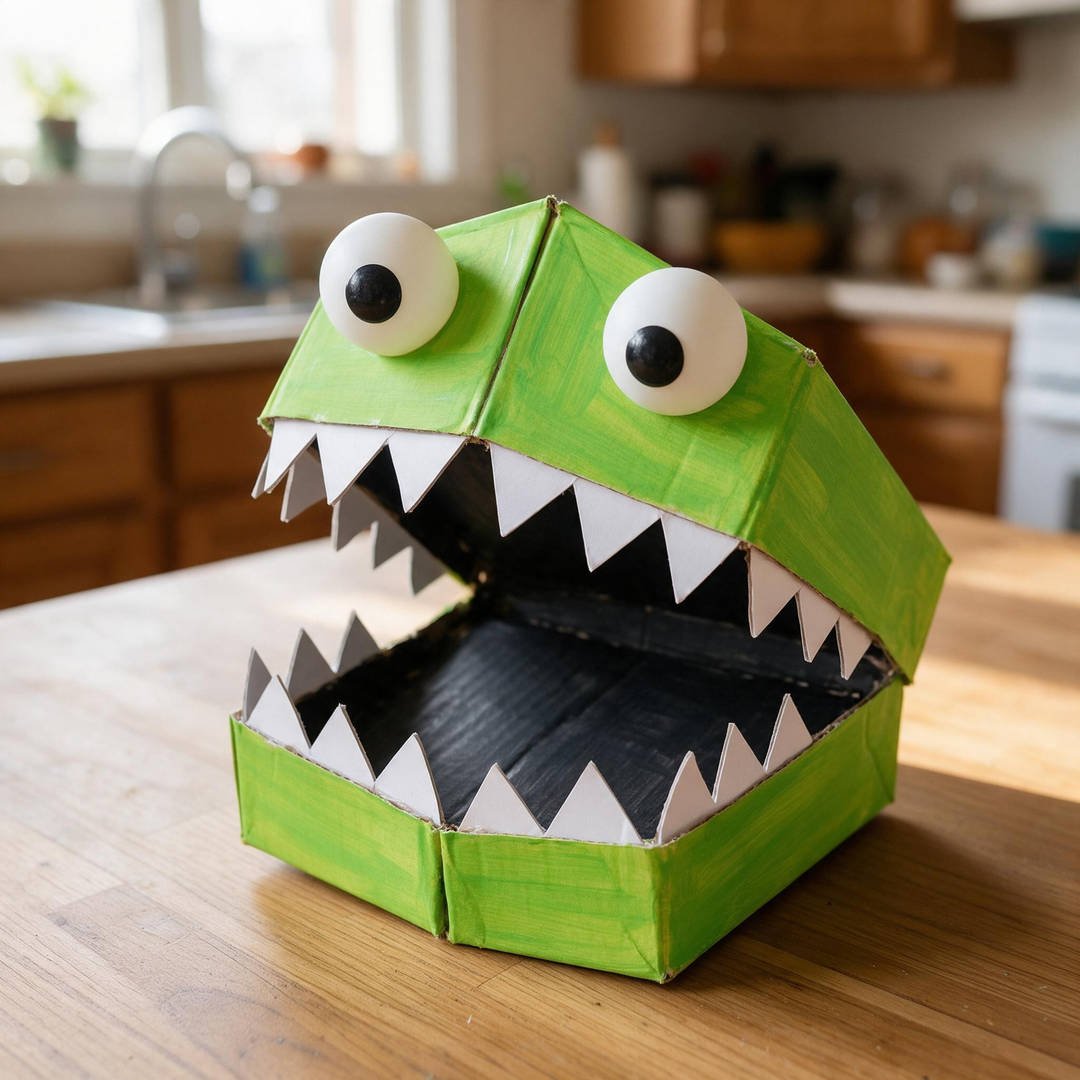
Every morning cereal box can transform into a hilarious hand puppet that actually opens and closes its jaws.
My kids spend entire rainy afternoons staging silly monster variety shows behind our living room sofa with these.
How to Craft It:
- Step 1: Take an empty family-size cereal box and cut horizontally across the front and both narrow sides exactly halfway down, leaving the back cardboard intact.
- Step 2: Fold the box in half along the uncut back spine so the two halves open and close like a giant hinged jaw.
- Step 3: Paint the exterior of the box bright neon green or purple using washable tempera paint and allow to dry.
- Step 4: Cut jagged pointed triangle teeth from scrap white cardstock and glue them along the inside edges of both lips.
- Step 5: Glue two large ping-pong balls or paper circles to the top roof for bulging eyes, then slip your hands into the back pockets to chomp!
Amazon Craft Materials You Should Buy:
| Material Name | Buy on Amazon |
|---|---|
| Nicpro 6 Colors Fluorescent Neon Washable Paint Set | Buy on Amazon → |
| BURVAGY 12 Pack 5-Inch Kids Safety Scissors | Buy on Amazon → |
👉 Watch the Cereal Box Monster Puppet Tutorial on YouTube
5. Punched Tin Can Luminary Lanterns
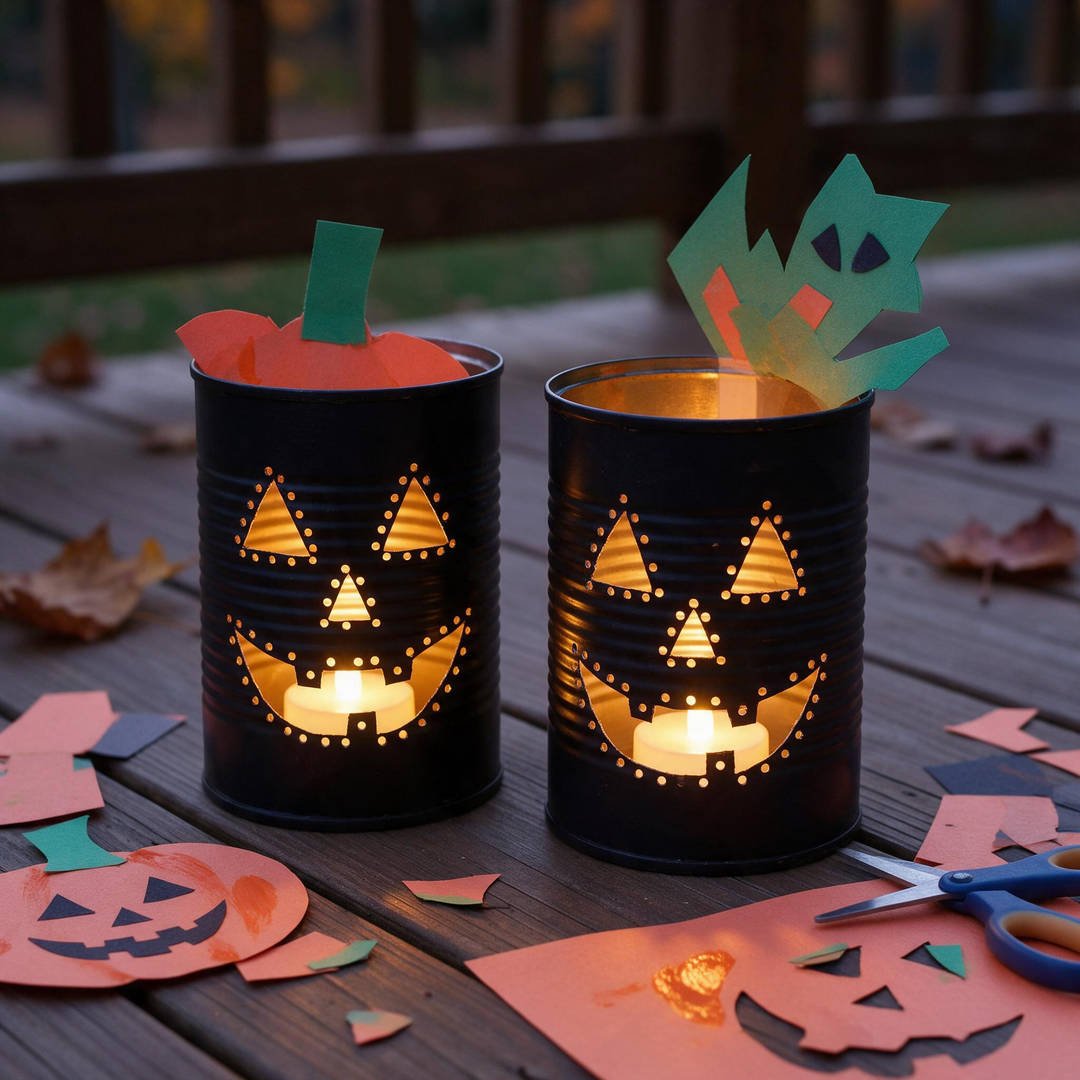
⏱️ Active & Dry Time: 20 mins active, 20 mins dry | 🧼 Mess Level: 2/5 | 👶 Age Adaptation: Ages 6+ (supervised adult hole punch) | 💰 Est. Cost: ~$0.30/tin
💬 Real Mom Question (from Reddit’s r/Parenting): “How do you hammer holes into a thin tin can without crushing the metal sides in?”
Nancy’s Fix: Never hammer an empty can! Freezing water solid inside the can provides solid internal ice support that keeps the steel perfectly round while you tap each hole effortlessly.
Empty soup cans make gorgeous, fire-safe candle lanterns that cast magical shadows across your outdoor patio table.
This is a wonderful collaborative craft where parents handle the nail hole punching while kids paint and arrange the designs.
How to Craft It:
- Step 1: Clean an empty tin soup can thoroughly, remove the paper label, and fill it to the brim with water before freezing solid overnight.
- Step 2: Lay the frozen can on a rolled kitchen towel to prevent rolling while working.
- Step 3: Use a hammer and a standard steel nail to gently tap holes through the metal, following a simple pumpkin or crescent moon pattern.
- Step 4: Let the ice melt out in the kitchen sink, then pat the dry metal completely with a paper towel.
- Step 5: Paint the outside in matte black or orange craft paint, pop a battery tea light inside, and watch the illuminated dots twinkle.
Amazon Craft Materials You Should Buy:
| Material Name | Buy on Amazon |
|---|---|
| Battery Operated LED Tea Lights (24-Pack) | Buy on Amazon → |
| DMSVK 20 Pcs Foam Paint Brushes 1-Inch | Buy on Amazon → |
👉 Watch the Tin Can Outdoor Lantern Tutorial on YouTube
6. Egg Carton Spooky Spider Family
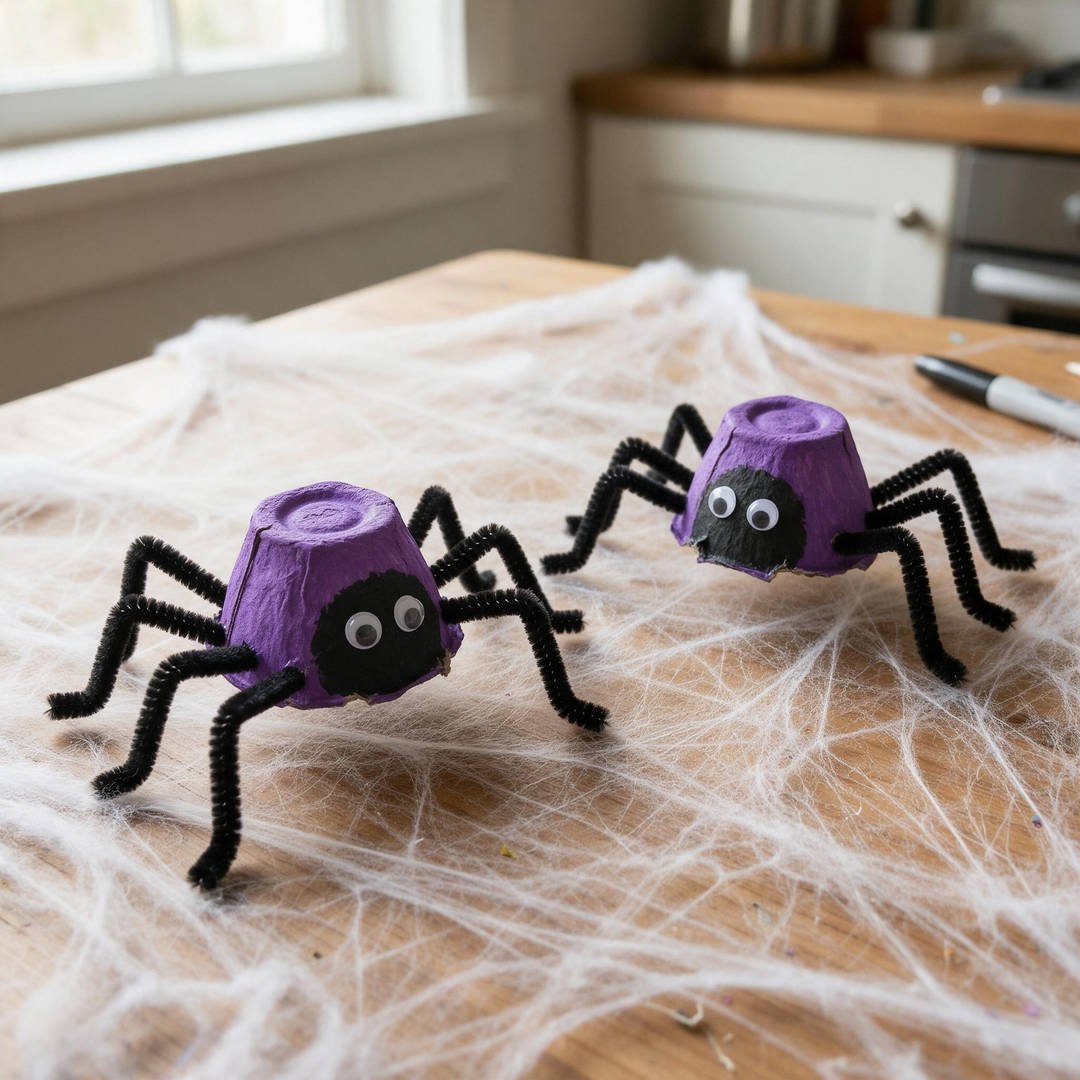
⏱️ Active & Dry Time: 15 mins active, 15 mins dry | 🧼 Mess Level: 2/5 | 👶 Age Adaptation: Ages 3+ (threading legs builds great pincer grasp) | 💰 Est. Cost: ~$0.15/spider
💬 Real Mom Question (from Reddit’s r/Preschoolers): “Pipe cleaners keep pulling out when my toddler plays with the spiders. Any sturdy tricks?”
Nancy’s Fix: Push the pipe cleaners all the way through one side of the cup and out the other side in one continuous piece. A dab of low-temp glue inside the cup seals them permanently!
Single egg carton cups make the cutest rounded spider bodies that sit flat on bookshelves or cobwebs.
You can make an entire family of colorful spiders in under half an hour using just leftover cups and pipe cleaners.
How to Craft It:
- Step 1: Separate individual egg cups from a cardboard carton using craft scissors.
- Step 2: Paint the egg cup black, purple, or neon green with washable craft paint and let dry completely.
- Step 3: Use a toothpick or skewer tip to poke four small holes along each side of the cardboard cup.
- Step 4: Cut two black chenille pipe cleaners in half to make four 6-inch pieces, then thread them through the holes to form eight legs.
- Step 5: Bend the ends of the pipe cleaners downwards so your spider stands up on its feet, then glue four tiny googly eyes to the front face.
Amazon Craft Materials You Should Buy:
| Material Name | Buy on Amazon |
|---|---|
| Cra-Z-Art Washable Classic Paint Bulk Pack | Buy on Amazon → |
| BURVAGY 12 Pack 5-Inch Kids Safety Scissors | Buy on Amazon → |
👉 Watch the Egg Carton Spider Tutorial on YouTube
7. Shoebox Miniature Haunted Manor
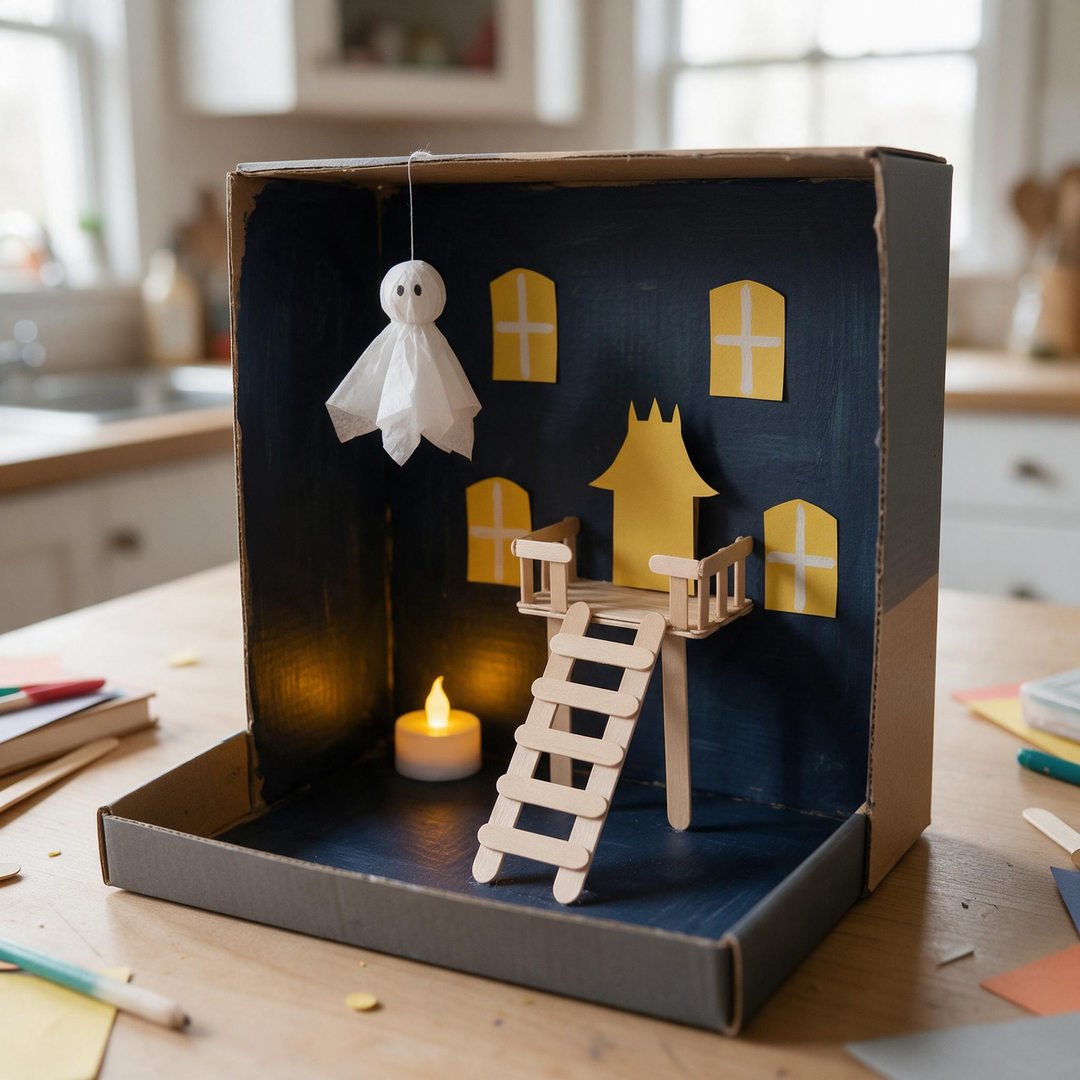
⏱️ Active & Dry Time: 35 mins active, 30 mins dry | 🧼 Mess Level: 2/5 | 👶 Age Adaptation: Ages 5+ (perfect for independent creative building) | 💰 Est. Cost: ~$0.50/house
💬 Real Mom Question (from Reddit’s r/crafts): “What is the best way to glue cardboard partitions inside a slick shoebox without it collapsing?”
Nancy’s Fix: Score both gluing surfaces with the edge of scissors to create tiny ridges, then use a low-temp glue gun. The glue grips the scored paperboard and cures rock solid in 30 seconds!
Turn any old delivery shoebox into an interactive haunted dollhouse diorama that kids can decorate for days.
This multi-room project is an incredible creative outlet that recycles craft scraps and packaging foam into tiny furniture.
How to Craft It:
- Step 1: Set an empty cardboard shoebox horizontally on its long side so the open interior faces toward you.
- Step 2: Glue a piece of cardboard across the middle horizontally to create an upstairs attic and downstairs foyer.
- Step 3: Paint the interior walls dark midnight blue or charcoal gray using non-toxic tempera paint.
- Step 4: Cut windows out of the sides and glue yellow tissue paper behind the openings so daylight creates a glowing window effect.
- Step 5: Add stairs made from glued popsicle sticks, hang cotton ball cobwebs from the corners, and suspend a paper ghost from black thread.
Amazon Craft Materials You Should Buy:
| Material Name | Buy on Amazon |
|---|---|
| AdTech Cool Tool Low-Temp Glue Gun | Buy on Amazon → |
| Crayola Construction Paper Bulk Pack | Buy on Amazon → |
👉 Watch the Cardboard Haunted House Tutorial on YouTube
🍂 Newsprint & Bottle Upcycled Table Decor
Complete your homemade Halloween display with classic folded newspaper costume pieces and upcycled beverage bottle pumpkins.
These budget crafts give a vintage, nostalgic warmth to your mantle while ensuring not a single scrap of grocery paper goes to waste.
8. Recycled Newspaper Witch Hat
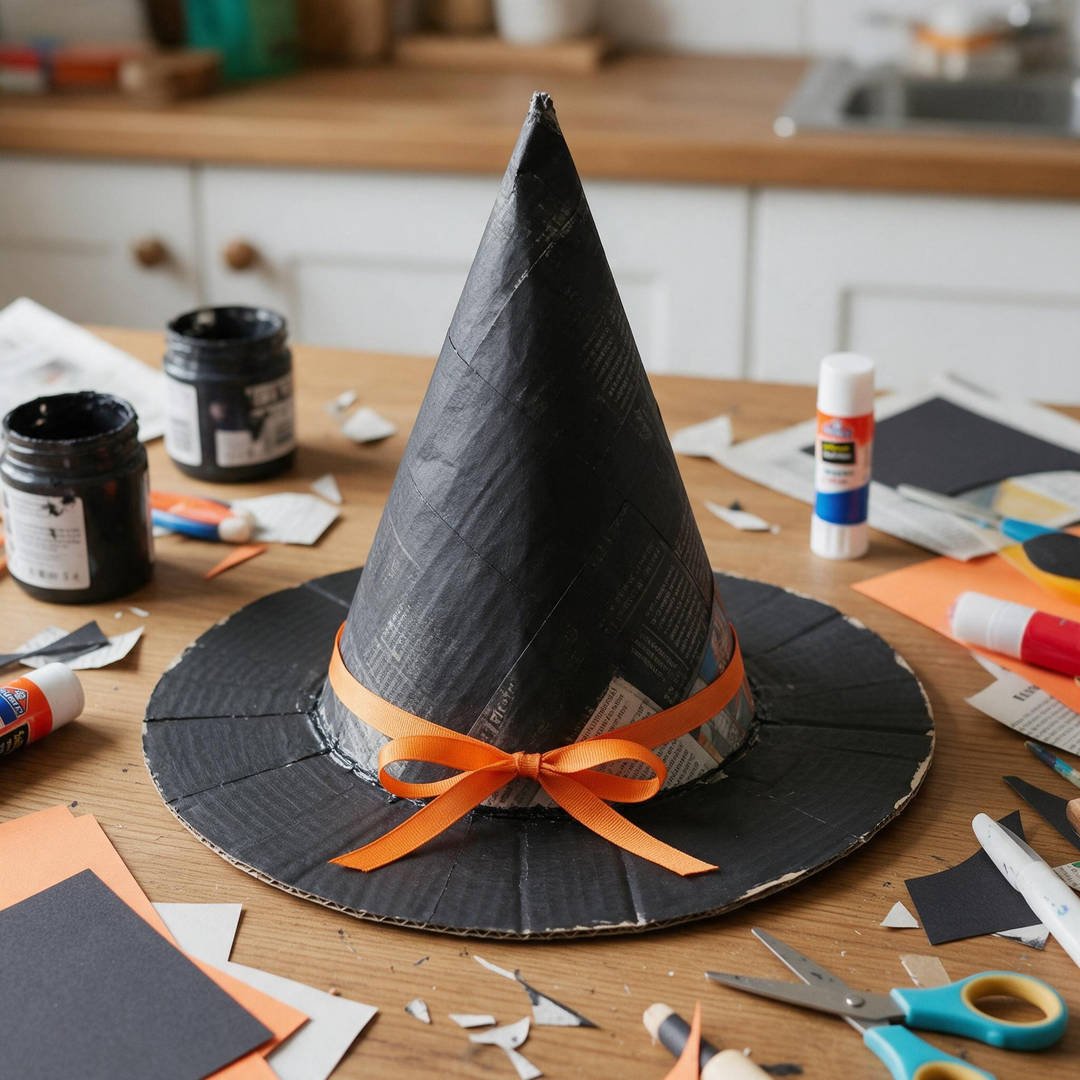
⏱️ Active & Dry Time: 15 mins active, 20 mins dry | 🧼 Mess Level: 2/5 | 👶 Age Adaptation: Ages 4+ (great folding and painting exercise) | 💰 Est. Cost: ~$0.10/hat
💬 Real Mom Question (from Reddit’s r/Mommit): “Will newspaper tear when kids paint it with wet paint?”
Nancy’s Fix: Layer two sheets together before folding, and use a dry sponge brush rather than soaking wet bristles. The newsprint stays strong and dries crisp like cardstock!
Folded newspaper crafts are a classic childhood tradition that costs virtually nothing to make right at the kitchen table.
This hat is custom-fitted directly to your child’s head, making it a fantastic wearable dress-up piece for school parties.
How to Craft It:
- Step 1: Take two full sheets of recycled newspaper and roll them diagonally into a tall, pointed cone shape that fits your child’s head.
- Step 2: Tape the cone seam securely with masking tape and trim the bottom edge evenly with child safety scissors.
- Step 3: Cut a large donut ring out of scrap cardboard from a pizza or shipping box to create the hat brim.
- Step 4: Cut 1-inch vertical tabs along the bottom rim of the newspaper cone, flare them outward, and glue them beneath the cardboard brim.
- Step 5: Paint the entire hat matte black with acrylic paint, then wrap an orange ribbon or yarn band around the base.
Amazon Craft Materials You Should Buy:
| Material Name | Buy on Amazon |
|---|---|
| Cra-Z-Art Washable Classic Paint Bulk Pack | Buy on Amazon → |
| DMSVK 20 Pcs Foam Paint Brushes 1-Inch | Buy on Amazon → |
👉 Watch the Paper Witch Hat Tutorial on YouTube
9. Plastic Water Bottle Jack-O’-Lanterns
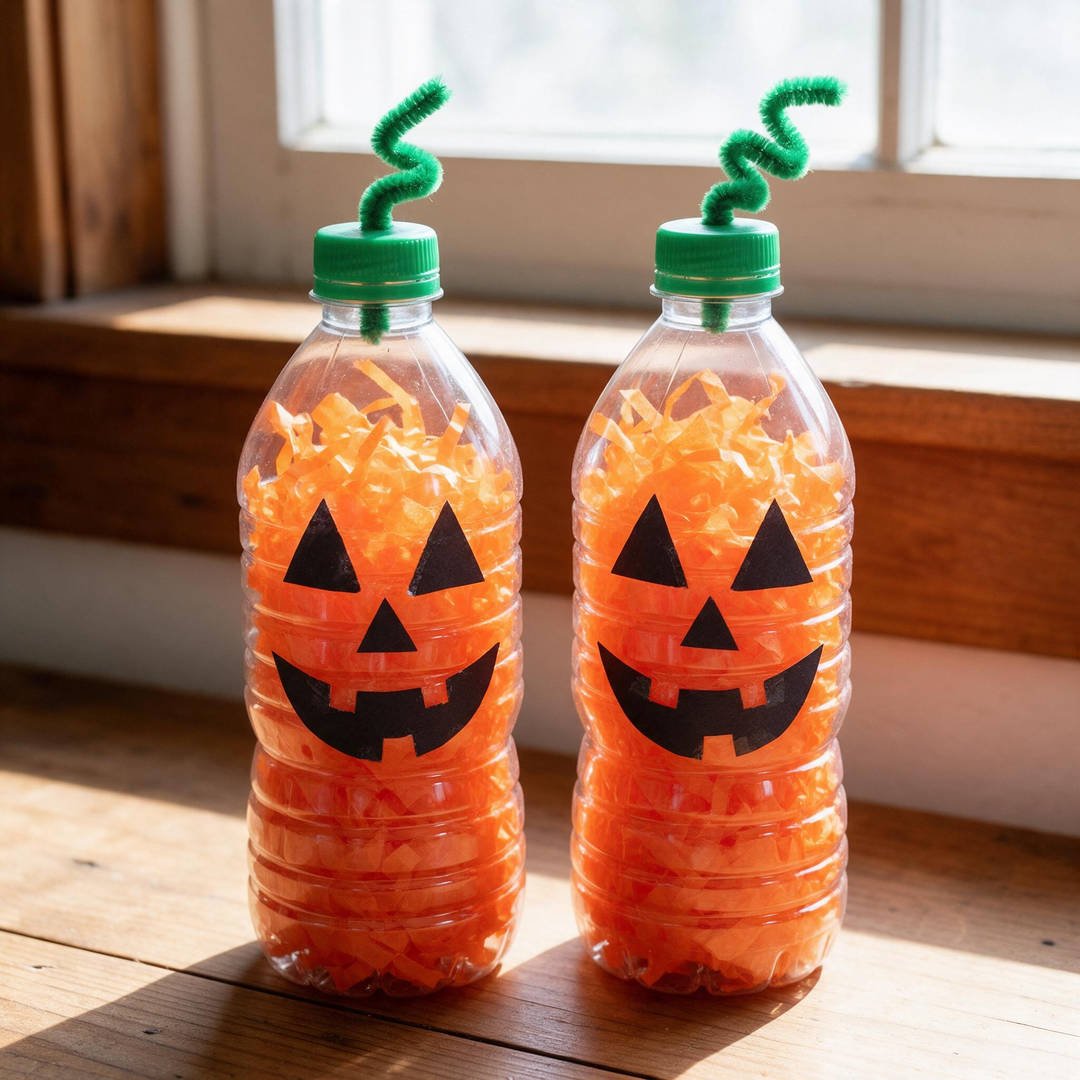
⏱️ Active & Dry Time: 10 mins active, 0 mins dry | 🧼 Mess Level: 1/5 | 👶 Age Adaptation: Ages 2 to 5 (fantastic sensory stuffing project) | 💰 Est. Cost: ~$0.10/pumpkin
💬 Real Mom Question (from Reddit’s r/toddlers): “My toddler struggles to poke big paper scraps through the narrow bottle top. What helps?”
Nancy’s Fix: Give them an unsharpened wooden pencil or a drinking straw to use as a gentle ramrod. Poking paper into the bottle turns into an engaging motor puzzle they will repeat for twenty minutes!
Instead of tossing clear single-use plastic water bottles into the recycling bin, transform them into adorable table pumpkins.
This mess-free project requires zero liquid paint, making it a favorite for parents who hate scrubbing paint out of kitchen tablecloths.
How to Craft It:
- Step 1: Remove the label from an empty, dry 16oz or 20oz plastic water bottle.
- Step 2: Tear orange tissue paper or scrap construction paper into small 2-inch squares.
- Step 3: Let your toddler or preschooler push the orange paper pieces through the bottle neck until the container is packed full.
- Step 4: Screw the green cap back on and wrap a green chenille pipe cleaner around the spout, twisting the extra length into a curly pumpkin vine.
- Step 5: Stick pre-cut black paper triangle eyes and a crooked jack-o-lantern smile onto the front plastic surface.
Amazon Craft Materials You Should Buy:
| Material Name | Buy on Amazon |
|---|---|
| Crayola Construction Paper Bulk Pack | Buy on Amazon → |
| BURVAGY 12 Pack 5-Inch Kids Safety Scissors | Buy on Amazon → |
👉 Watch the Plastic Bottle Pumpkin Tutorial on YouTube
10. Cereal Box Graveyard Tombstones

⏱️ Active & Dry Time: 15 mins active, 15 mins dry | 🧼 Mess Level: 2/5 | 👶 Age Adaptation: Ages 4+ (fun sponge dabbing and lettering) | 💰 Est. Cost: ~$0.15/tombstone
💬 Real Mom Question (from Reddit’s r/crafts): “How do I make the marker lettering stand out against dark gray paint?”
Nancy’s Fix: Write with a black sharpie first, then trace lightly along one edge with a white chalk pen or white crayon. It creates a subtle 3D carved-stone shadow that looks professional!
Flattened cereal and cracker boxes have the perfect stiffness to create freestanding spooky graveyard headstones for your mantel.
By sponge-painting gray over the cardboard, you get a textured granite appearance that looks remarkably authentic.
How to Craft It:
- Step 1: Draw rounded arched tombstone shapes onto flattened cereal box cardboard and cut them out with safety scissors.
- Step 2: Cut a 2-inch strip of leftover cardboard, fold it into a triangle kickstand, and glue it to the back so each tombstone stands upright.
- Step 3: Dab a damp kitchen sponge in gray and black acrylic paint, then tap it gently over the front surface to create authentic stone grain texture.
- Step 4: Once the paint is dry, use a black broad-line marker to write ‘RIP’, funny family names, or spooky dates across the front.
- Step 5: Scatter dried backyard leaves and green craft moss around the base of the tombstones on your table or bookshelf.
Amazon Craft Materials You Should Buy:
| Material Name | Buy on Amazon |
|---|---|
| Cra-Z-Art Washable Classic Paint Bulk Pack | Buy on Amazon → |
| Crayola Broad Line Washable Markers (10-Count) | Buy on Amazon → |
👉 Watch the Cardboard Tombstone Tutorial on YouTube
💡 Nancy’s Sanity-Saving Craft Tips for Busy Parents
Crafting with recycled household waste is liberating because you do not have to stress about wasting pristine art supplies.
Here are four simple rules I follow in our home to keep every session cheerful, mess-managed, and easy on your schedule:
- Start a Dedicated October Recycling Bin Early: Set aside a cardboard box in the garage starting mid-September strictly for clean milk jugs, egg cartons, paper tubes, and delivery boxes. When crafting afternoon arrives, your “store” is fully stocked.
- Always Use Cool-Touch Battery LEDs: Never place real flame tealights inside plastic bottles or cardboard rolls. Inexpensive battery LEDs provide warm flickering illumination while remaining 100% cool to touch and safe around curious toddlers.
- Keep Baby Wipes and Damp Washcloths Stationed: Keep a pack of baby wipes directly on the table. Wiping wet acrylic paint off little fingers before moving to the next step eliminates 90% of household paint smears on furniture.
- Celebrate the Imperfect Cuts: If an egg carton bat wing looks crooked or a milk jug ghost has lopsided eyes, leave it! Homemade charm is what makes childhood seasonal memories special.
🛡️ Child Safety & Safe Material Guidelines
We prioritize child safety above all else. When crafting with everyday recycled goods, keep these pediatrician-approved guidelines in mind:
* Clean and Sanitize All Containers: Wash all plastic milk jugs, food jars, and tin cans with hot soapy water and allow them to dry completely before handing them to children to prevent mold or bacterial growth.
* Inspect Metal and Glass Edges: If working with tin soup cans, ensure an adult inspects the inner rim for sharp burrs. Smooth any rough spots with fine sandpaper or cover edges with electrical tape before kids handle them.
* Supervise Hot Glue and Small Pieces: Always use low-temperature craft glue guns around elementary kids. For toddlers under age 3, skip small beads and loose buttons to prevent potential choking hazards, following CPSC guidelines.
❓ Real Mom Questions Answered (From Reddit & Parenting Forums)
Q1: What is the best glue for holding recycled cardboard together quickly?
As asked by moms on Reddit’s r/Parenting:
“Is there a glue that holds cardboard boxes together immediately without me standing there holding it for 10 minutes?”
Nancy’s Answer:
A low-temperature mini glue gun is the gold standard for immediate cardboard bond without waiting for wet PVA glue to dry. For independent toddler crafting without heat, heavy-duty craft glue dots or double-sided carpet tape hold heavy cardboard shapes instantly without any mess!
Q2: How can I make acrylic paint stick to slippery plastic milk jugs?
As asked by moms on Reddit’s r/crafts:
“My acrylic paint just pools or scratches right off plastic milk jugs. What am I doing wrong?”
Nancy’s Answer:
Wiping the plastic surface with a 50/50 mix of rubbing alcohol and water removes surface oils and helps paint adhere. Adding one drop of liquid dish soap into your acrylic paint also breaks surface tension, allowing smooth, streak-free brush coverage on slick plastics!
Q3: Are paper egg cartons safe for children with egg allergies?
As asked by parents on Reddit’s r/Parenting:
“Can kids with severe egg contact allergies use paper egg cartons for crafting?”
Nancy’s Answer:
If anyone in your household has an egg allergy, it is safest to avoid egg cartons that previously held raw shell eggs. Swap them for clean cardboard drink carriers from coffee shops or molded pulp packaging inserts from electronics delivery boxes, which offer the exact same shape and texture!
Q4: Can we leave recycled cardboard decorations outside in the rain?
As asked by moms on Reddit’s r/Mommit:
“Will recycled cardboard tombstones hold up if it sprinkles rain on Halloween night?”
Nancy’s Answer:
Standard cardboard and newspaper crafts will soften if exposed to heavy rain. Display cardboard tombstones and egg carton bats on covered porches or behind window panes, or brush two light coats of Mod Podge water-based sealer over them to provide splash resistance for dry autumn evenings!
🧹 Real-Mom Cleanup & Storage Checklist
- Station Wet Wipes on the Table: Keep an open container of unscented baby wipes right beside the craft tray for instant paint-finger wipes before doorknobs get touched.
- Prep a Box Cutting Station: Have an adult pre-cut thick cardboard tubes and milk jug backdoor flaps ahead of time so kids can dive straight into assembly.
- Flattened Delivery Box Drop Cloths: Lay out opened Amazon shipping boxes or brown paper grocery bags under painting stations for instant, disposable table protection.
- Flat Seasonal Storage: Pack sturdy milk jug lanterns and cereal box tombstones flat in a dry plastic storage tote in the garage to reuse year after year!