10 Easy DIY Potion Bottles for Spooky Halloween Magic

Brew up magical decor! Learn how to make 10 diy potion bottles with swirling galaxy glitter, bubbling brews, and vintage apothecary labels. 🎃
💬 The Real Mom Question (from Reddit’s r/crafts):
“I made potion bottles with water, food coloring, and pearl powder, but the glitter sinks like a rock to the bottom within 30 seconds unless you violently shake it non-stop!”
Nancy’s Fix: Water has zero surface viscosity! The secret to that hypnotic, slow-motion billowing swirl is adding light corn syrup, clear liquid glycerin, or clear school glue. Mixing 60% warm water with 40% corn syrup creates the perfect density to keep fine mica powder suspended in swirling ribbons for 10 to 15 minutes per gentle shake.
There is an irresistible enchantment in creating your own dusty apothecary shelf filled with bubbling green elixirs, shimmering fairy dust, and glowing dragon tears. Halloween potion crafting transforms everyday glass jars and recycled condiment bottles into museum-worthy wizard props that mesmerize children and party guests alike.
Best of all, making potion bottles is an incredible hands-on science and sensory activity that kids of all ages can customize with food-grade ingredients. Pair these spellbinding apothecary bottles with our popular kid-safe diy potion making, creative halloween crafts for kids, and clever budget-friendly halloween crafts for the ultimate haunted laboratory experience at home!
⚡ The Quick Mom Skim (TL;DR)
- The Corn Syrup Suspension Secret: Pure tap water causes mica powders and heavy glitter to sink immediately. Mixing in 40% light corn syrup creates the perfect fluid density for continuous, ethereal swirling effects.
- Sterilize Stored Display Liquids: Never store organic tea leaves, unpreserved tap water, or raw juices in sealed bottles. Add one tablespoon of rubbing alcohol or clear liquid soap to prevent mold spores from fermenting and popping corks.
- Decoupage Kraft Labels with Mod Podge: Brush matte Mod Podge behind and over paper labels to create an impermeable waterproof barrier that resists accidental drips and spills.
- Shatter-Safe Jars for Toddlers: For children under age 6, swap fragile vintage glassware for thick-walled canning mason jars or clear PET sensory bottles for worry-free magical play.
🏆 Nancy’s Top 3 Quick Picks for DIY Potion Bottles
| Category | Product Name | Why Busy Moms Love It | |
|---|---|---|---|
| Best Apothecary Glass Bottles | [PINIWON 12 Pack 16 oz Amber Glass Bottles, Boston Round Bottles | Sample Bottles with Black Poly Cone Caps](https://www.amazon.com/dp/B0D97TG1C9?tag=kaveeshshopus-20) | Rich amber Boston round glass bottles that give an authentic Victorian gothic apothecary look while keeping light-sensitive potions protected. |
| Best Antique Writable Labels | [Wisdompro Fancy Shape Kraft Label Stickers, 256 Pcs Gift Tag Stickers | 2 x 1.2 inch, Blank Writable Labels, Self Adhesive, Printable, for Essential Oil Bottles, Jars, Food Containers, Small](https://www.amazon.com/dp/B01IAY71UO?tag=kaveeshshopus-20) | Beautiful die-cut vintage kraft sticker labels that take ink and calligraphy markers without feathering or smudging. |
| Best Decoupage & Label Sealer | Mod Podge Waterbase Sealer, Glue and Finish (16-Ounce), CS11302 Matte Finish, 1 Pack | The essential crafting medium for distressing glassware, applying aged parchment labels, and creating waterproof seal coats. |
👀 People Also Read
🧺 Nancy’s Real-Mom Supply Swap Table
| Craft Supply Needed | Real-Mom Pantry / Household Swap | What to Buy if Starting Fresh | |
|---|---|---|---|
| Apothecary Bottles | Recycled maple syrup, olive oil, or hot sauce bottles | [PINIWON 12 Pack 16 oz Amber Glass Bottles, Boston Round Bottles | Sample Bottles with Black Poly Cone Caps](https://www.amazon.com/dp/B0D97TG1C9?tag=kaveeshshopus-20) |
| Potion Labels | Brown paper grocery bag scraps soaked in brewed coffee | [Wisdompro Fancy Shape Kraft Label Stickers, 256 Pcs Gift Tag Stickers | 2 x 1.2 inch, Blank Writable Labels, Self Adhesive, Printable, for Essential Oil Bottles, Jars, Food Containers, Small](https://www.amazon.com/dp/B01IAY71UO?tag=kaveeshshopus-20) |
| Specimen Jars | Empty 16-oz glass pickle or marinara jars | Ball – 16oz Regular Mouth Jars with Lids & Bands 12 Pack Jars, Large Glass Mason Jar for Food Storage with airtight Lid, 0.125 Gallon Glass Jar with Lid and Bands, Set of 12 | |
| Rustic Neck Wrap | Natural garden hemp cord or torn gauze strips | KINGLAKE Natural Jute Twine String 656 Feet 2mm Twine for Crafts Gift Wrapping Christmas Packing String for Arts Decoration, Wedding, Gardening | |
| Creepy Floaters | Cut-up black plastic drinking straw rings | Halloween Plastic Spiders, 120 PCS Fake Spider Decorations, Black Small Realistic Spiders, Little Spider Toys Prank Props for Crafts Halloween Home Party Favors Decoration Supplies 2 x 1.8 In, Black | |
| Label Weathering Paint | Burnt umber diluted instant coffee wash | Apple Barrel Acrylic Craft Paint Set, Matte Finish, Set of 8, 8 Fl Oz (Pack of 8), Assorted |
1. Shimmering Swirling Galaxy Potion Bottle
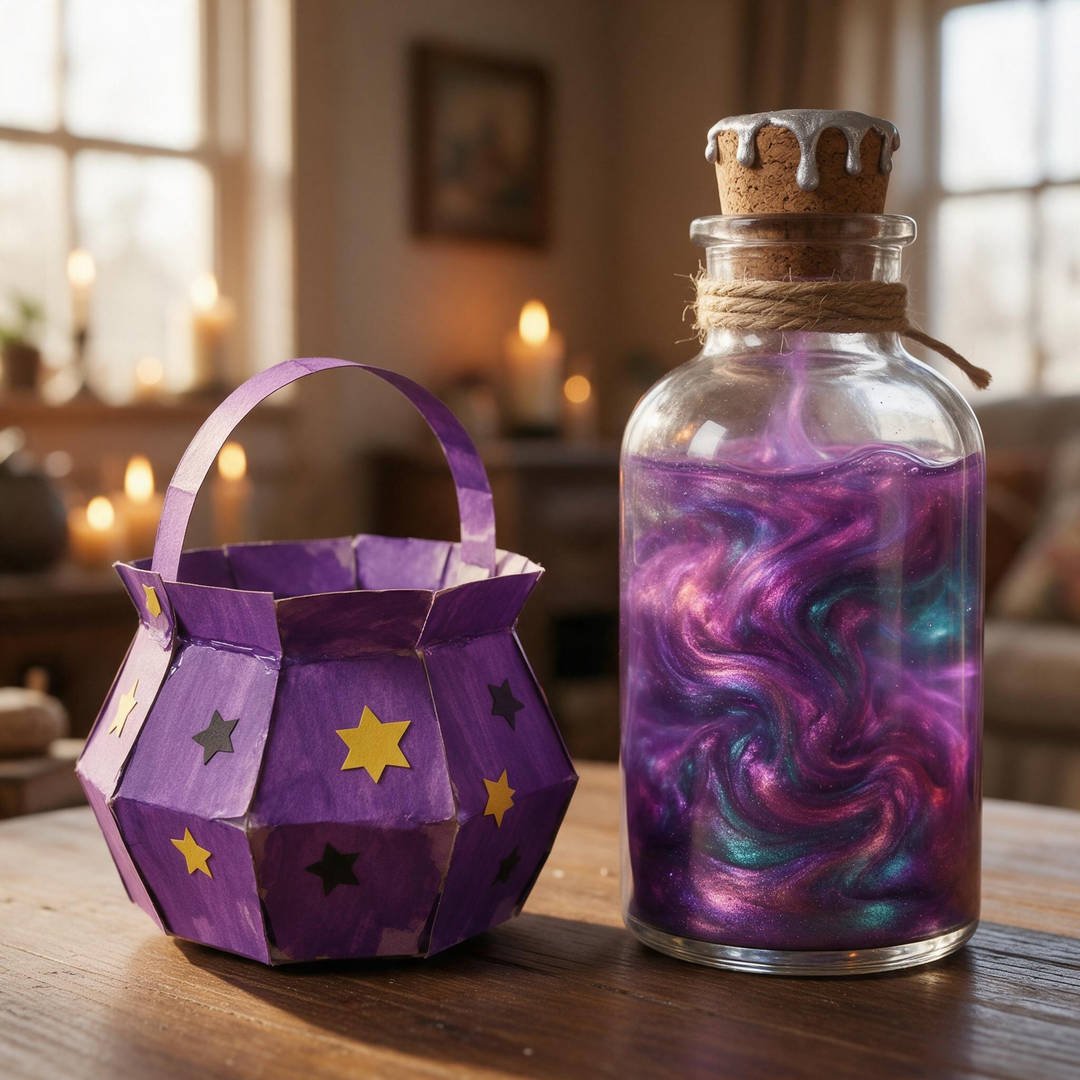
⏱️ Active & Dry Time: 15 mins active, 5 mins prep | 🧼 Mess Level: 2/5 | 👶 Age Adaptation: Ages 4+ (pouring corn syrup and stirring mica pigment) | 💰 Est. Cost: ~$2.50 total
💬 Real Mom Question (from Reddit’s r/crafts): “How do you keep mica powder from sinking to the bottom within seconds?”
Nancy’s Fix: Mix 60% warm water with 40% light corn syrup or clear liquid glycerin! The thick syrup suspends the mica flakes so they billow in radiant swirls for 15 minutes.
Few sensory experiences match the mesmerizing spectacle of swirling galaxy potions. A single gentle tip of the bottle sets off shimmering metallic purple, magenta, and celestial teal clouds that mimic a star nebula.
Kids can spend half an hour peacefully turning and tilting this magical sensory elixir on their nightstand before bed!
How to Craft It:
- Fill a clean bottle from the PINIWON Amber & Clear Glass Bottles Set halfway with warm distilled water.
- Add three drops of purple food coloring and a pea-sized scoop of cosmetic pearl or mica powder.
- Pour in light corn syrup or clear liquid school glue until the bottle is filled within 1/2 inch of the rim.
- Stir thoroughly using a wooden stick from Perfect Stix Jumbo Birchwood Craft Sticks to dissolve any clumped mica flakes.
- Seal the cork rim with Mod Podge Waterbase Sealer and wrap the bottle neck in rustic twine!
Amazon Craft Materials You Should Buy:
| Material Name | Buy on Amazon | |
|---|---|---|
| PINIWON 12 Pack 16 oz Amber Glass Bottles, Boston Round Bottles | Sample Bottles with Black Poly Cone Caps | Buy on Amazon → |
| Mod Podge Waterbase Sealer, Glue and Finish (16-Ounce), CS11302 Matte Finish, 1 Pack | Buy on Amazon → | |
| KINGLAKE Natural Jute Twine String 656 Feet 2mm Twine for Crafts Gift Wrapping Christmas Packing String for Arts Decoration, Wedding, Gardening | Buy on Amazon → |
👉 Watch the Shimmering Swirling Galaxy Potion Bottle Tutorial on YouTube
2. Glowing Dragon Tears Potion Bottle
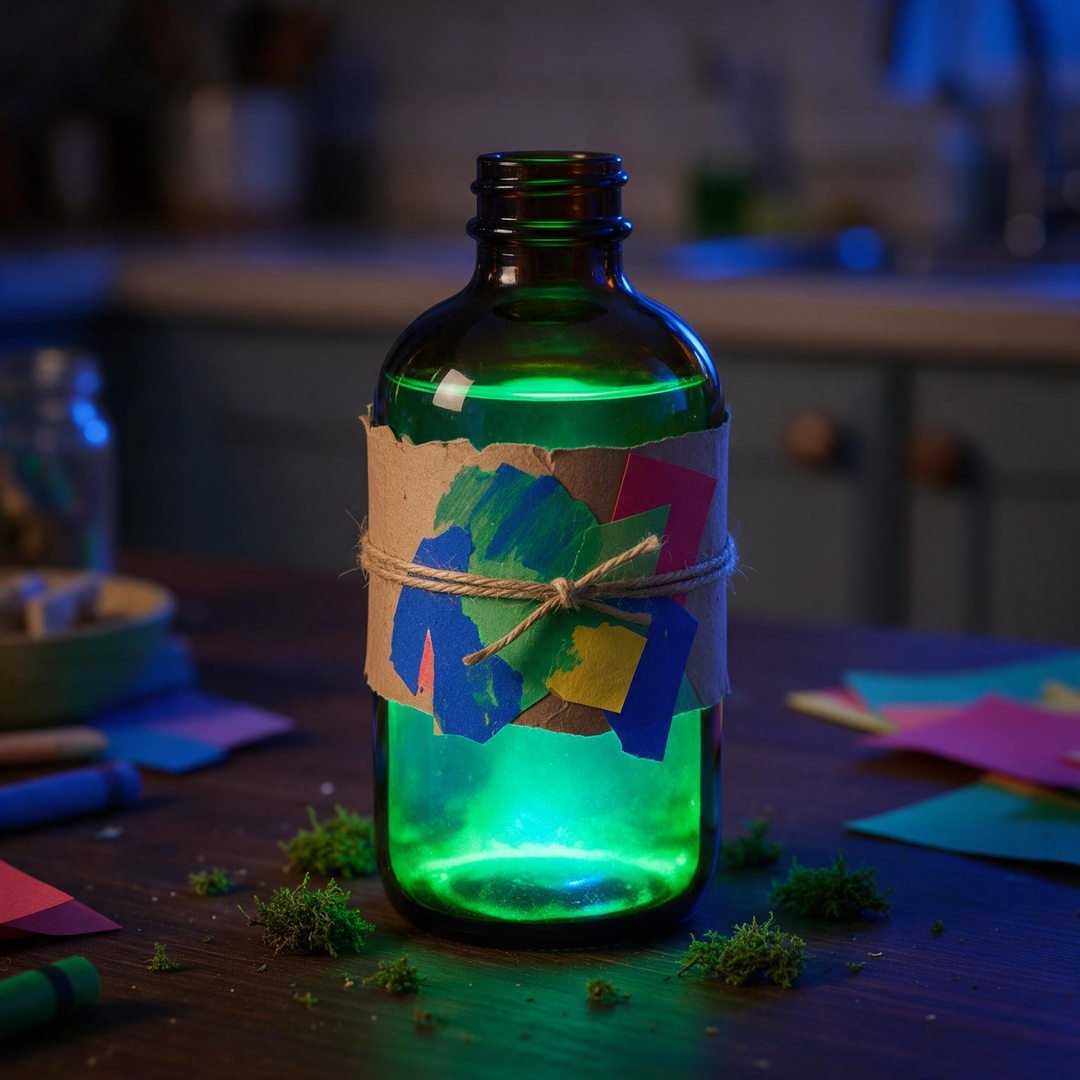
⏱️ Active & Dry Time: 15 mins active, 5 mins prep | 🧼 Mess Level: 1/5 | 👶 Age Adaptation: Ages 3+ (pipetting glowing liquid into dark apothecary bottles) | 💰 Est. Cost: ~$2.20 total
💬 Real Mom Question (from Reddit’s r/parenting): “How do you make potion bottles glow safely without snapping toxic glow sticks?”
Nancy’s Fix: Fill bottles with standard grocery store tonic water under a 395nm blacklight! The botanical quinine naturally fluoresces an electric radioactive cyan-blue with 100% food-grade safety.
When the room lights go down and a soft ultraviolet blacklight switches on, this vintage amber bottle transforms into a radioactive-looking apothecary artifact.
Because the glow comes from natural botanical quinine in grocery store tonic water, you never have to worry about harsh chemicals near your little wizards.
How to Craft It:
- Pour room-temperature tonic water into an amber bottle from PINIWON 12 Pack Amber Glass Bottles.
- Add one drop of yellow food dye so the liquid looks like an amber dragon elixir in normal daylight.
- Hand-write “Dragon Tears” on a kraft sticker from Wisdompro Fancy Shape Kraft Label Stickers using a fine black pen from posca Paint Markers.
- Affix the label to the center of the bottle and rub smooth with a thumb.
- Wrap KINGLAKE Natural Jute Twine around the neck and illuminate with a safe blacklight to watch it blaze electric blue!
Amazon Craft Materials You Should Buy:
| Material Name | Buy on Amazon | |
|---|---|---|
| PINIWON 12 Pack 16 oz Amber Glass Bottles, Boston Round Bottles | Sample Bottles with Black Poly Cone Caps | Buy on Amazon → |
| Wisdompro Fancy Shape Kraft Label Stickers, 256 Pcs Gift Tag Stickers | 2 x 1.2 inch, Blank Writable Labels, Self Adhesive, Printable, for Essential Oil Bottles, Jars, Food Containers, Small | Buy on Amazon → |
| KINGLAKE Natural Jute Twine String 656 Feet 2mm Twine for Crafts Gift Wrapping Christmas Packing String for Arts Decoration, Wedding, Gardening | Buy on Amazon → |
👉 Watch the Glowing Dragon Tears Potion Bottle Tutorial on YouTube
3. Apothecary Bubbling Witches Brew Bottle
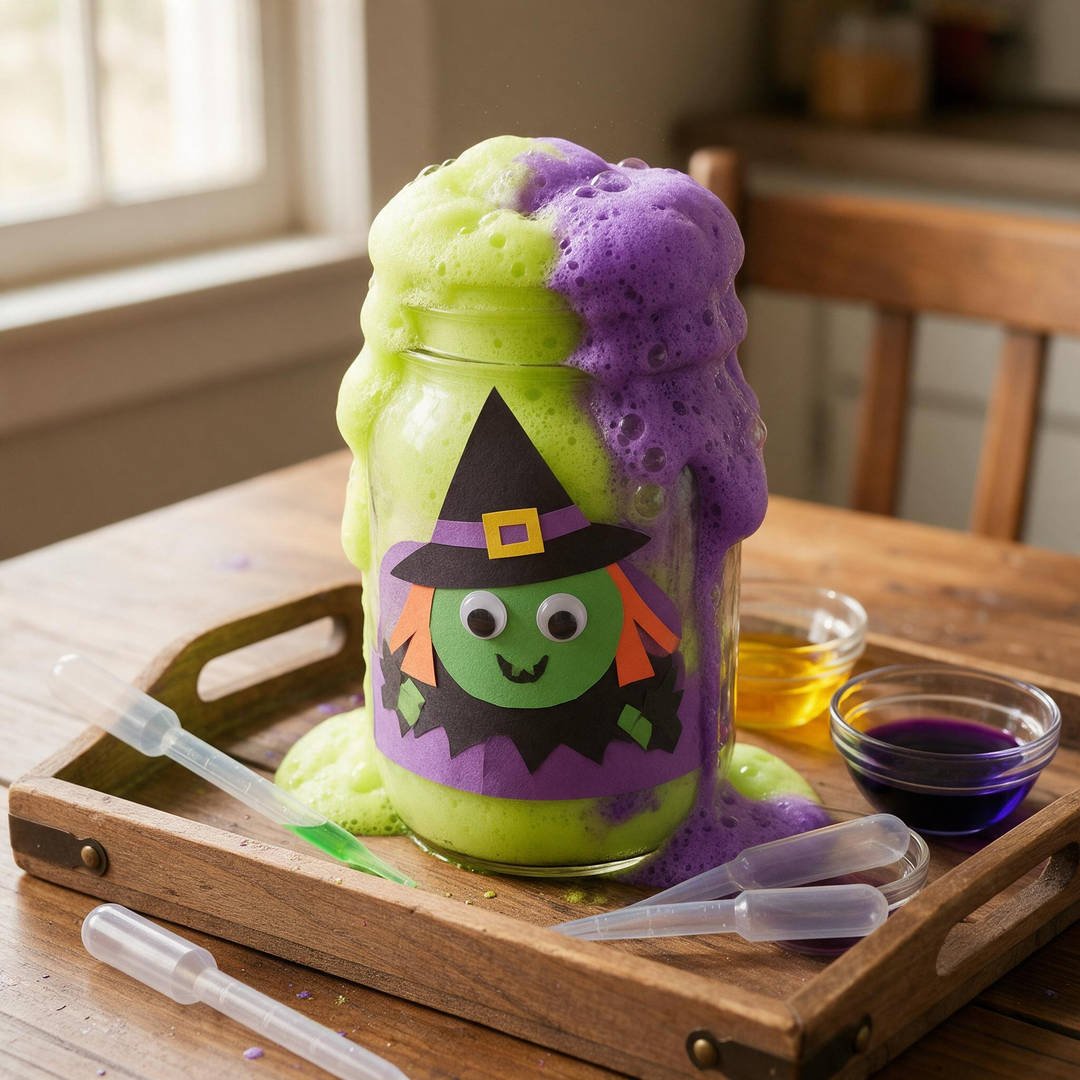
⏱️ Active & Dry Time: 20 mins active, 10 mins prep | 🧼 Mess Level: 3/5 | 👶 Age Adaptation: Ages 4+ (squirting colored vinegar into baking soda bottles) | 💰 Est. Cost: ~$2.00 total
💬 Real Mom Question (from Reddit’s r/toddlers): “Can you make potion bottles that actively bubble and foam without dangerous chemicals?”
Nancy’s Fix: Pre-load the bottle with two tablespoons of baking soda, dish soap, and purple glitter! When kids squirt in warm green vinegar with an eye dropper, it erupts into an overflowing fizzy witches cauldron.
This bubbling laboratory experiment turns your kitchen counter into an active potions classroom where kids cast fizzing, overflowing spells.
Watching thick velvety foam creep up the bottle neck and spill over the glass rim provides unmatched tactile and visual excitement!
How to Craft It:
- Place a sturdy jar from Ball 16oz Regular Mouth Mason Jars inside a rimmed baking sheet or tray.
- Spoon two tablespoons of baking soda and one squirt of liquid dish soap into the bottom of the jar.
- Sprinkle in a generous pinch of fine cosmetic glitter or food sprinkles.
- In a separate cup, mix white distilled vinegar with green and purple food dye.
- Hand your child an eye dropper or small plastic pitcher, let them chant their favorite spell, and pour the vinegar inside to watch the bubbling eruption!
Amazon Craft Materials You Should Buy:
| Material Name | Buy on Amazon |
|---|---|
| Ball – 16oz Regular Mouth Jars with Lids & Bands 12 Pack Jars, Large Glass Mason Jar for Food Storage with airtight Lid, 0.125 Gallon Glass Jar with Lid and Bands, Set of 12 | Buy on Amazon → |
| KINGLAKE Natural Jute Twine String 656 Feet 2mm Twine for Crafts Gift Wrapping Christmas Packing String for Arts Decoration, Wedding, Gardening | Buy on Amazon → |
| Apple Barrel Acrylic Craft Paint Set, Matte Finish, Set of 8, 8 Fl Oz (Pack of 8), Assorted | Buy on Amazon → |
👉 Watch the Apothecary Bubbling Witches Brew Bottle Tutorial on YouTube
4. Distressed Vintage Spellcaster Label Potion Bottle

⏱️ Active & Dry Time: 25 mins active, 20 mins dry | 🧼 Mess Level: 2/5 | 👶 Age Adaptation: Ages 6+ (dry-brushing black paint on glass and distressing kraft labels) | 💰 Est. Cost: ~$2.80 total
💬 Real Mom Question (from Reddit’s r/diy): “Printed vintage potion labels peel and curl off curved glass surfaces.”
Nancy’s Fix: Brush a generous coat of matte Mod Podge onto the glass, press the kraft label down firmly, and brush two coats directly over the top to create a wipe-clean waterproof seal.
If you love the authentic look of 18th-century apothecary artifacts salvaged from a forgotten potion cellar, this distressed bottle is your centerpiece.
Older elementary kids and teens will relish using dry-brush weathering techniques to make brand-new glass look centuries old!
How to Craft It:
- Dip a dry foam sponge brush into black paint from the Apple Barrel Acrylic Craft Paint Set and dab most of it off on a paper towel.
- Lightly stipple the dry paint around the shoulders and base of a bottle from PINIWON Amber Glass Bottles.
- Tear the edges of a Wisdompro Fancy Shape Kraft Label Sticker and shade the borders with brown paint.
- Write an ominous Latin potion title like “Elixir of Night” using posca Paint Markers.
- Brush two generous coats of Mod Podge Matte Sealer over the label and wind jute twine tightly around the neck!
Amazon Craft Materials You Should Buy:
| Material Name | Buy on Amazon | |
|---|---|---|
| Wisdompro Fancy Shape Kraft Label Stickers, 256 Pcs Gift Tag Stickers | 2 x 1.2 inch, Blank Writable Labels, Self Adhesive, Printable, for Essential Oil Bottles, Jars, Food Containers, Small | Buy on Amazon → |
| Mod Podge Waterbase Sealer, Glue and Finish (16-Ounce), CS11302 Matte Finish, 1 Pack | Buy on Amazon → | |
| Apple Barrel Acrylic Craft Paint Set, Matte Finish, Set of 8, 8 Fl Oz (Pack of 8), Assorted | Buy on Amazon → |
👉 Watch the Distressed Vintage Spellcaster Label Potion Bottle Tutorial on YouTube
5. Spider Venom Polyjuice Potion Bottle
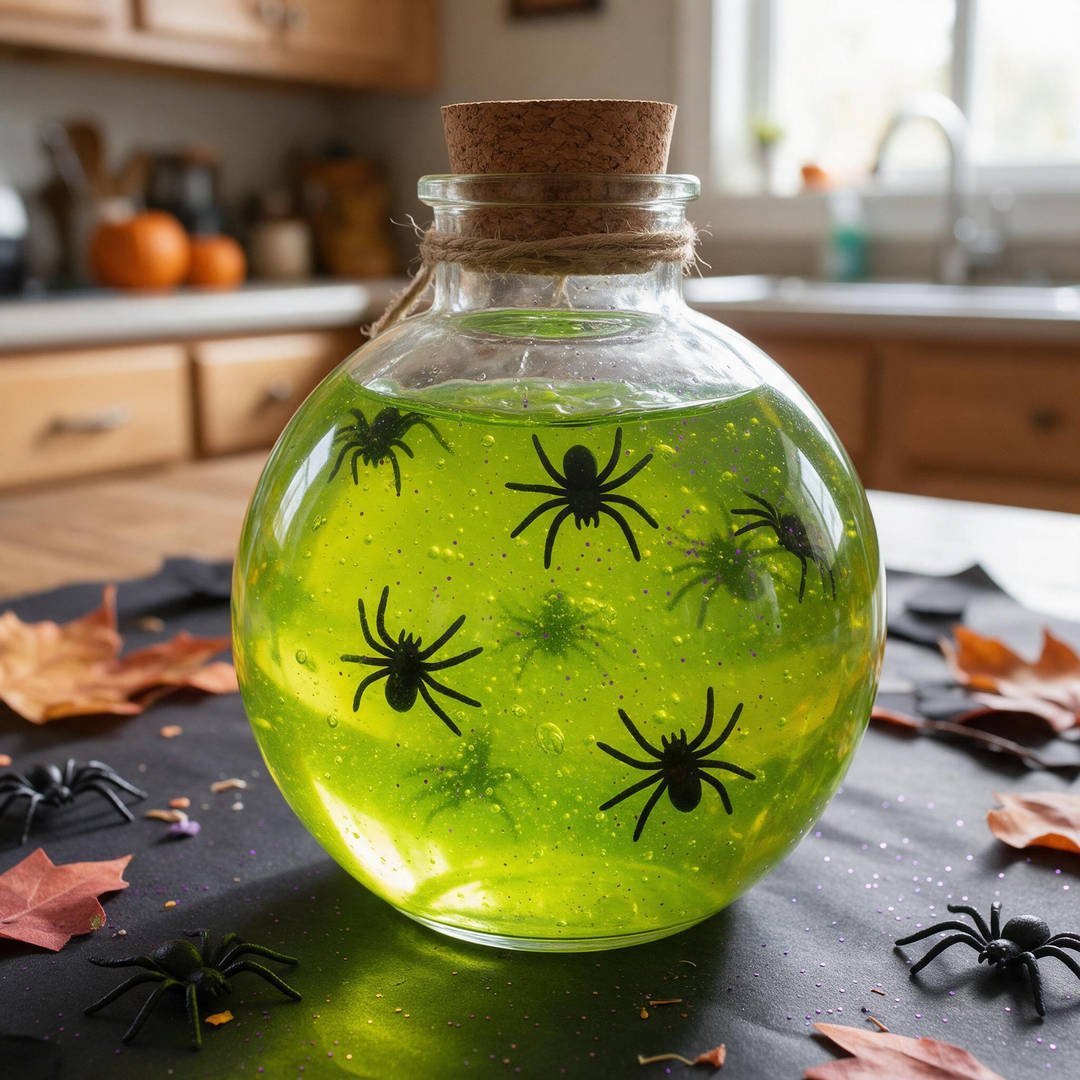
⏱️ Active & Dry Time: 15 mins active, 5 mins prep | 🧼 Mess Level: 1/5 | 👶 Age Adaptation: Ages 3+ (pushing creepy plastic spiders into thick green hair gel) | 💰 Est. Cost: ~$2.20 total
💬 Real Mom Question (from Reddit’s r/halloween): “Plastic spiders sink directly to the bottom instead of floating eerily in the middle.”
Nancy’s Fix: Fill the bottle with clear green dollar-store hair gel instead of water! The thick gel holds plastic spiders permanently suspended at varying heights throughout the bottle.
Nothing says creepy witch apothecary quite like a bubbling bottle of potent spider venom. The secret to keeping creepy crawlers suspended at mid-height is thick hair gel!
Preschoolers love using craft sticks to guide each tiny plastic spider into position and adding swirls of purple fairy dust.
How to Craft It:
- Squeeze clear or lime-green hair gel into a glass bottle until it is two-thirds full.
- Drop in six to eight small spiders from Halloween Plastic Spiders Set.
- Use a wooden stick from Perfect Stix Jumbo Birchwood Craft Sticks to push spiders downward, spacing them at different depths.
- Sprinkle in a pinch of purple cosmetic glitter and stir gently to create venom ribbons without air bubbles.
- Seal the bottle with its cork or cap, tie a loop of jute cord, and attach a handwritten “Spider Venom” label!
Amazon Craft Materials You Should Buy:
| Material Name | Buy on Amazon | |
|---|---|---|
| Halloween Plastic Spiders, 120 PCS Fake Spider Decorations, Black Small Realistic Spiders, Little Spider Toys Prank Props for Crafts Halloween Home Party Favors Decoration Supplies 2 x 1.8 In, Black | Buy on Amazon → | |
| PINIWON 12 Pack 16 oz Amber Glass Bottles, Boston Round Bottles | Sample Bottles with Black Poly Cone Caps | Buy on Amazon → |
| Perfect Stix Jumbo Birchwood Craft Sticks, 6 x 3/4 inches, Natural, 500 Count, Made in USA | Buy on Amazon → |
👉 Watch the Spider Venom Polyjuice Potion Bottle Tutorial on YouTube
6. Fairy Dust Sparkling Glitter Potion Bottle
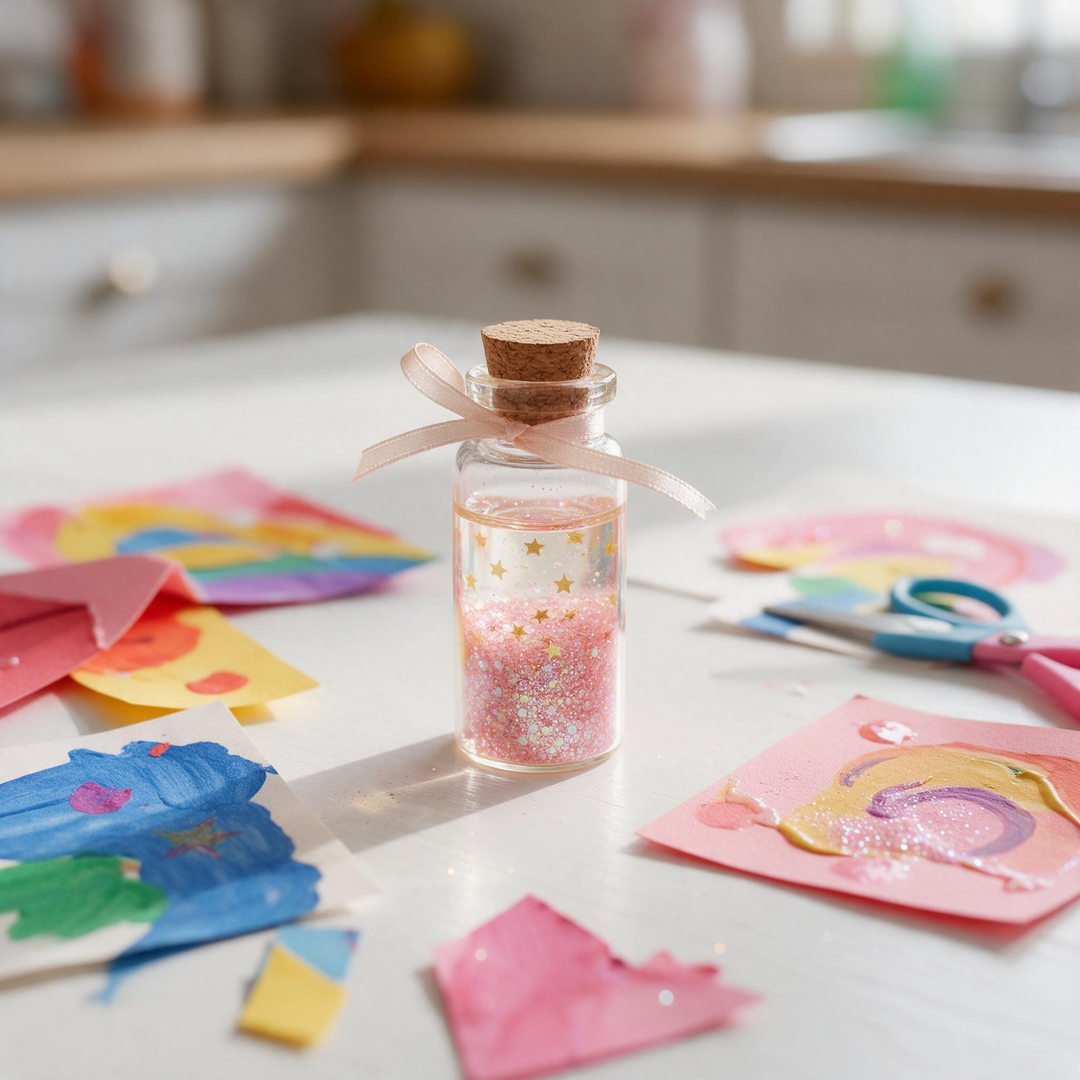
⏱️ Active & Dry Time: 15 mins active, 5 mins prep | 🧼 Mess Level: 1/5 | 👶 Age Adaptation: Ages 4+ (funneling colorful glitter and stars into mini potion vials) | 💰 Est. Cost: ~$1.80 total
💬 Real Mom Question (from Reddit’s r/parenting): “How do you keep fine glitter from sticking to dry glass walls?”
Nancy’s Fix: Fill the vial with clear baby oil or mineral oil! Baby oil lets ultra-fine iridescent glitter drift down in slow, dreamy drifts without clinging static to the glass.
Not every potion in the apothecary has to be creepy—this sparkling fairy dust vial brings pure magical wonder to young storytellers.
Using lightweight mineral oil allows the tiny star sequins and iridescent pastel glitter to float in slow, dreamy suspensions that capture the light!
How to Craft It:
- Use a small paper funnel to pour ultra-fine iridescent glitter and miniature star confetti into a small corked vial.
- Fill the remaining space with clear baby oil or mineral oil, leaving an 1/8-inch air bubble at the top.
- Apply a drop of Elmer’s Liquid School Glue or Mod Podge Waterbase Sealer around the cork stopper and press firmly into the bottle neck.
- Tie a delicate strand of KINGLAKE Natural Jute Twine around the cork.
- Invert the bottle gently to watch the sparkling fairy dust create a cascading waterfall of miniature shimmering stars!
Amazon Craft Materials You Should Buy:
| Material Name | Buy on Amazon |
|---|---|
| Mod Podge Waterbase Sealer, Glue and Finish (16-Ounce), CS11302 Matte Finish, 1 Pack | Buy on Amazon → |
| Elmer’s Liquid School Glue, Slime & Craft, Safe and Non-Toxic, Washable, White, 4 Ounces Each, 12 Count – For Classroom, Home, Office, Teacher Supplies, #1 Teacher Brand | Buy on Amazon → |
| KINGLAKE Natural Jute Twine String 656 Feet 2mm Twine for Crafts Gift Wrapping Christmas Packing String for Arts Decoration, Wedding, Gardening | Buy on Amazon → |
👉 Watch the Fairy Dust Sparkling Glitter Potion Bottle Tutorial on YouTube
7. Creepy Floating Eye Specimen Potion Jar
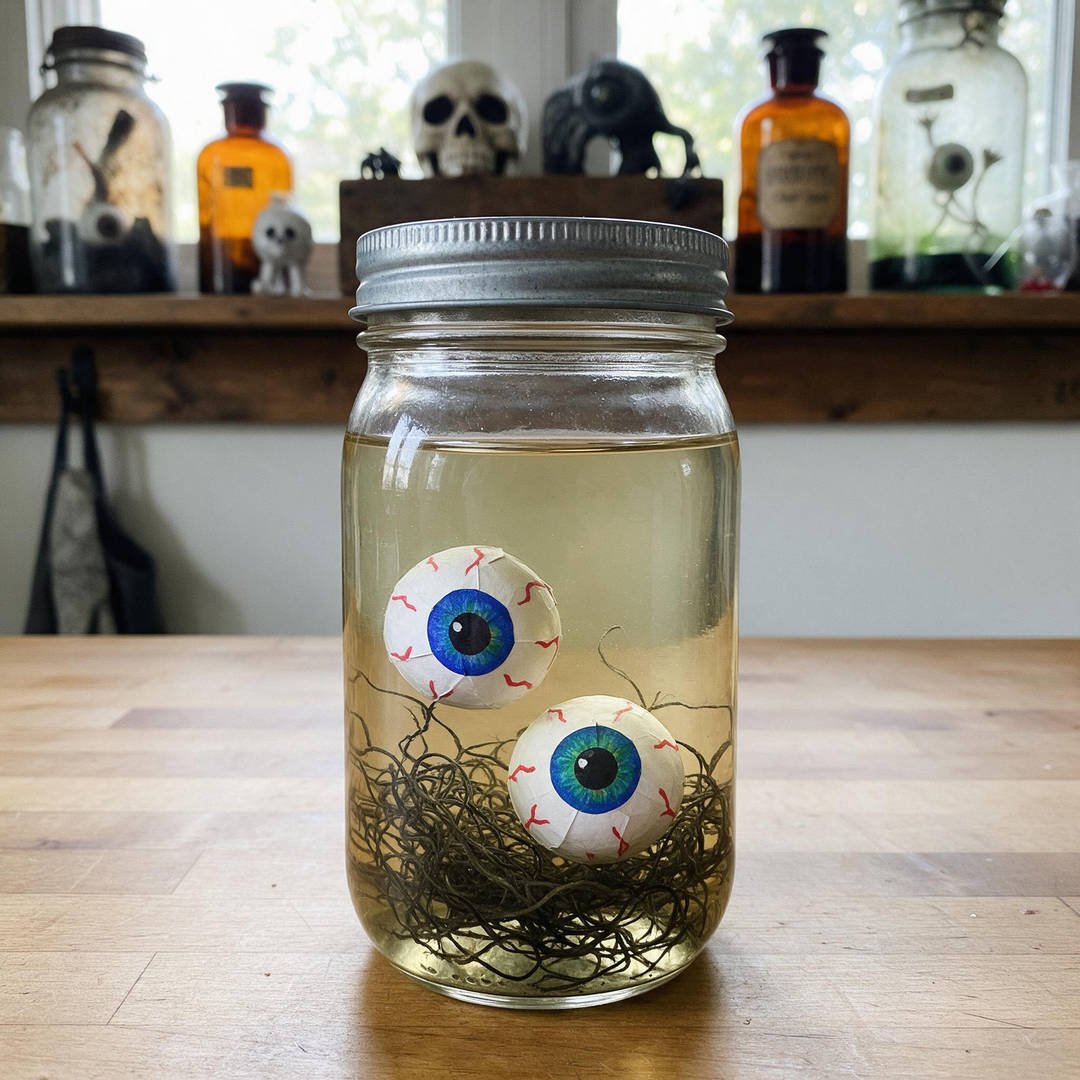
⏱️ Active & Dry Time: 20 mins active, 10 mins prep | 🧼 Mess Level: 2/5 | 👶 Age Adaptation: Ages 5+ (drawing bloodshot red veins on eyeball spheres) | 💰 Est. Cost: ~$2.60 total
💬 Real Mom Question (from Reddit’s r/halloween): “How do you make eyeball props stay submerged under water in specimen jars?”
Nancy’s Fix: Plastic eyeballs float! Anchor them to dark green Spanish moss or submerged glass craft marbles at the bottom of the jar using a drop of waterproof glue.
Every mad scientist’s laboratory needs an unsettling specimen jar preserving mysterious monster eyeballs in murky amber fluid.
Using heavy canning jars ensures this spooky prop won’t tip over on a crowded treat table or classroom science counter.
How to Craft It:
- Fill a heavy jar from Ball 16oz Regular Mouth Mason Jars three-quarters full of tap water.
- Add one drop of yellow food dye and half a drop of green food dye to create an authentic preserved specimen tint.
- Take two large white ping-pong balls or spherical eyeballs and peel backing off FEBSNOW Googly Eyes to make pupils.
- Draw fine red squiggly veins across the whites using a fine red marker from posca Paint Markers.
- Anchor the eyeballs among dark moss strands at the bottom and screw the metal lid ring down tight!
Amazon Craft Materials You Should Buy:
| Material Name | Buy on Amazon |
|---|---|
| Ball – 16oz Regular Mouth Jars with Lids & Bands 12 Pack Jars, Large Glass Mason Jar for Food Storage with airtight Lid, 0.125 Gallon Glass Jar with Lid and Bands, Set of 12 | Buy on Amazon → |
| FEBSNOW 200Pcs 15mm-30mm Googly Wiggle Eyes Self Adhesive for DIY Crafts | Buy on Amazon → |
| posca Paint Markers, 3M Fine Point Acrylic Paint Pens with Reversible Tips, Art Supplies For Gifts, Decorations, Fabric, Metal, Glass, Wood and Canvas, Set of 24 | Buy on Amazon → |
👉 Watch the Creepy Floating Eye Specimen Potion Jar Tutorial on YouTube
8. Crackle Glaze Vampire Blood Elixir Bottle
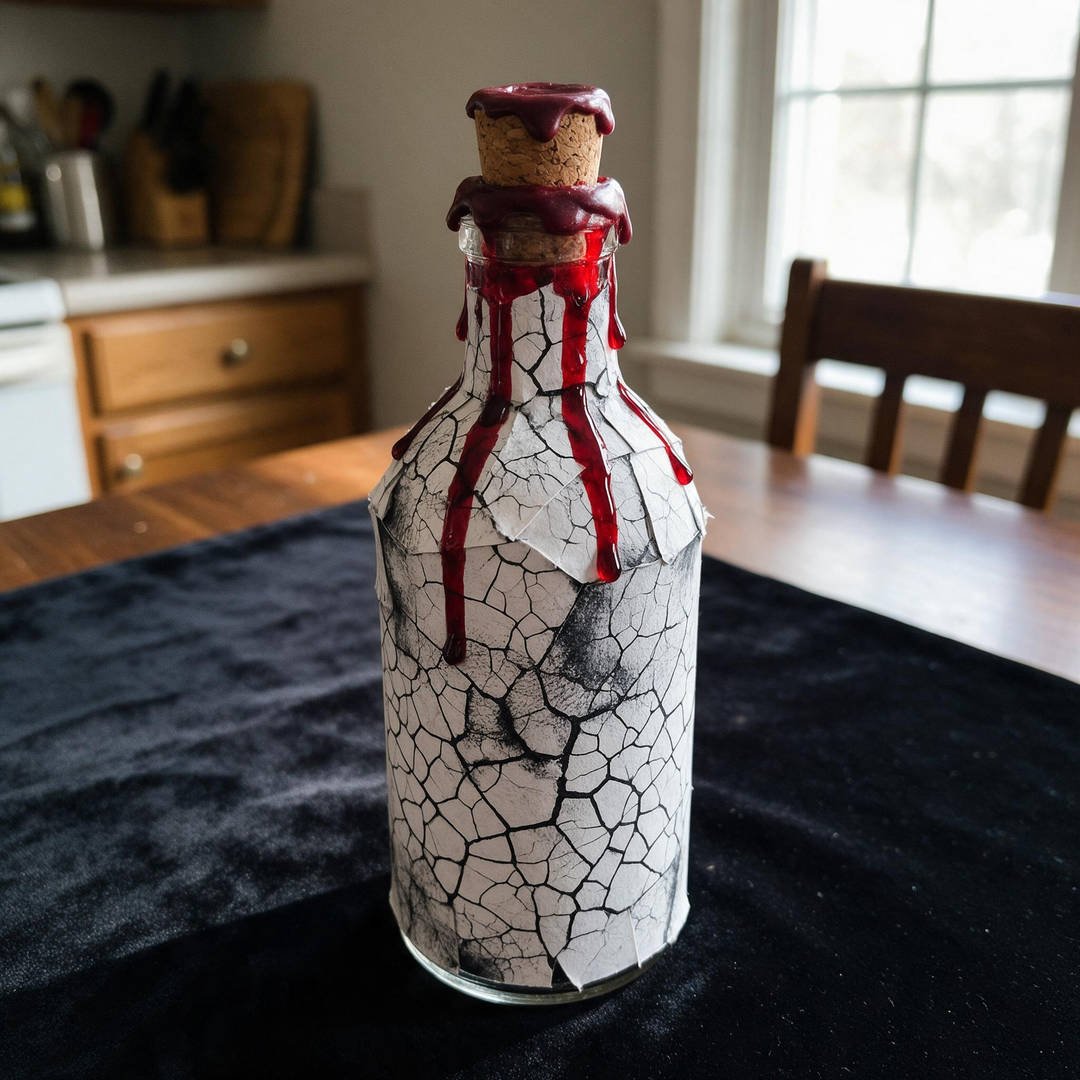
⏱️ Active & Dry Time: 30 mins active, 25 mins dry | 🧼 Mess Level: 2/5 | 👶 Age Adaptation: Ages 6+ (painting Elmer’s glue crackle glaze and dark red blood drips) | 💰 Est. Cost: ~$2.90 total
💬 Real Mom Question (from Reddit’s r/diy): “How do you get a realistic antique crackle texture without expensive specialty crackle medium?”
Nancy’s Fix: Apply a thick coat of white Elmer’s liquid school glue to the bottle; while the glue is still tacky, paint over it with black acrylic paint! As it dries, deep antique crackles form instantly.
Nothing commands attention on a Halloween mantle quite like an ancient vampire blood elixir dripping in glossy crimson gore.
The magic crackle finish is created with plain white school glue—giving you high-end theatrical props for pennies on the dollar!
How to Craft It:
- Brush a generous layer of Elmer’s Liquid School Glue across a clear glass bottle.
- While the glue is semi-tacky (about 3 minutes), brush flat black paint from Apple Barrel Acrylic Craft Paint Set lightly over the surface in one direction.
- Watch in amazement as dramatic porcelain crackles appear as the paint dries!
- Mix two tablespoons of corn syrup with red and blue food coloring to make thick, realistic faux vampire blood.
- Dribble the glossy red mixture down the neck from the cork stopper, letting it pool naturally over the antique crackles!
Amazon Craft Materials You Should Buy:
| Material Name | Buy on Amazon |
|---|---|
| Elmer’s Liquid School Glue, Slime & Craft, Safe and Non-Toxic, Washable, White, 4 Ounces Each, 12 Count – For Classroom, Home, Office, Teacher Supplies, #1 Teacher Brand | Buy on Amazon → |
| Apple Barrel Acrylic Craft Paint Set, Matte Finish, Set of 8, 8 Fl Oz (Pack of 8), Assorted | Buy on Amazon → |
| Mod Podge Waterbase Sealer, Glue and Finish (16-Ounce), CS11302 Matte Finish, 1 Pack | Buy on Amazon → |
👉 Watch the Crackle Glaze Vampire Blood Elixir Bottle Tutorial on YouTube
9. Mermaid Tears Layered Sensory Potion Bottle

⏱️ Active & Dry Time: 15 mins active, 5 mins prep | 🧼 Mess Level: 1/5 | 👶 Age Adaptation: Ages 3+ (tilting dual-density liquid layers to watch color waves) | 💰 Est. Cost: ~$2.10 total
💬 Real Mom Question (from Reddit’s r/preschool): “Why do colored water and cooking oil turn murky and greasy over time?”
Nancy’s Fix: Use clear baby mineral oil colored with oil-based candy dye on top and distilled water colored with neon food dye on the bottom! They remain separated in crystal-clear layers forever.
This dual-layer ocean potion creates a mesmerizing rolling wave effect when tilted horizontally, showing children the wonders of immiscible liquids.
The bright turquoise oil gliding effortlessly over vibrant electric magenta water makes this bottle a soothing sensory favorite for toddlers and calm-down corners!
How to Craft It:
- Fill a glass bottle halfway with distilled water and tint with three drops of neon pink or magenta food dye.
- In a small cup, tint clear baby oil or mineral oil with oil candy coloring to make an electric aqua blue.
- Slowly pour the blue oil down the inside neck of the bottle so it floats gently atop the pink water.
- Leave 1/2 inch of space at the top so the liquids have room to create bubbling wave breaks when rocked.
- Coat the cork stopper with Mod Podge Waterbase Sealer, insert firmly, and tie with KINGLAKE Jute Twine!
Amazon Craft Materials You Should Buy:
| Material Name | Buy on Amazon | |
|---|---|---|
| PINIWON 12 Pack 16 oz Amber Glass Bottles, Boston Round Bottles | Sample Bottles with Black Poly Cone Caps | Buy on Amazon → |
| Mod Podge Waterbase Sealer, Glue and Finish (16-Ounce), CS11302 Matte Finish, 1 Pack | Buy on Amazon → | |
| KINGLAKE Natural Jute Twine String 656 Feet 2mm Twine for Crafts Gift Wrapping Christmas Packing String for Arts Decoration, Wedding, Gardening | Buy on Amazon → |
👉 Watch the Mermaid Tears Layered Sensory Potion Bottle Tutorial on YouTube
10. Ancient Mummy Dust Sand Potion Bottle
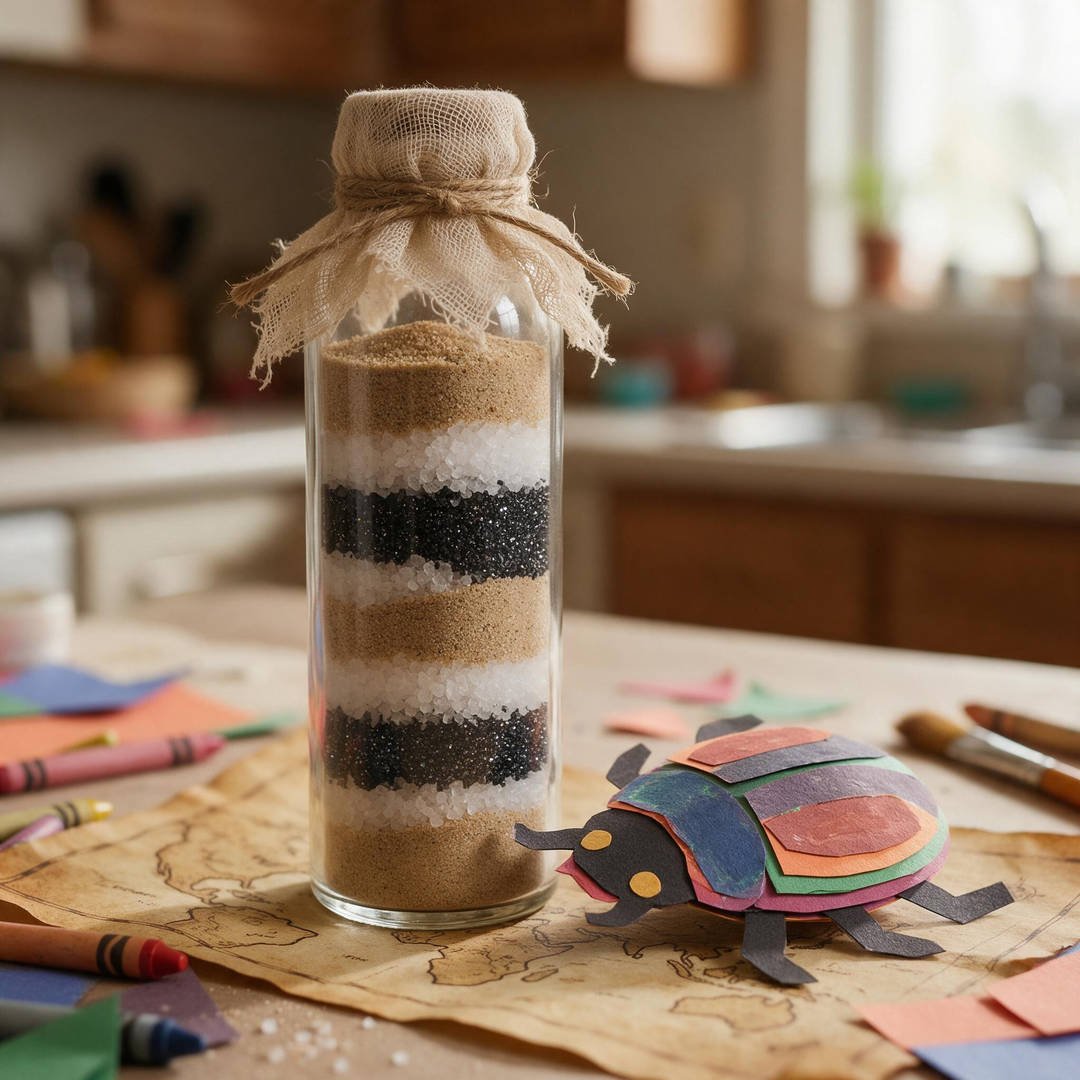
⏱️ Active & Dry Time: 20 mins active, 10 mins prep | 🧼 Mess Level: 1/5 | 👶 Age Adaptation: Ages 4+ (funneling layered textured sands and tying rustic cheesecloth wraps) | 💰 Est. Cost: ~$2.30 total
💬 Real Mom Question (from Reddit’s r/crafts): “How do you keep dry layered sand from mixing into a solid gray blob when moved?”
Nancy’s Fix: Fill the bottle completely to the absolute brim so there is zero air gap beneath the cork stopper! Without room to shift, the sand layers stay crisp and distinct during transport.
Evoking the ancient tombs of pharaohs, this layered sand potion bottle brings archaeological mystery to your spooky Halloween collection.
Tightly packing alternating strata of natural sand, coarse sea salt, and black charcoal glitter creates razor-sharp decorative bands that never spill.
How to Craft It:
- Place a small funnel into a tall cylinder glass bottle from PINIWON Bottles.
- Spoon in a 1-inch layer of natural desert tan craft sand, tapping the bottle base gently on the table to level the band.
- Add a 1/2-inch layer of sparkling white sea salt crystals.
- Spoon in a 1/4-inch band of black charcoal cosmetic glitter.
- Repeat the strata all the way to the rim, seal the cork tight, and wrap the neck in aged medical gauze tied with KINGLAKE Natural Jute Twine!
Amazon Craft Materials You Should Buy:
| Material Name | Buy on Amazon | |
|---|---|---|
| PINIWON 12 Pack 16 oz Amber Glass Bottles, Boston Round Bottles | Sample Bottles with Black Poly Cone Caps | Buy on Amazon → |
| Wisdompro Fancy Shape Kraft Label Stickers, 256 Pcs Gift Tag Stickers | 2 x 1.2 inch, Blank Writable Labels, Self Adhesive, Printable, for Essential Oil Bottles, Jars, Food Containers, Small | Buy on Amazon → |
| KINGLAKE Natural Jute Twine String 656 Feet 2mm Twine for Crafts Gift Wrapping Christmas Packing String for Arts Decoration, Wedding, Gardening | Buy on Amazon → |
👉 Watch the Ancient Mummy Dust Sand Potion Bottle Tutorial on YouTube
❓ Real Mom Questions Answered (From Reddit & Parenting Forums)
How do I prevent potion liquids from smelling sour or developing mold over time?
💬 Mom Dilemma (from Reddit’s r/halloween): “We spent all weekend making gorgeous decorative potion jars for our mantel, but three weeks later they smelled like rotten pond water.”
Nancy’s Fix: Bacteria and fungal spores flourish in warm, stagnant tap water—especially if you added organic glitter, plant twigs, or sugar-based syrups! Always use distilled water as your base. Add one tablespoon of 70% isopropyl rubbing alcohol, two drops of clear tea tree essential oil, or a squirt of antibacterial liquid hand soap to your water mix. Then seal the cork stopper permanently into the glass neck using a bead of Mod Podge Waterbase Sealer so airborne spores cannot enter!
What is the safest way to achieve the look of antique dripped sealing wax?
💬 Mom Dilemma (from Reddit’s r/crafts): “I want that cool medieval wax seal look dripping down the neck of our potion bottles, but real melted wax is a severe burn risk for kids.”
Nancy’s Fix: Ditch real flame-melted sealing wax! You can create 100% kid-safe faux wax drips using colored hot glue sticks on low-temperature settings or thick craft glue mixed with acrylic paint. For the safest toddler method, paint Elmer’s Liquid School Glue mixed with crimson or black paint from Apple Barrel Acrylic Craft Paint Set onto the cork rim using a craft stick. It drips downward realistically and dries with a glossy, rubbery faux-wax texture with zero burns!
How do I make aged parchment labels without burning paper edges with matches?
💬 Mom Dilemma (from Reddit’s r/diy): “Pinterest tutorials say to singe the edges of paper labels with a lighter, but I don’t want open flames around my kids during craft time.”
Nancy’s Fix: Fire is totally unnecessary for gorgeous antique labels! Use pre-cut die-cut labels from Wisdompro Fancy Shape Kraft Label Stickers. Tear the outer perimeter gently with your fingers to create natural ragged deckle edges. Then dip a dry foam makeup wedge or paper towel into diluted dark brown paint or brewed black tea and dab it along the torn paper edges. It creates the identical centuries-old burned parchment effect safely in 60 seconds!
🧹 Real-Mom Cleanup & Storage Checklist
- Funnel & Pipette Station Setup: Conduct all potion filling on a wide plastic tray lined with paper towels. Provide children with plastic funnels and eye dropper pipettes to eliminate countertop puddles when pouring colored liquids.
- Permanent Cork Gluing: Before storing potion bottles away in storage bins, ensure the cork or cap is glued tight with waterproof adhesive. Once sealed, jars can be stored upright without risk of evaporation or accidental leaks.
- Bubble Wrap Bottle Dividers: When storing glass potion bottles after Halloween, wrap each vessel individually in clean bubble wrap and pack them snugly inside a sturdy plastic tote box with cardboard dividers.
- Instant Food Dye Skin Cleanser: If kids get food dye or colored paint on their fingertips while brewing potions, rub hands with a dab of shaving cream or baking soda and hand soap—the foaming lather lifts stubborn dye pigments from skin instantly.
Healthy Play & Child Safety Guidelines
All kids craft activities should be enjoyed with attentive adult supervision. Keep small decorative items like plastic spiders, googly eyes, sequins, and glass beads away from infants and mouthing toddlers to prevent choking hazards, following recommendations from the American Academy of Pediatrics (HealthyChildren.org). Always choose non-toxic, child-safe craft supplies conforming to ASTM D-4236 standards under the guidelines of the Consumer Product Safety Commission (CPSC).