10 Easy Halloween Craft Ideas for Kids (Fun & Spooky DIYs)

Discover 10 easy halloween craft ideas for kids that make spooky holiday memories with zero stress, mess-free pantry swaps, and budget supplies! 🎃
💬 The Real Mom Question (from Reddit’s r/Parenting):
“I have a 3-year-old and a 7-year-old. How do I find Halloween crafts they can both do together without the little one eating paint or the older one getting completely bored in five minutes?”
Nancy’s Fix: The secret to multi-age sanity is ‘Parallel Crafting’ with adaptable pantry staples like paper plates and coffee filters! Give your toddler washable tempera paint sticks and peel-and-stick googly eyes, while your older child handles scissor fringe cuts and intricate marker details at the very same table!
Every October, my kitchen table turns into a flurry of black construction paper scraps, tangled yarn, and crooked googly eyes. And every year, I remind myself of one golden truth: the best Halloween memories are never about Pinterest-perfect results—they are about the laughter, sticky fingers, and pure pride on your child’s face when they show off their spooky creation.
If you have ever felt overwhelmed by elaborate online tutorials that demand a trip to three specialty stores, take a deep breath. These 10 fail-proof holiday crafts rely on affordable household basics, dry quickly, and keep kids from toddlerhood to upper elementary blissfully entertained. Pair them with our popular quick halloween crafts for busy moms and budget-friendly dollar store craft challenge to build the ultimate autumn crafting week!
⚡ The Quick Mom Skim (TL;DR)
- The Solid Paint Stick Lifesaver: Swap runny bottled tempera paints for Kwik Stix Solid Tempera Paint Sticks. They glide like butter, produce rich opaque coverage, and dry completely in 90 seconds flat.
- Peel-and-Stick Eye Sanity: Skip messy liquid glue bottles and loose wiggle eyes that slide off tilted tables. A tub of Febsnow 200pcs Self-Adhesive Googly Wiggle Eyes lets tiny toddler fingers stick eyes independently with zero cleanup.
- Pantry Base Versatility: Standard uncoated paper plates, clean egg cartons, and white coffee filters make up 70% of high-impact kid projects without spending a dime on specialized craft blanks.
- Keepsake Preservation Hack: Coat salt dough ornaments and paper plate projects with a light layer of Mod Podge Waterbase Sealer so you can pack them away in autumn memory boxes for years of festive nostalgia.
🏆 Nancy’s Top 3 Quick Picks for Halloween Crafts
| Category | Product Name | Why Busy Moms Love It |
|---|---|---|
| Best Mess-Free Paint | Kwik Stix Solid Tempera Paint Sticks | Solid gouache sticks that dry in 90 seconds without water cups, messy brush cleanup, or table stains. |
| Best Independent Toddler Supply | Febsnow 200pcs Self-Adhesive Googly Wiggle Eyes | Pre-glued peel-and-stick backing that allows toddlers and preschoolers to decorate monsters without glue spills. |
| Best All-Purpose Bonding Gluestick | Elmer’s Disappearing Purple School Glue Sticks | Goes on purple so little eyes can see their application, then dries 100% clear with strong paper-to-cardboard hold. |
🧺 Nancy’s Real-Mom Supply Swap Table
| Craft Supply Needed | Real-Mom Pantry / Household Swap | What to Buy if Starting Fresh |
|---|---|---|
| Craft Paint Canvas | Sturdy paper dinner plates or flattened cereal boxes | Amazon Basics 9 Inch White Paper Plates |
| Gauze Mummy Wrap | White paper towels, toilet paper strips, or torn old t-shirts | Self Adhesive Bandage Gauze Wrap Rolls |
| Craft Stick Structure | Wooden kitchen chopsticks or backyard twigs | Perfect Stix Jumbo Birchwood Craft Sticks |
| Monster Tubes | Empty paper towel rolls cut in half | Crayola Construction Paper Bulk Pack |
| Lantern Glass Base | Washed marinara or salsa jars from the recycle bin | Ball Regular Mouth 16 oz Glass Mason Jars |
1. Paper Plate Black Cat Jack-o’-Lanterns
⏱️ Active & Dry Time: 15 mins active, 15 mins dry | 🧼 Mess Level: 2/5 | 👶 Age Adaptation: Ages 3+ (finger painting and sticking eyes) | 💰 Est. Cost: ~$2.00 total
💬 Real Mom Question (from Reddit’s r/toddlers): “My 3-year-old loses interest in painting within 3 minutes. How do I get a cute craft out of short attention spans?”
Nancy’s Fix: Paint plates in advance or let them do a quick 2-minute wash using a wide foam sponge brush! The magic happens when adding the precut ears, pink nose, and pipe cleaner whiskers—that part is instant gratification for little crafters.
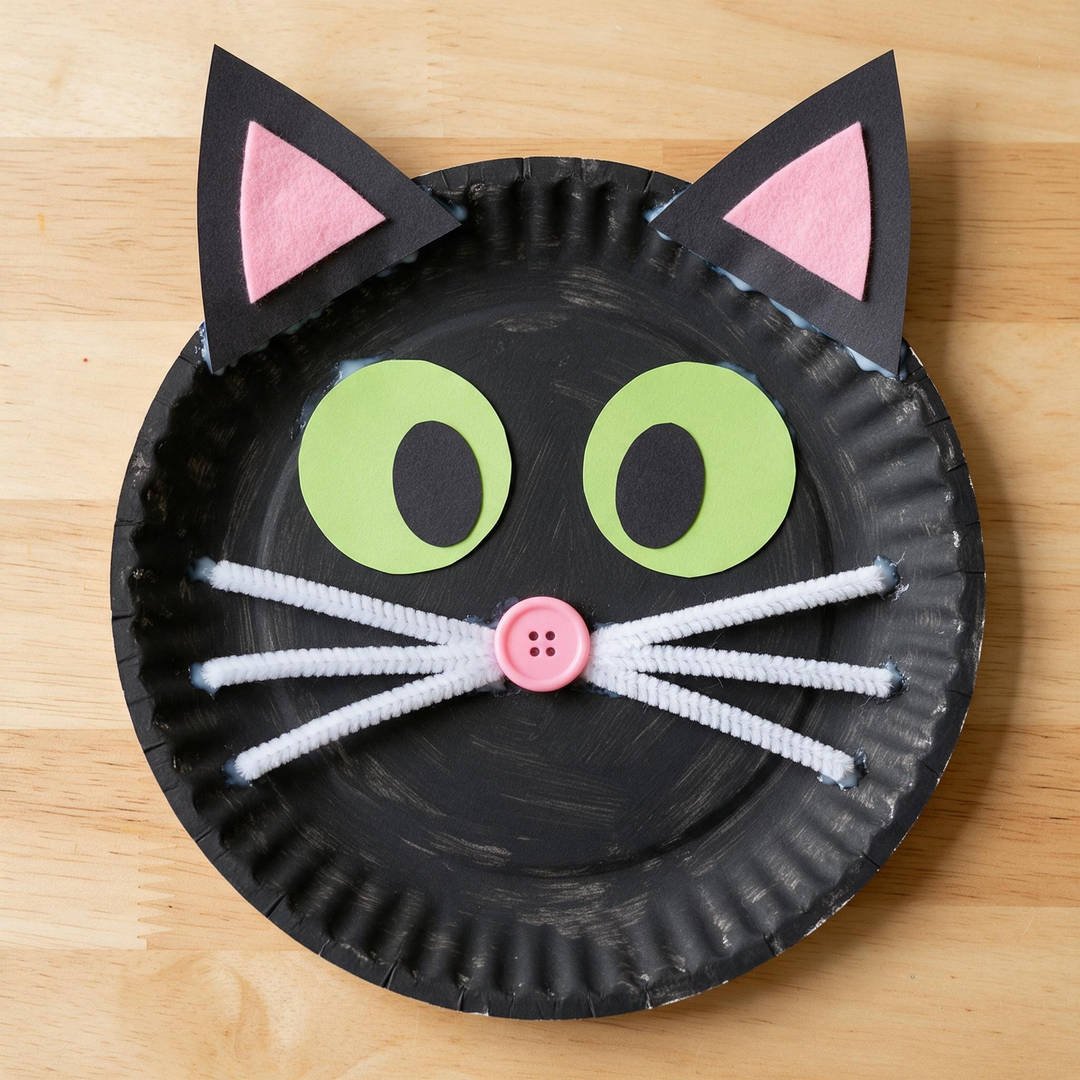
Paper plates are the holy grail of toddler and preschool holiday crafting. This classic black cat project is utterly adorable and doubles as festive playroom wall art.
If your child wants variety, make it double-sided: paint the front as a friendly midnight black cat and paint the reverse side bright orange with a smiling jack-o’-lantern grin!
How to Craft It:
- Lay down an Amazon Basics 9 Inch White Paper Plate on your newspaper craft mat.
- Coat the plate surface with Crayola Washable Black Kids Paint using a wide foam sponge brush and allow to dry for 15 minutes.
- Cut two 2-inch triangles from black cardstock and smaller pink felt triangles for the inner ear pads.
- Glue the triangular ears to the top rim of the plate using an Elmer’s Disappearing Purple School Glue Stick.
- Attach two lime green paper oval eyes, three white pipe cleaner whiskers to each cheek, and a small pink felt button nose.
Amazon Craft Materials You Should Buy:
| Material | Purpose & Recommendation |
|---|---|
| White Paper Plates | Amazon Basics 9 Inch White Paper Plates – Uncoated, sturdy plates that absorb tempera paint without soggy rippling. |
| Washable Black Paint | Crayola Washable Black Kids Paint – Ultra-washable non-toxic black formula that washes clean from skin and cotton shirts. |
👉 Watch the Paper Plate Black Cat Tutorial on YouTube
2. Mason Jar Mummy Lanterns
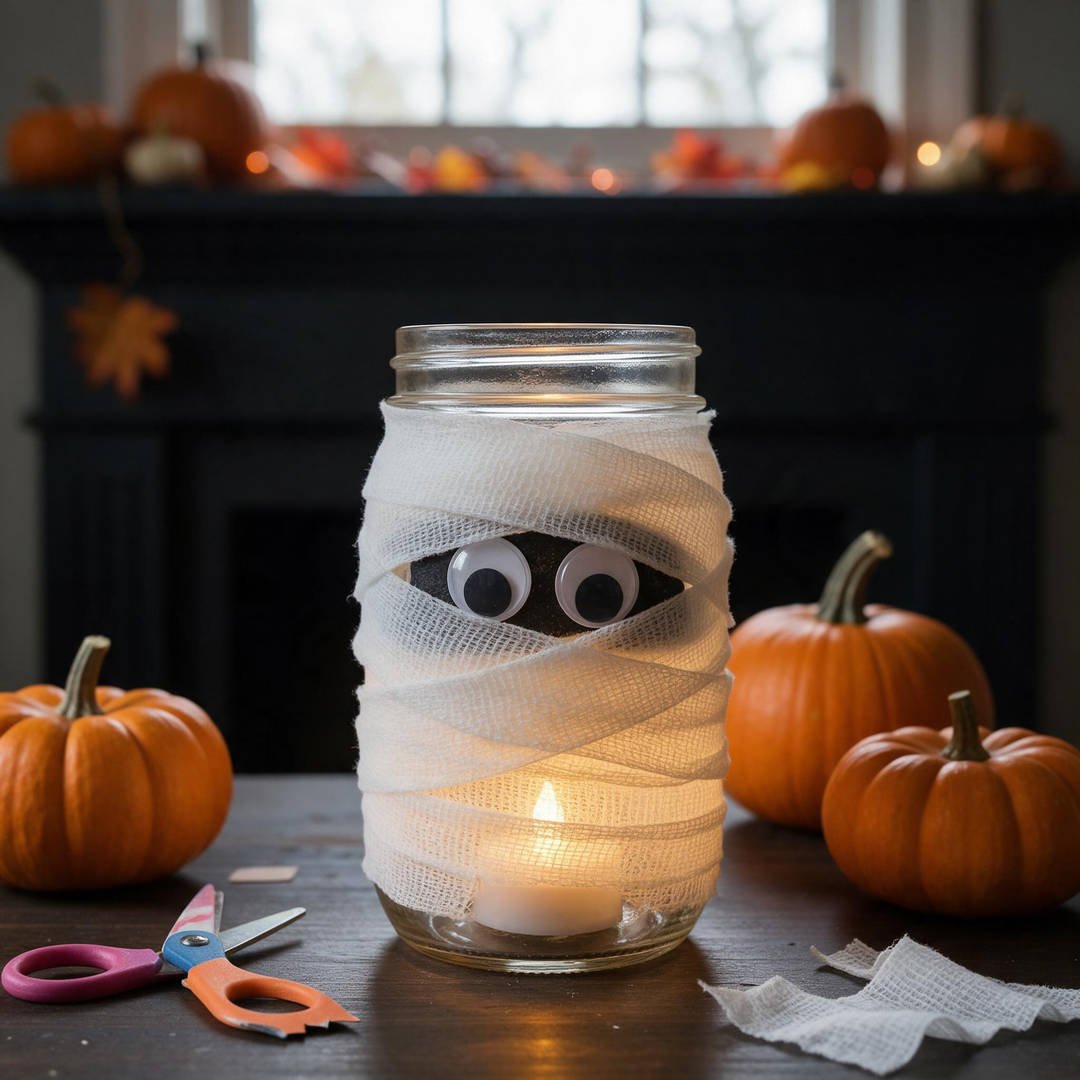
⏱️ Active & Dry Time: 12 mins active, 0 mins dry | 🧼 Mess Level: 1/5 | 👶 Age Adaptation: Ages 4+ (wrapping self-adhesive gauze around jar) | 💰 Est. Cost: ~$3.50 total
💬 Real Mom Question (from Reddit’s r/crafts): “Every time we wrap jars in gauze, the tape shows or the bandage slips off after a few days. How do you keep it snug?”
Nancy’s Fix: Use self-adhesive cohesive bandage tape (the flexible wrap doctors use for sprains)! It sticks firmly to itself without a drop of wet glue, creating realistic crinkled mummy folds that stay tight all season long.
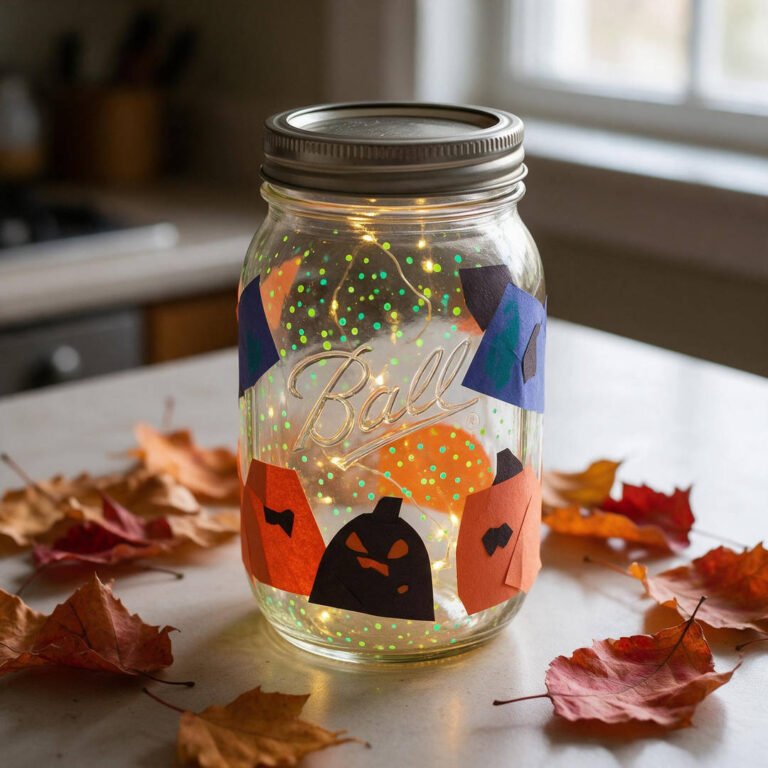
These glowing mummy jars are an absolute staple in our home every autumn. They look gorgeous lined along outdoor steps or casting a warm, flickering candlelight on your fireplace mantel.
Because self-adhesive bandage wrap requires zero liquid glue or paint, this is one of the cleanest holiday projects you can make with little hands!
How to Craft It:
- Clean and thoroughly dry the outside of a Ball Regular Mouth 16 oz Glass Mason Jar.
- Take a roll of Self Adhesive Bandage Gauze Wrap and anchor the end at the base of the jar.
- Wrap the bandage around the jar at slight diagonal angles, overlapping layers to create organic mummy wraps while leaving small glass peek-a-boo slits.
- Press two large peel-and-stick eyes from your Febsnow 200pcs Self-Adhesive Googly Wiggle Eyes between two bandage layers.
- Drop a flickering Homemory Flameless LED Battery Tea Light inside and watch your friendly mummy glow!
Amazon Craft Materials You Should Buy:
| Material | Purpose & Recommendation |
|---|---|
| Glass Mason Jars | Ball Regular Mouth 16 oz Glass Mason Jars – Durable, heat-resistant glass jars that create the perfect luminary silhouette. |
| Self-Adhesive Bandage Wrap | Self Adhesive Bandage Gauze Wrap Rolls – Textured elastic wrap that clings tightly to itself without sticky tape or glue. |
👉 Watch the Mason Jar Mummy Lantern Tutorial on YouTube
3. Egg Carton Bat Hanging Mobiles
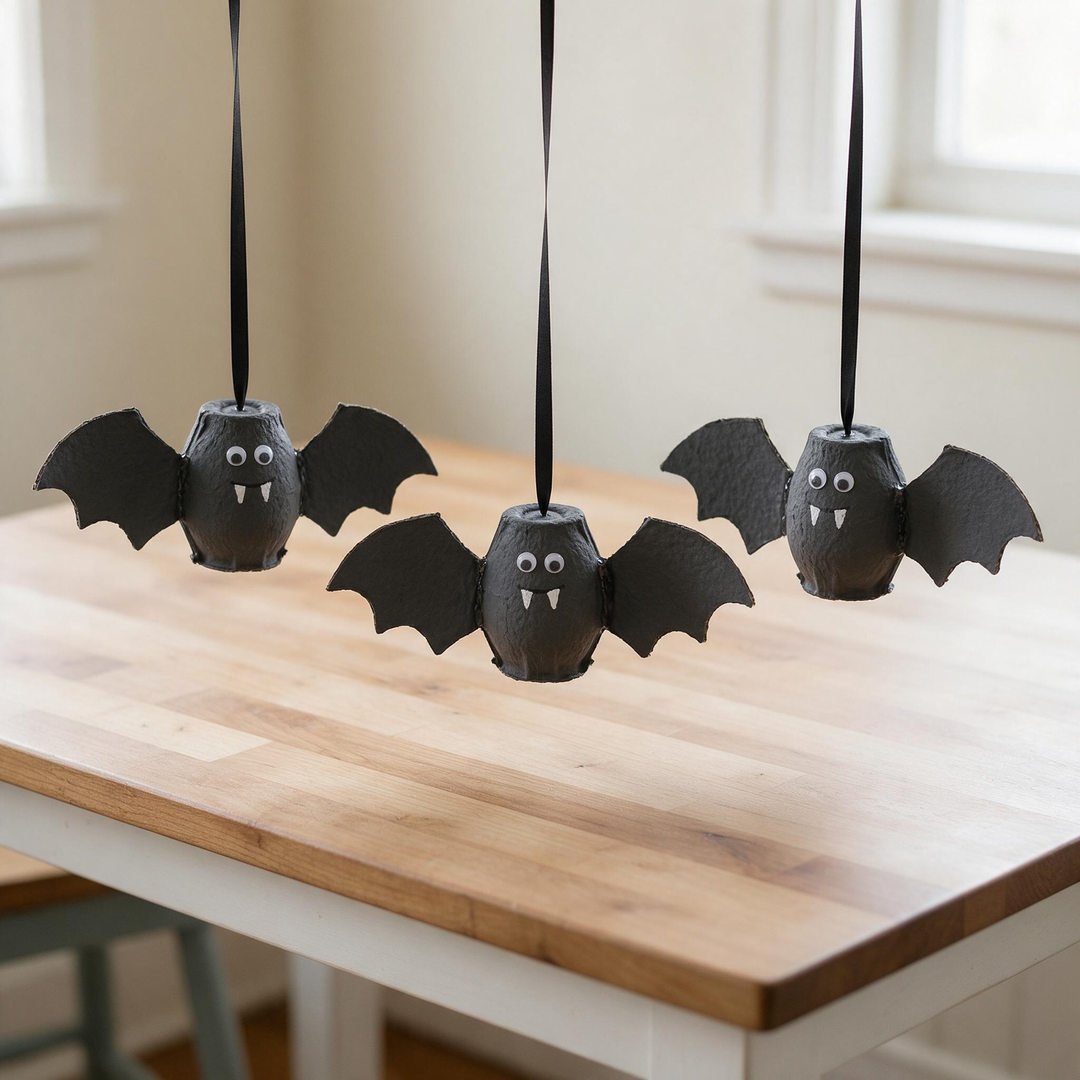
⏱️ Active & Dry Time: 20 mins active, 20 mins dry | 🧼 Mess Level: 2/5 | 👶 Age Adaptation: Ages 4+ (painting cups with foam brush) | 💰 Est. Cost: ~$1.50 total
💬 Real Mom Question (from Reddit’s r/Parenting): “How can I cut pressed cardboard egg cartons cleanly without squishing the cups?”
Nancy’s Fix: Always cut egg cartons with sharp kitchen shears rather than dull kid scissors! Score the center cup division first, then trim the scallop wings in short, deliberate snips.
Transforming empty breakfast egg cartons into flying Halloween bats is a rite of childhood passage! The natural curvature of three joined egg cups creates an uncanny bat body with arched wings.
Hang several bats at staggered heights using satin ribbon or fishing wire to turn any dining room light fixture into an enchanted bat roost.
How to Craft It:
- Using kitchen shears, cut an empty cardboard egg carton into 3-cup horizontal strips.
- Trim the bottom curved rims of the two outer cups into scalloped triangles to form pointed bat wings.
- Have your child paint the entire cardboard strip in matte black using Crayola Washable Black Kids Paint.
- Once dry, press two self-adhesive googly eyes onto the front center cup.
- Use a toothpick or white gel pen to draw two tiny white triangle fangs, punch a small hole in the center cup top, and thread a black ribbon loop for hanging.
Amazon Craft Materials You Should Buy:
| Material | Purpose & Recommendation |
|---|---|
| Washable Tempera Paint | Crayola Washable Black Kids Paint – Deep black pigment that soaks into recycled porous cardboard cups quickly. |
| Self-Adhesive Wiggle Eyes | Febsnow 200pcs Self-Adhesive Googly Wiggle Eyes – Assorted round wiggle eyes with instant peel-and-stick backing. |
👉 Watch the Egg Carton Bat Tutorial on YouTube
4. Coffee Filter Watercolor Bats & Ghosts
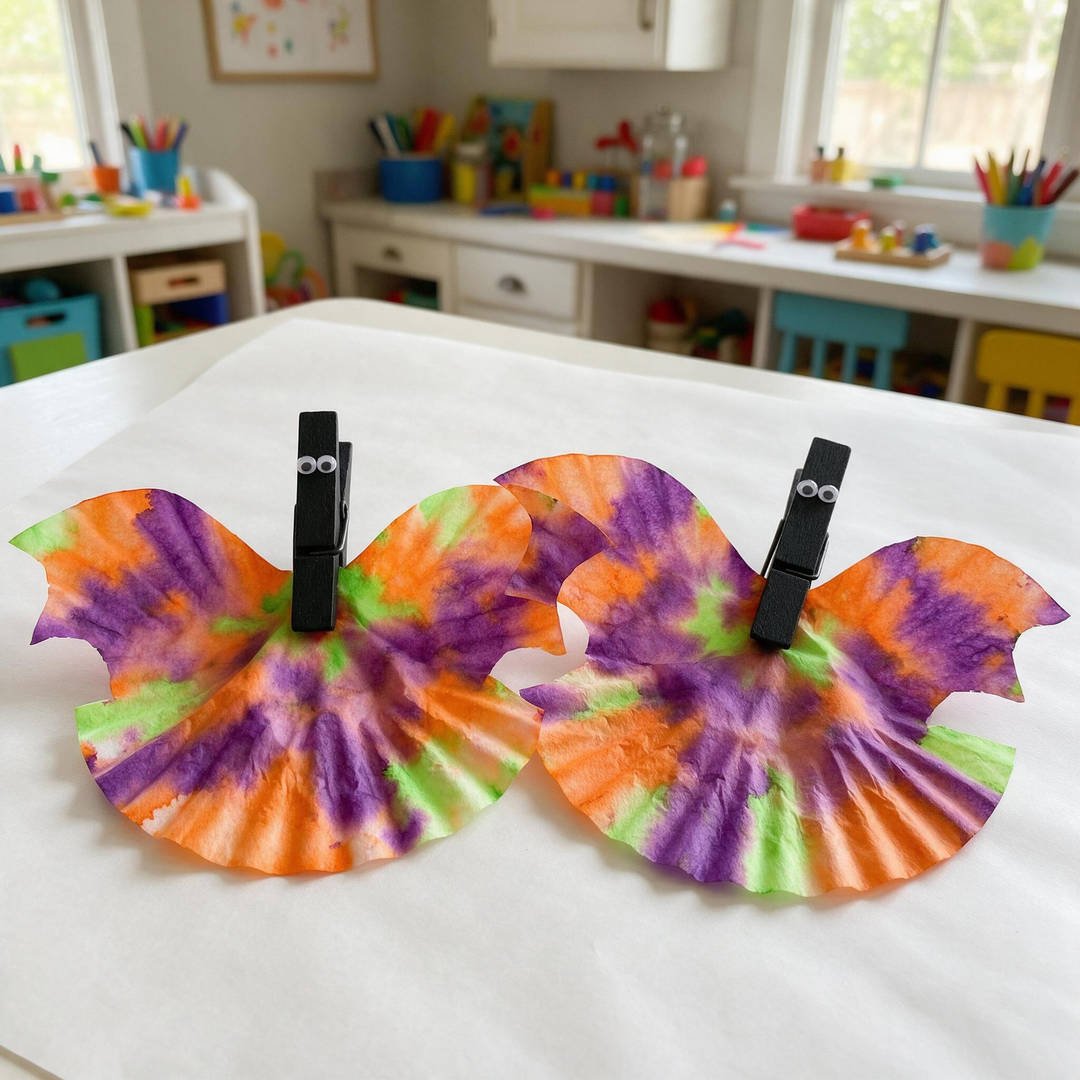
⏱️ Active & Dry Time: 15 mins active, 30 mins dry | 🧼 Mess Level: 2/5 | 👶 Age Adaptation: Ages 3+ (scribbling with markers and spraying water) | 💰 Est. Cost: ~$2.00 total
💬 Real Mom Question (from Reddit’s r/Mommit): “My kids love watercolors, but watercolor paper is so expensive for messy play. Is there an affordable substitute?”
Nancy’s Fix: Plain white fluted coffee filters are essentially inexpensive chromatographic paper! They absorb ink and diffuse colors into breathtaking tie-dye blooms when misted with a five-cent water spray bottle.
This vibrant process art project combines basic science and Halloween creativity. Watching marker ink bleed across the circular pleated paper filters never fails to fascinate toddlers and elementary kids alike.
Once dry, pinching the center with a painted black wooden clothespin creates dramatic fluttery bat wings that kids can flap around the living room!
How to Craft It:
- Flatten two round white fluted coffee filters on a rimmed baking sheet or plastic craft tray.
- Let kids scribble heavy abstract patterns using orange, purple, green, and black markers from their Crayola Ultra Clean Washable Markers.
- Mist the paper with a water spray bottle or let kids drip water droplets using medicine droppers until colors blend together.
- Let the filters dry completely in a warm spot for approximately 30 minutes.
- Accordion-fold the center of the filter and clip it with a black-painted wooden clothespin, then attach two small googly eyes to the clothespin head.
Amazon Craft Materials You Should Buy:
| Material | Purpose & Recommendation |
|---|---|
| Washable Broad Line Markers | Crayola Ultra Clean Washable Markers – Rich watercolor pigments that bleed cleanly into circular paper filters. |
| Googly Wiggle Eyes | Febsnow 200pcs Self-Adhesive Googly Wiggle Eyes – Strong adhesive backing that sticks securely to painted wooden clothespins. |
👉 Watch the Coffee Filter Bat Tutorial on YouTube
5. Popsicle Stick Haunted House Frames
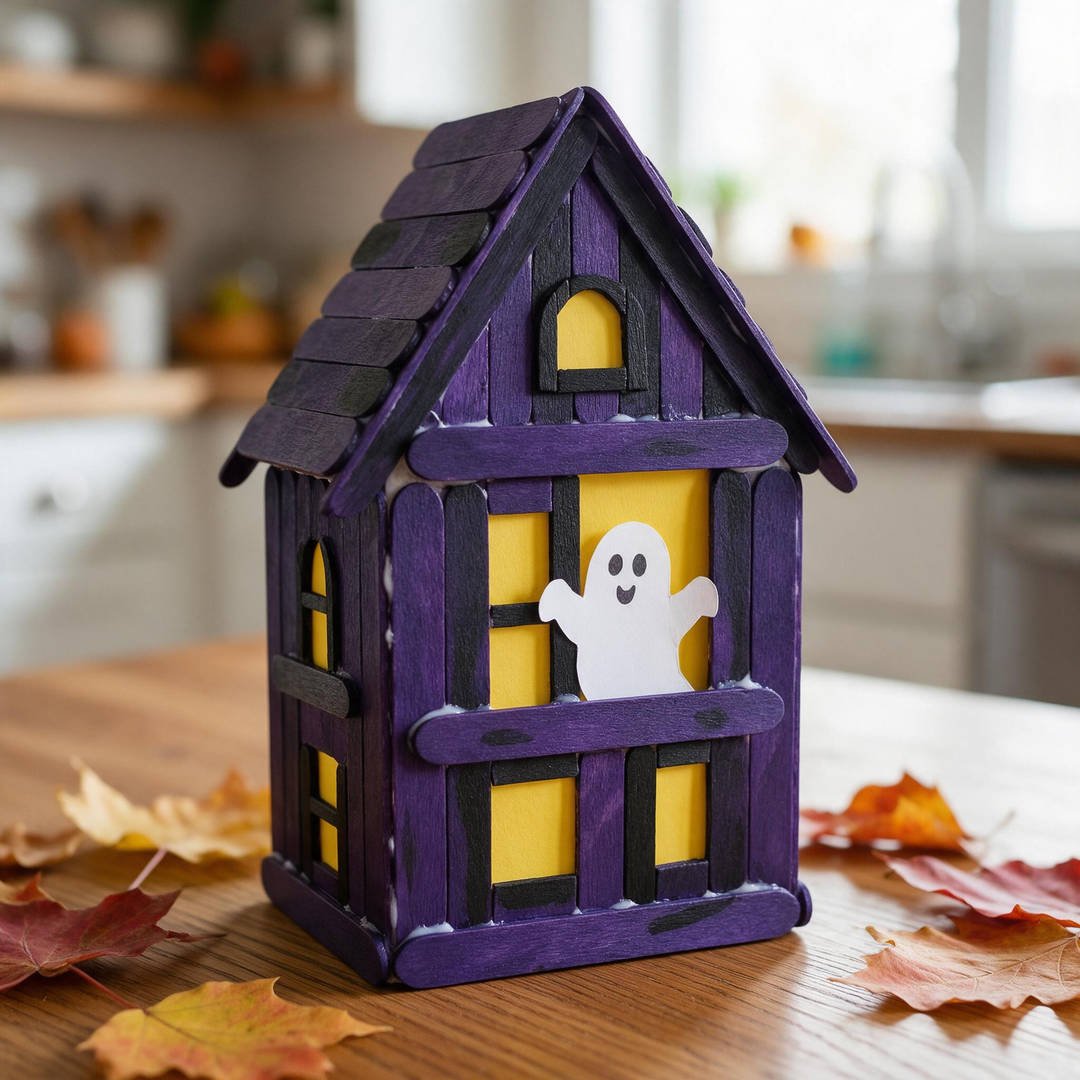
⏱️ Active & Dry Time: 25 mins active, 15 mins dry | 🧼 Mess Level: 2/5 | 👶 Age Adaptation: Ages 5+ (arranging sticks and gluing spooky shapes) | 💰 Est. Cost: ~$2.50 total
💬 Real Mom Question (from Reddit’s r/crafts): “Craft glue takes forever to dry when building popsicle stick houses. How do you stop sticks from sliding apart?”
Nancy’s Fix: Glue your popsicle sticks directly onto a square cardstock backing sheet! The paper acts as an anchor foundation, keeping your house perfectly square while glue sets.
Building spooky haunted mansion frames out of craft sticks is an incredible fine-motor activity that older preschoolers and early elementary kids adore.
You can frame a cute Halloween photo of your child in costume inside the window, or let them cut out friendly paper ghosts and bats to lurk in the attic!
How to Craft It:
- Lay down 5 Perfect Stix Jumbo Birchwood Craft Sticks side-by-side to form the house body and glue two cross-braces on the back.
- Form a triangular attic roof using three additional craft sticks and adhere securely with Elmer’s Purple School Glue.
- Paint the assembled stick frame with purple and black acrylic craft paint, leaving a rustic distressed finish.
- Glue a square of bright yellow construction paper behind the center window opening to create an eerie glowing candlelight effect.
- Adhere a friendly paper ghost silhouette inside the glowing yellow window and glue a magnet to the back for refrigerator display.
Amazon Craft Materials You Should Buy:
| Material | Purpose & Recommendation |
|---|---|
| Jumbo Craft Sticks | Perfect Stix Jumbo Birchwood Craft Sticks – Smooth, splinter-free natural birchwood sticks ideal for gluing and painting. |
| Disappearing Purple Glue | Elmer’s Disappearing Purple School Glue Sticks – Reliable non-toxic paper bonding formula that dries crystal clear. |
👉 Watch the Popsicle Stick Haunted House Tutorial on YouTube
6. Cotton Ball Puffy Ghost Silhouette Cards
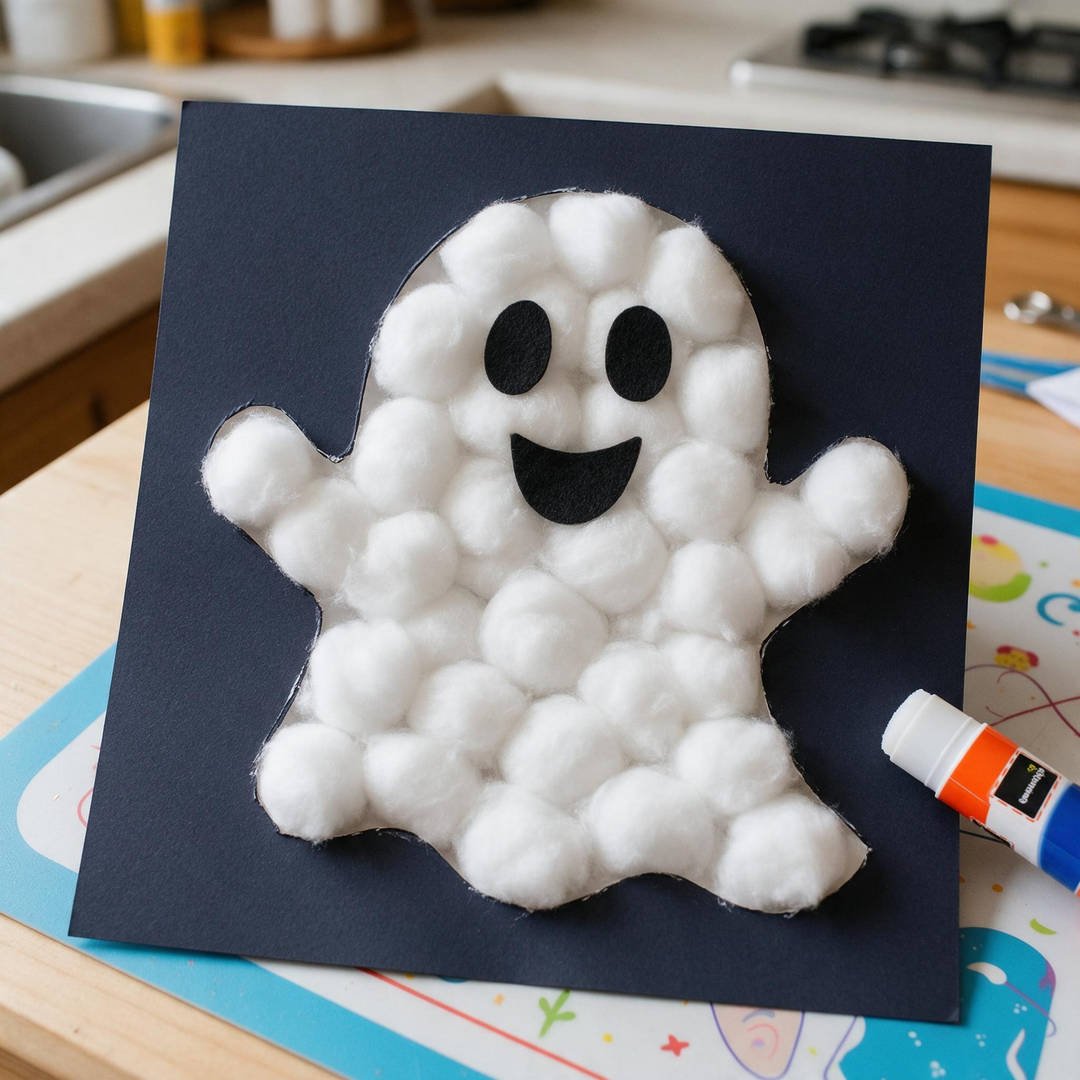
⏱️ Active & Dry Time: 15 mins active, 10 mins dry | 🧼 Mess Level: 1/5 | 👶 Age Adaptation: Ages 2+ (pulling fluffy cotton balls and pressing down) | 💰 Est. Cost: ~$1.75 total
💬 Real Mom Question (from Reddit’s r/toddlers): “What is the safest, gentlest Halloween craft for a 2-year-old who still puts everything in their mouth?”
Nancy’s Fix: Fluffy cotton ball ghost silhouettes! Cotton balls are 100% soft and tactile. Toddlers get immense sensory satisfaction from pulling apart the fluffy fibers and patting them down onto glue sheets.
If you have a toddler or young preschooler who wants to join in the holiday crafting fun, this puffy ghost project is pure magic.
The soft, pillowy texture looks delightful against high-contrast black cardstock, and there are zero toxic chemicals or sharp scissors involved.
How to Craft It:
- Trace a large friendly ghost silhouette onto a sheet of black cardstock from your Crayola Construction Paper Bulk Pack.
- Generously coat the interior of the ghost outline with an Elmer’s Disappearing Purple Glue Stick.
- Let your toddler gently pull standard cotton balls into puffy cloud puffs.
- Have them press the fluffy cotton puffs down onto the purple glue until the entire ghost silhouette is filled with cloud-like texture.
- Glue two black cardstock oval eyes and an open smiling mouth onto the puffy cotton face to complete your adorable friendly ghost.
Amazon Craft Materials You Should Buy:
| Material | Purpose & Recommendation |
|---|---|
| Construction Paper Pack | Crayola Construction Paper Bulk Pack – 240 sheets of heavyweight colored construction paper with deep black tones. |
| Washable Glue Sticks | Elmer’s Disappearing Purple School Glue Sticks – Smooth, washable adhesive that locks cotton fibers permanently to paper. |
👉 Watch the Cotton Ball Ghost Tutorial on YouTube
7. Yarn-Wrapped Cardboard Mummy Keepsakes
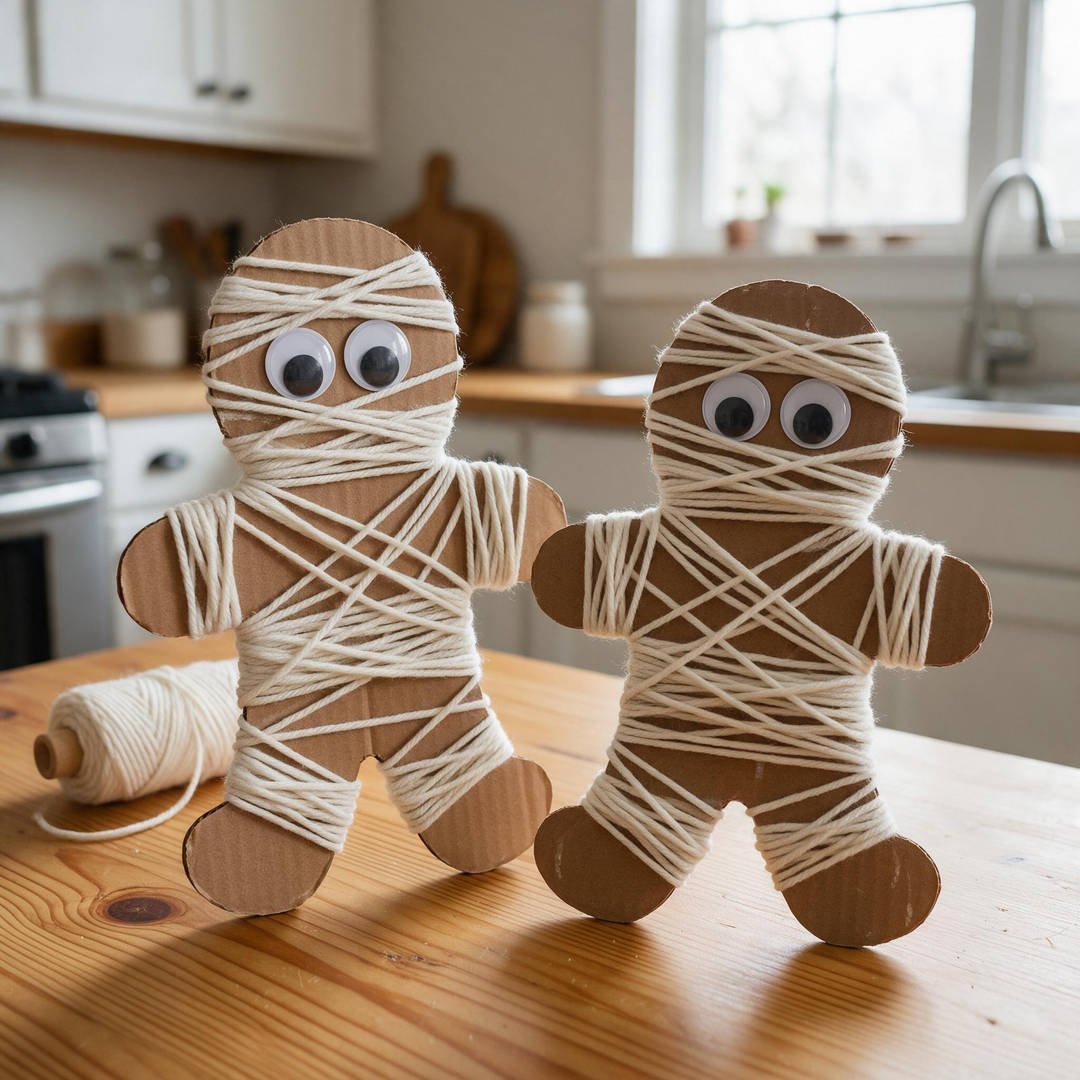
⏱️ Active & Dry Time: 18 mins active, 0 mins dry | 🧼 Mess Level: 0/5 | 👶 Age Adaptation: Ages 4+ (criss-crossing yarn loops around cutout) | 💰 Est. Cost: ~$1.50 total
💬 Real Mom Question (from Reddit’s r/Parenting): “How do I keep yarn from slipping off the ends of cardboard craft shapes while my child is wrapping?”
Nancy’s Fix: Snip tiny 1/8-inch notches along the edges of the cardboard cutout! The notches catch the yarn loops effortlessly, keeping the wrapping tight and preventing frustrating unraveling.
Yarn-wrapping is one of the single best fine-motor coordination exercises for developing hands. Kids get completely absorbed in the meditative rhythm of looping yarn around and around.
Because this craft uses recycled shipping boxes and leftover knitting yarn, it is virtually free and produces completely mess-free results!
How to Craft It:
- Cut a simple person silhouette or gingerbread-man shape out of clean corrugated cardboard from a shipping box.
- Cut tiny shallow 1/8-inch snips along the arms, torso, and legs with craft shears.
- Tape the tail end of your Red Heart Acrylic Yarn to the back of the cardboard figure.
- Let your child wind the yarn across the body in criss-cross diagonal directions, locking the yarn into the edge notches.
- Once wrapped to their liking, tape the yarn end to the back and press two jumbo Febsnow Self-Adhesive Googly Wiggle Eyes onto the head.
Amazon Craft Materials You Should Buy:
| Material | Purpose & Recommendation |
|---|---|
| Acrylic Yarn Skein | Red Heart Super Saver Black Medium Acrylic Yarn – Durable, snag-resistant four-ply acrylic yarn that wraps smoothly around cutouts. |
| Self-Adhesive Googly Eyes | Febsnow 200pcs Self-Adhesive Googly Wiggle Eyes – Large animated eyes that stick firmly to textured woolen yarn strands. |
👉 Watch the Yarn Wrapped Mummy Tutorial on YouTube
8. Toilet Paper Roll Monster Pencil Holders
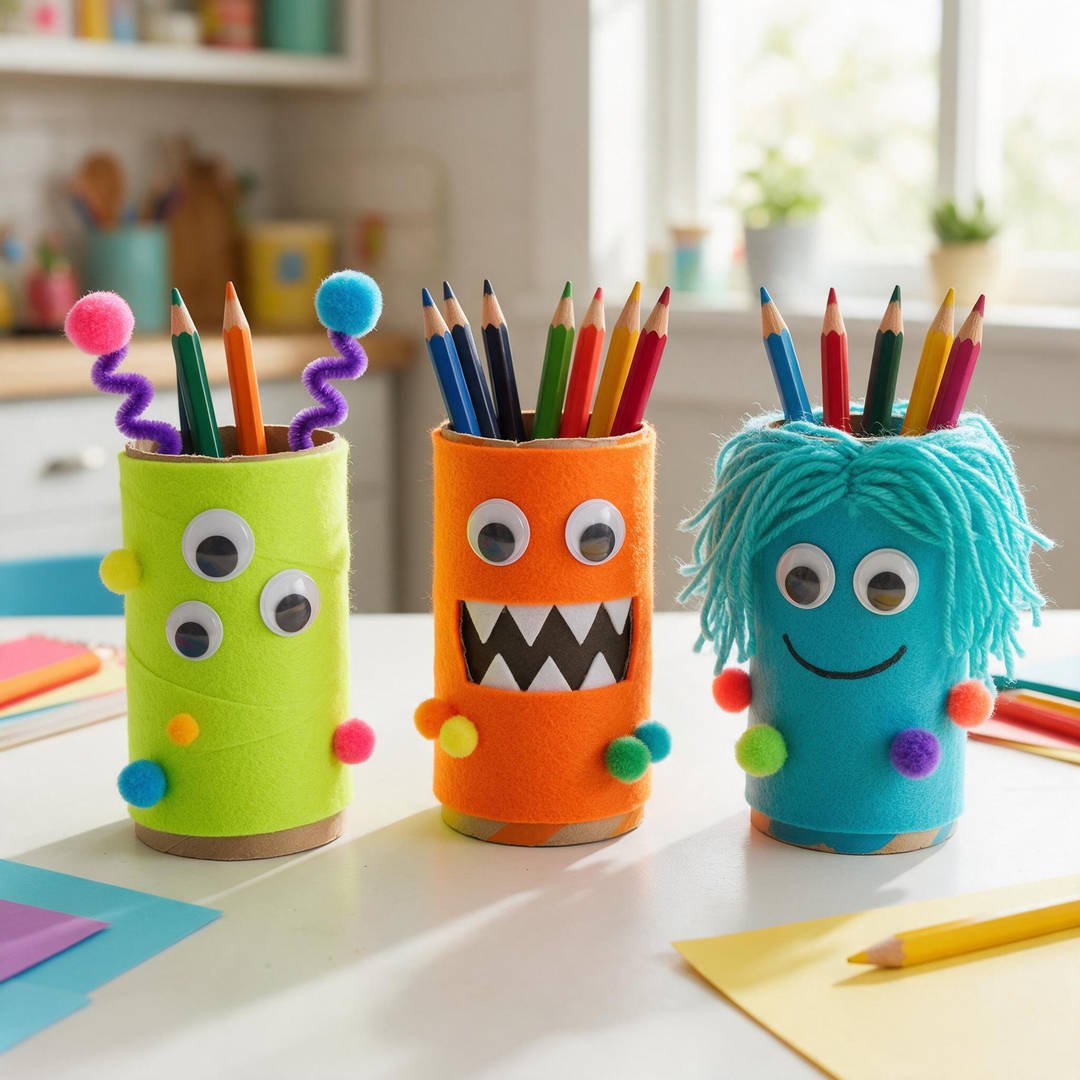
⏱️ Active & Dry Time: 20 mins active, 10 mins dry | 🧼 Mess Level: 2/5 | 👶 Age Adaptation: Ages 4+ (wrapping paper around tubes and adding horns) | 💰 Est. Cost: ~$2.00 total
💬 Real Mom Question (from Reddit’s r/crafts): “We have dozens of empty toilet paper rolls. What can kids make that isn’t just throwaway junk?”
Nancy’s Fix: Turn them into desk organizers! Hot-glue the cardboard tubes to a small cardboard base plate and let kids decorate them with crazy monster features to hold their colored pencils and school scissors.
Instead of tossing empty paper towel or bathroom tissue rolls into the recycling bin, turn them into whimsical desk monster pencil caddies!
Kids can let their imaginations run wild: give one monster three eyes, another fuzzy chenille antenna horns, and another jagged green felt teeth!
How to Craft It:
- Take an empty cardboard tube and wrap it in vibrant neon green or purple paper from your Crayola Construction Paper Bulk Pack.
- Glue the paper seam down with an Elmer’s Glue Stick and tuck excess paper neatly into the tube ends.
- Glue a circle of cardboard to the bottom opening so pencils won’t fall through.
- Twist colorful stems from your Multi Color Chenille Pipe Cleaners into coils or zigzags and glue them inside the top rim for monster antennae.
- Add clusters of mismatched googly eyes and cut out jagged paper monster teeth to complete your desk buddy!
Amazon Craft Materials You Should Buy:
| Material | Purpose & Recommendation |
|---|---|
| Chenille Pipe Cleaners | Multi Color Chenille Pipe Cleaners – 200 flexible wire pipe cleaners perfect for bendable monster antennae and arms. |
| Colored Construction Paper | Crayola Construction Paper Bulk Pack – Heavyweight sheets with bright fade-resistant colors that wrap tubes cleanly. |
👉 Watch the Toilet Paper Roll Monster Tutorial on YouTube
9. Salt Dough Halloween Keepsake Ornaments
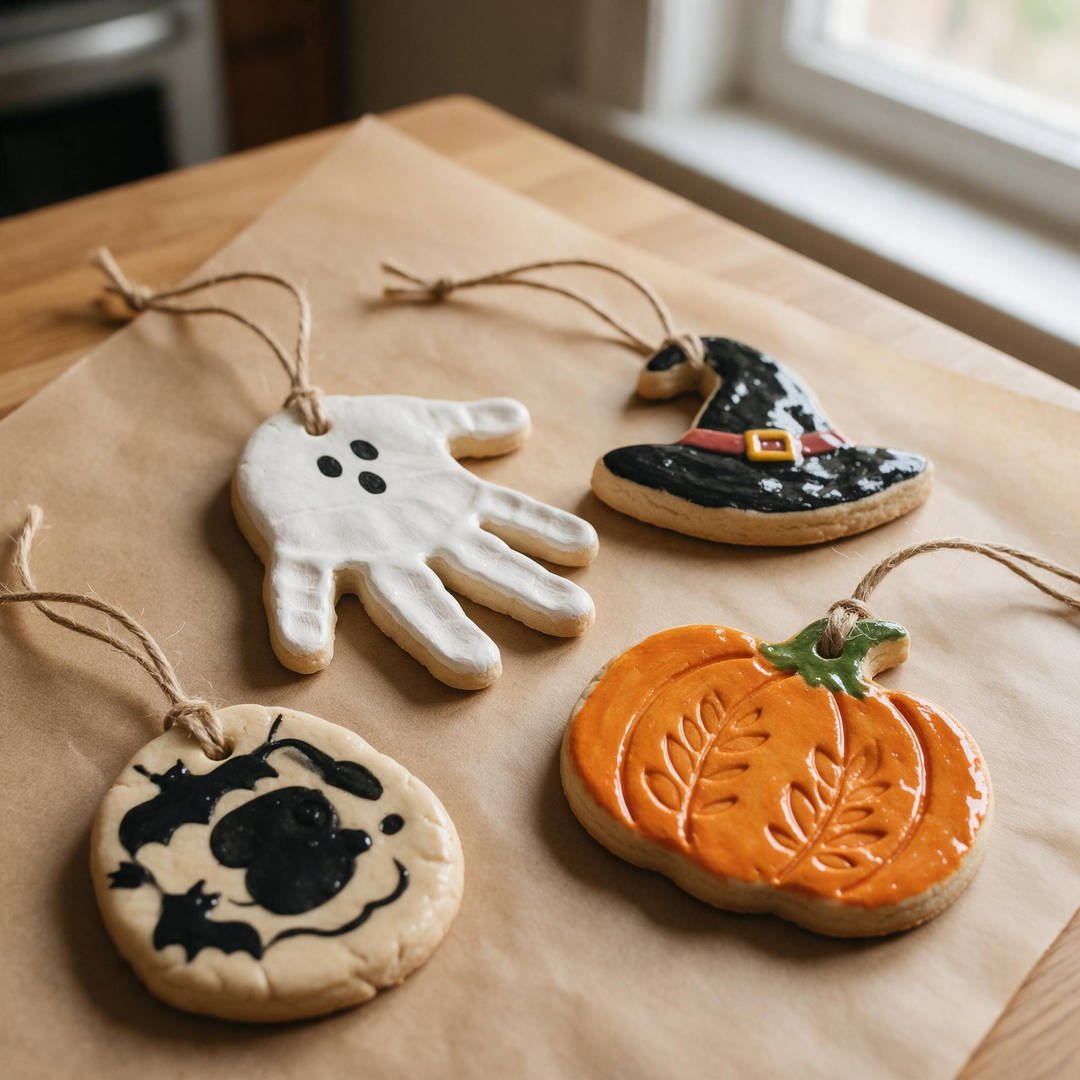
⏱️ Active & Dry Time: 30 mins active, Bake 2 hrs | 🧼 Mess Level: 3/5 | 👶 Age Adaptation: All Ages (handprints and pressing cookie cutters) | 💰 Est. Cost: ~$1.25 total
💬 Real Mom Question (from Reddit’s r/Mommit): “My salt dough ornaments always puff up or crack in the oven. What is the trick to flat, smooth dough?”
Nancy’s Fix: Bake low and slow at 200°F (95°C) for 2 hours rather than cranking up the heat! High heat causes moisture pockets to expand and crack the dough surface.
Salt dough is the ultimate nostalgic family craft. Using three basic pantry staples—flour, table salt, and warm water—you can create heirloom holiday ornaments that last for decades.
Pressing your child’s handprint into the dough and turning the white-painted hand upside down into a cluster of ghosts is an irreplaceable seasonal milestone keepsake.
How to Craft It:
- In a mixing bowl, combine 2 cups of all-purpose flour, 1 cup of table salt, and 1 cup of warm water; knead until a smooth dough forms.
- Roll out dough on parchment paper to a uniform 1/4-inch thickness.
- Press your child’s hand firmly into the dough, or cut out holiday shapes using pumpkin and ghost cookie cutters.
- Poke a 1/4-inch hole near the top using a drinking straw for hanging twine.
- Bake on a baking sheet at 200°F for 2 hours until stone-hard, allow to cool completely, paint with Crayola Washable Paint, and seal with Mod Podge Waterbase Sealer.
Amazon Craft Materials You Should Buy:
| Material | Purpose & Recommendation |
|---|---|
| Sealer & Gloss Finish | Mod Podge Waterbase Sealer, Glue & Finish – Clear protective sealer that shields baked salt dough from air humidity and chipping. |
| Washable Paint | Crayola Washable Black Kids Paint – Vibrant pigment for painting eyes, fangs, and handprint ghost outlines. |
👉 Watch the Salt Dough Halloween Crafts Tutorial on YouTube
10. Pinecone Spooky Spiders
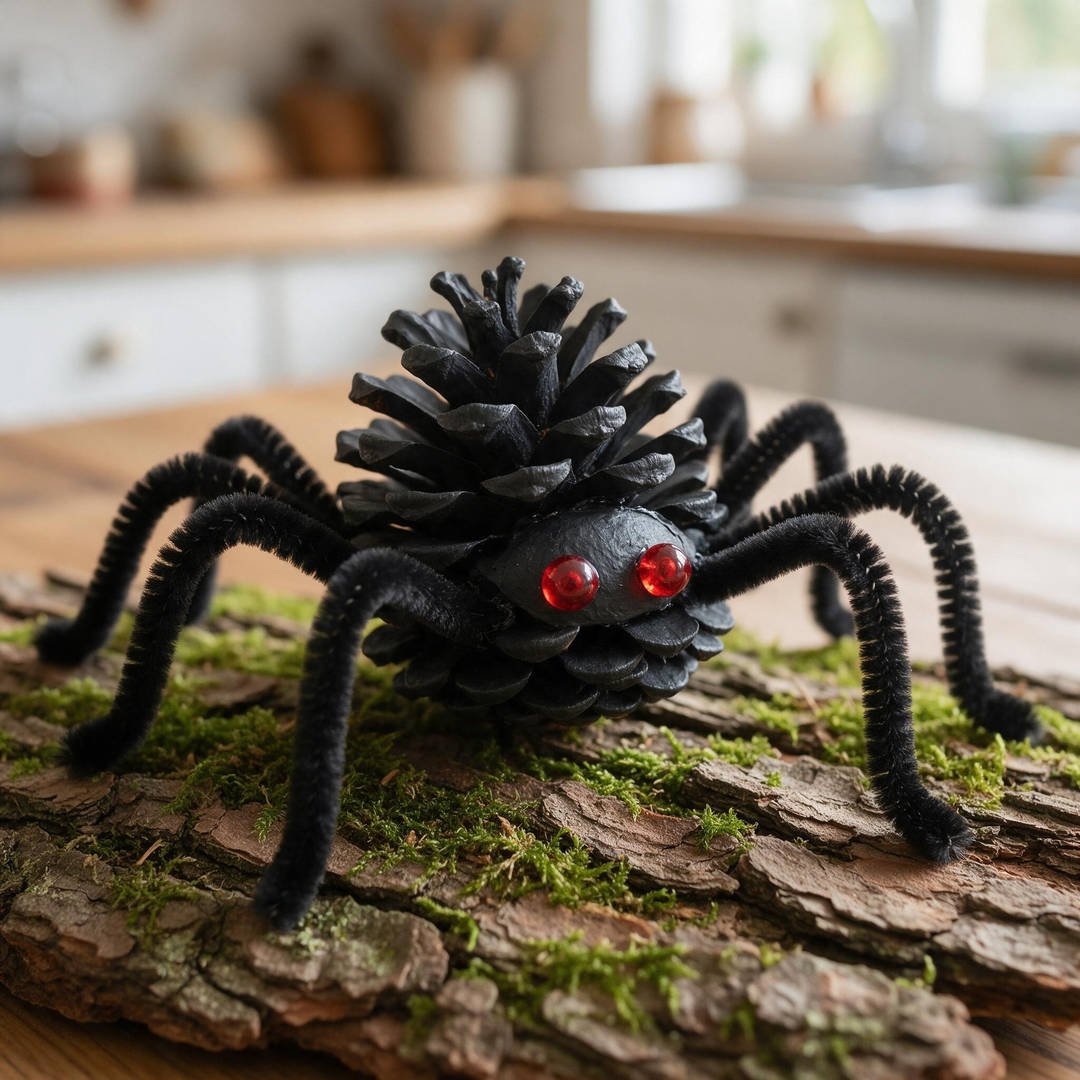
⏱️ Active & Dry Time: 15 mins active, 15 mins dry | 🧼 Mess Level: 2/5 | 👶 Age Adaptation: Ages 4+ (threading pipe cleaners through pinecone scales) | 💰 Est. Cost: ~$1.50 total
💬 Real Mom Question (from Reddit’s r/Parenting): “How do you sanitize backyard pinecones before kids craft with them so you don’t bring bugs inside?”
Nancy’s Fix: Bake foraged pinecones on a foil-lined baking sheet at 200°F for 30 minutes! The gentle heat kills any tiny hidden critters and melts away sticky tree sap, leaving smooth, clean pinecones.
Combine autumn outdoor nature walks with hands-on craft time! Kids love collecting pinecones from the backyard, and their jagged wooden scales look naturally spider-like when given long fuzzy legs.
These little critters look wonderfully spooky perched on autumn houseplants, front porch pumpkins, or crawling up curtains.
How to Craft It:
- Collect 4 medium pinecones from your yard and brush away loose pine needles and dirt.
- Paint the scales in matte black with a foam brush and allow to dry for 15 minutes.
- Take 4 black stems from your Multi Color Chenille Pipe Cleaners and cut each stem in half to create 8 spider legs.
- Tuck each leg into the pinecone scales near the center, twisting the wire around the stem to lock in place without glue.
- Bend each leg downward to form jointed spider knees and glue two Febsnow Self-Adhesive Googly Wiggle Eyes to the front face.
Amazon Craft Materials You Should Buy:
| Material | Purpose & Recommendation |
|---|---|
| Chenille Stems | Multi Color Chenille Pipe Cleaners – Flexible wired black stems that hold bent arachnid leg shapes easily. |
| Self-Adhesive Googly Eyes | Febsnow 200pcs Self-Adhesive Googly Wiggle Eyes – Peel-and-stick googly eyes that adhere firmly to rough pinecone tips. |
👉 Watch the Pinecone Spider Tutorial on YouTube
❓ Real Mom Questions Answered (From Reddit & Parenting Forums)
How do I manage crafting mess with multiple young children?
💬 Reddit Mom Insight (from r/Parenting): “I get so anxious about acrylic paint getting spilled on our dining room rug that I avoid holiday crafts altogether.”
Nancy’s Fix: Spread an inexpensive plastic dollar store shower curtain liner underneath your craft table! When craft time ends, gather the four corners with all scraps and spilled glitter inside and toss it or shake it outside. For little hands, replace liquid paint bottles with solid tempera paint sticks to eliminate spills entirely.
What is the best glue to use for paper and cardboard kid crafts?
💬 Reddit Mom Insight (from r/crafts): “Standard school glue makes construction paper buckle and get soaked, but hot glue guns burn tiny fingers. What glue actually works?”
Nancy’s Fix: High-tack glue sticks like Elmer’s Disappearing Purple School Glue Sticks are best for construction paper because they contain very little water moisture, completely preventing soggy paper wrinkling. For heavier items like craft sticks or pinecones, low-temp mini glue guns used under direct supervision or double-sided adhesive craft dots work wonders!
How can I make Halloween crafts educational for homeschool or preschool?
💬 Reddit Mom Insight (from r/homeschool): “How can I tie holiday crafts into early learning lessons without taking the fun away?”
Nancy’s Fix: Weave in basic counting, color mixing, and sensory fine-motor skills naturally! Ask your preschooler to count out 8 spider legs or sort googly eyes by size. The coffee filter tie-dye craft offers a gentle introduction to capillary action and watercolor absorption, while yarn-wrapping builds essential pincer grip strength for future pencil writing.
🧹 Real-Mom Cleanup & Storage Checklist
- The Shower Curtain Drop Cloth: Always keep a $1.25 plastic shower curtain liner folded under your craft bin. Throw it over your table before unpacking paint or glitter for instant 30-second cleanup.
- The Damp Washcloth Station: Keep a warm, damp washcloth in a plastic bowl right in the center of the table. Kids can wipe gluey fingers independently without running to the bathroom sink with messy hands.
- Bubble Wrap Keepsake Storage: When packing away dimensional paper plate masks or salt dough handprints in November, wrap them individually in bubble wrap and store flat in a labeled plastic autumn tote.
- The “Work-in-Progress” Tray: Place unfinished wet paintings or drying glue projects on inexpensive plastic cafeteria trays so you can clear the kitchen table in 5 seconds when dinnertime arrives.